Featured Accessories
Showing posts with label Featured Accessories. Show all posts
Showing posts with label Featured Accessories. Show all posts
4 Easy Headband Hairstyles For School In 5 Minutes
Cute, no-heat headband hairstyles for every day wear!
Hey guys! We are always looking for simple and quick hairstyles for school mornings and thought these headband styles from our YouTube channel would be perfect for back to school season. These "5 minute hairstyles" are all super easy but still look fashionable, even though they take very little effort! The headbands add a stylish finishing touch and of course can be changed up and matched to your outfit of the day.
4 Simple Headband Hairstyles Video Tutorials:
(Click here to watch the video directly on YouTube.)
Hair tutorial #1 features a classic twist on each side of her head, finishing in a low fishtail braid.
Hairstyle #2 is a trendy half up hairstyle with extra micro braids wrapping around the headband. We used a silver braided headband and placed it high on her forehead.
Hairstyle #3 is the easiest of all! A fancy side ponytail with a twist wrapping around the back.
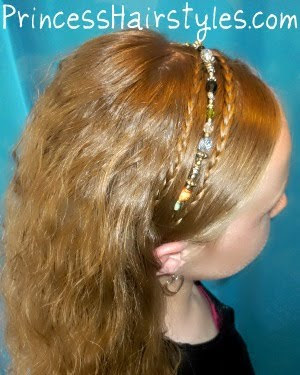
Hairstyle #4 features a pretty beaded headband placed between 2 small braids. We created no heat waves by sleeping in braids overnight to complete this look.
All four of these hairstyles can be done with straight hair, wavy hair, or curly hair. Medium length hair or long hair will work best.
Link for the Topsy tail (affiliate) as shown in hairstyle tutorial #2
Bandables Twisty Braids Headband Review and Tutorial
Today we are testing the "bandables twisty braids headband" by Localoc. We saw this at our local Walmart and thought it looked cute and fun to try.
We are always looking for easy hairstyles for school mornings and thought it would be perfect for those days when you need a 5 minute hairstyle. (Which is pretty much every school morning at our house!)
This would also be a great accessory for 2nd or 3rd day hair, to help disguise when it's looking slightly greasy. For those of you who are growing out your bangs, this would be fabulous as well!
Review and Tutorial Video: (Click here to watch this hairstyle video directly on YouTube.)
We liked that the little hair elastics on this headband held her hair back quite tightly without pulling or clamping her hair. We've tried similar options in the past (with barrettes or clips attached to the headband) and it seems like you need exactly the right amount of hair to make those work. We've had trouble with the hair being too thick to clip the barrettes shut, or the hair being too thin and sliding right out. So, the elastics are a great option that will accommodate all different hair textures and thickness.
There are many different hairstyles that can be created using this headband. We have shown just a few basic ideas in this video:
A half up twist.
A ponytail.
If you play sports, I think this would be a nice option for keeping your hair out of your face. You could add a ponytail, bun, or braid and be ready to go.
I think this would look really cute with curled, wavy, or crimped hair as well as straight. This would also be perfect for short hair, as well as long. So fun!
We unfortunately were not able to find this available to purchase online yet... I think it is too new. Here are some similar headbands on Amazon, but none with the elastics yet:
Headband 1, Headband 2, Headband 3. You might have better luck finding this at your local drugstore or retailer.
Testing The Faux Hawk Kit! Is It Actually Quick And Easy?
We recently purchased this "FauxHawk Kit" made by Goody and wanted to give it a try, so we decided to do a tutorial and review/first impression for you. My daughter has worn a faux hawk hairstyle quite often in the past as her dance team used to use it as their competition hairstyle. She also will occasionally wear the style to school or church. But, as much as we love the edgy yet glamorous look, the traditional way to make a faux hawk hairstyle (using messy buns) can be quite time consuming. And on school mornings, we are all about quick! We wanted to see if this tool actually would make the process faster and easier with the same cute result!
Faux Hawk Kit Review, Tutorial, and First Impression Video: (Click here to watch the video directly on YouTube.)
This kit comes in several different colors. I would recommend looking for the one that matches your hair the closest. We found ours at Walmart and I'm guessing it can be found in most discount and drug stores for around $5.
This hairstyle would be great for all ages... teens, little girls, and moms. I could see this working for casual as well as formal occasions. This style could even work for Prom, Homecoming, church, recitals, weddings, etc.
You can choose to leave this the braided faux hawk sleek and neat looking, or stretch it out and deconstruct it a bit more for a messy and voluminous look. You might notice in our photos (above and below) that one side is messier than the other (below.) We purposely deconstructed one side after the tutorial to see if the messy look was possible with this tool and it is... it just takes some work to mess the braid up a little more.
After looking over the instructions for a second time, I'm pretty sure a hair elastic was not meant to be used at the top of the ponytail before placing the tool in her hair (as we demonstrated in our video.) But, we found that this "misunderstood hair tie" actually helped to hold the hairstyle in place very securely in her fine and slippery hair. We tried the style again without the elastic and it did not hold well at all. If you have textured or thick hair, the tool will probably work just fine without adding a hair tie.
This tool will work best with at least medium length or long hair. I think it would look adorable with curly or wavy hair as well as straight.
If you are wanting to make a faux hawk the traditional way, we do have a few tutorials on our blog showing how to do that:
Messy Bun Faux Hawk
Topsy Tail Faux Hawk
Trolls Headband Tutorial & Easy DIY Halloween Costume
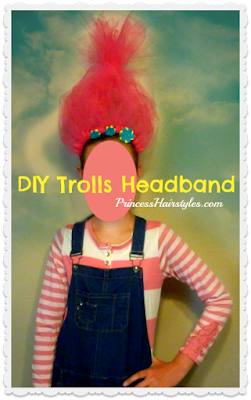
Since Halloween is right around the corner, this week we are showing a fun DIY "Halloween hairstyle" and Trolls costume idea! We are loving how easy and quick this "no sew" Trolls headband is to make. Your finished Trolls hairstyle could be worn to school for a Halloween party, crazy hair day, a Halloween dance, a trip to the pumpkin patch, Oktoberfest, as part of a costume for trick or treating, dress up, or to watch the new Trolls movie featuring Anna Kendrick (Poppy) and Justin Timberlake. We have seen these cute headbands all over Pinterest and Etsy and thought they were such a great idea! We love that you could dress up as a troll without having to wear a hot, itchy, and uncomfortable wig!
Trolls Headband Video Tutorial: (Click here to watch the video directly on YouTube.)
Supplies Needed To Create Your Own Troll Hair:
- Around 5 yards of tulle (cut into 6x24 inch strips.) As mentioned in our video tutorial (above) stiffer tulle will work best and don't worry about getting your strips cut perfectly. You can use any color you want and can even mix colors if you desire multi colored hair or even rainbow hair.
- 1 headband
- 1 medium size, clear elastic
- Scissors
- Decorative flowers, ribbons, or other accessories (optional)
- Hot glue gun
For more Halloween hair and DIY costume ideas, check out our our Halloween Hairstyles Collection. (Including Disney Princess Hairstyles... Belle, Jasmine, Cinderella, Elsa, Anna, a genie, pirate, unicorn, spider hairstyles, and more.)
Easy Fishtail Braid Hack! Snap Braid Half Up Hair Tutorial
Have you struggled with learning how to french fishtail braid? Or dislike how long these intricate braids can take to create? Then you will love this braiding hack!
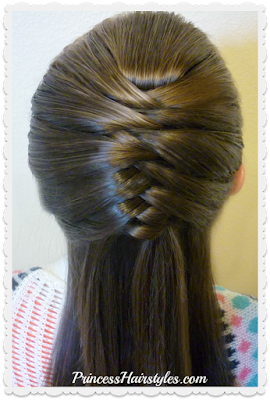
For today's hair tutorial we are showing a braiding tool called the "snap braid." We found ours a few years ago on Amazon (affiliate.) This tool is great for creating half up fishtail hairstyles (as shown) or full length fishtail braids.
Snap Braid Half Up Fishtail Braid Hairstyle Video Tutorial: (Click here to watch the video directly on YouTube.)
Fishtail braids have gained popularity over the years and are "on trend" with braided hairstyles in general. Of course, this braid can be made to look tight and neat, or a little more loose and messy. If you have wavy or curly hair, I think this style would look so beautiful and more textured / voluminous. We are loving the carefree boho look of this braid.
Supplies needed to recreate this look:
- A "snap braid" braiding tool (affiliate.)
- If you are making a full length braid, you will need a hair tie or elastic to tie the braid off at the end.
- Finishing hair spray, gel, etc.
Belle Hairstyle Tutorial, Beauty And The Beast Inspired
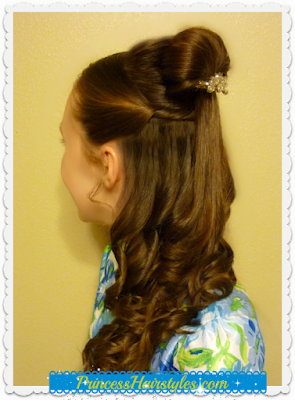
This Belle hair tutorial is inspired by Disney's new "Beauty And The Beast." A beautiful half up hairstyle which is worn with the gorgeous yellow ball gown in the dancing scene with the Beast.
We are so excited for the new live action Beauty and the Beast Disney movie coming out on March 17, 2017. And we could not wait to film this hair tutorial! We have loved watching Emma Watson for years and think she will make the perfect Belle. (Our favorite Disney Princess!)
Belle Hair Tutorial, Elegant Half Up Bun Hairstyle: (Click here to watch the video directly on YouTube.)
Before filming this tutorial, we tried searching the internet for a clear picture of this hairstyle from an actual movie still shot, but were unsuccessful. (We only found blurry pics from the side or front and a very quick flash of the style in the official trailer.) So, this is our perceived rendition and not an exact replica. Based off of the animated movie and books, seeing Belle at Disneyland, etc... we know her classic style is a half up with curls, with some type of bun in the back, possibly featuring a yellow ribbon or gold hair accessory of some sort. Of course, although our minor details may not be spot on with the new movie, this hairstyle will definitely pass for Belle! We can't wait to see the actual authentic details when we go watch this in the theater next month!
This hairstyle is fairly easy to make (for a Disney Princess hairstyle) and would be great to go with a Princess Belle Halloween costume, a day at Disneyland or Disney world, a Disney Princess party, watching the Beauty and the Beast movie premiere, etc.
Supplies needed to recreate this glamorous hairstyle:
Browse our Disney Princess Hairstyles playlist. We have renditions of hairstyles for Jasmine, Elsa, Anna, Cinderella & Aurora!
We are so excited for the new live action Beauty and the Beast Disney movie coming out on March 17, 2017. And we could not wait to film this hair tutorial! We have loved watching Emma Watson for years and think she will make the perfect Belle. (Our favorite Disney Princess!)
Belle Hair Tutorial, Elegant Half Up Bun Hairstyle: (Click here to watch the video directly on YouTube.)
Before filming this tutorial, we tried searching the internet for a clear picture of this hairstyle from an actual movie still shot, but were unsuccessful. (We only found blurry pics from the side or front and a very quick flash of the style in the official trailer.) So, this is our perceived rendition and not an exact replica. Based off of the animated movie and books, seeing Belle at Disneyland, etc... we know her classic style is a half up with curls, with some type of bun in the back, possibly featuring a yellow ribbon or gold hair accessory of some sort. Of course, although our minor details may not be spot on with the new movie, this hairstyle will definitely pass for Belle! We can't wait to see the actual authentic details when we go watch this in the theater next month!
This hairstyle is fairly easy to make (for a Disney Princess hairstyle) and would be great to go with a Princess Belle Halloween costume, a day at Disneyland or Disney world, a Disney Princess party, watching the Beauty and the Beast movie premiere, etc.
Supplies needed to recreate this glamorous hairstyle:
- 3 small or medium hair elastics
- Several bobby pins
- Finishing hair spray
- To create the voluminous bun for this style, we used our "Hollywood Half Up" accessory made by Scunci. When we saw this tool at Walmart, we thought it would be perfect for helping to create Belle's hairstyle and it really was simple to use. We have an older Belle hair tutorial showing another idea for making the bun from several years ago if you want to check that out. This Bell hairstyle could also be created by following the first few steps shown in our video, and then making a regular twisted, braided, or messy bun with the half ponytail and tying a yellow ribbon around it, or adding a gold clip or barrette (instead of using a bun maker like we did.)
- The ringlet curls cascading underneath the bun were created using our 3/4 inch curling iron, starting at the the root.
- A topsy tail (affiliate) is optional for creating this hairstyle, but does make it easier and can be used for many other styles as well. These can be found online and in some stores that sell hair accessories.
Browse our Disney Princess Hairstyles playlist. We have renditions of hairstyles for Jasmine, Elsa, Anna, Cinderella & Aurora!
Hair Brush Straightener Review
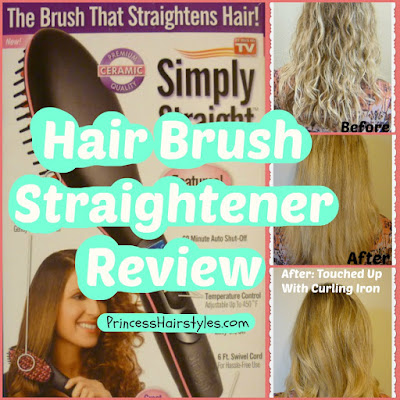
Today we are reviewing the "Simply Straight" hair brush straightener (as seen on TV.) We saw a commercial for this product quite awhile ago and have been wanting to try it ever since. Then a few months ago we noticed that it was available at our local Walmart, so we went ahead and purchased it.
We are testing this heated brush on naturally wavy, slightly curly, color treated, fairly thick, and generally frizzy hair. I allowed my hair to air dry after washing it and did not add any hair products except for heat protectant before using (to see what this brush could do on its own.)
Hair Brush Straightener Video Review: (Click here to watch the video directly on YouTube.)
As shown in our video, this product did mostly straighten my hair, but left it frizzy looking and not completely smooth. Although It was fun, fairly quick, and easy to use, I felt that I needed to touch up my hair with a curling iron or flat iron afterwards to make it look presentable.... which kind of defeats the purpose.
On the box, this product claims to be "safe and gentle" with "salon quality results." I can agree that this would probably cause less damage than a flat iron, since your hair isn't being completely flattened between two hot plates giving direct heat, but heat is still being applied (up to 450 degrees) so I can guess that damage will still occur while using this brush. As with any heated tool, I would suggest using heat protectant, and to only use it occasionally. Also, we were not able to achieve salon quality results in my opinion.
I could see this being useful if you wanted to quickly straighten your hair before finishing with a curling iron or flat iron to smooth things out completely (as shown in the bottom photo below.)
There are several brands of these ceramic electric brushes available and I have only tried "simply straight." Some others I have heard of are: DAFNI, Apalus, Jouvelle, Femjolie, Uspicy, Conair, Chi, Vega, FHI, and Avon. The simply straight brush was priced at around $40. The other brands I have seen range from $19 to over $200.
Fancy Fishtail Kit Hair Tutorial, Fishtail Braid With Beads
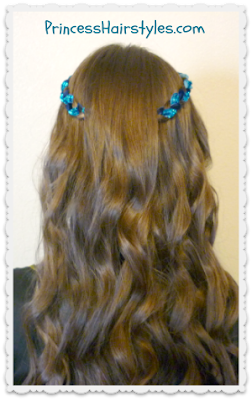
We recently purchased a "Fancy Fishtail Kit" (made by Goody) and thought it was so fun, we decided to do a tutorial with it. My daughter wears fishtail braids to school quite often, but loves the subtle style and flair these beads add to the braid. On top of that, this tool is so much quicker for her than creating a regular fishtail braid (which can be quite time consuming on long hair) and on school mornings, she is all about quick!
Fishtail Braid With Beads, Video Tutorial: (Click here to watch the video directly on YouTube.)
This hairstyle would be great for all ages... teens, little girls, even moms. I could also see this working for casual as well as formal occasions. The braid itself is quite standard, but the beads give it more of a glamorous look, which would be pretty for Prom, Homecoming, church, recitals, weddings, etc. You can choose to leave the braid sleek and neat looking, or stretch it out and deconstruct it a bit for more of a relaxed, trendy, and voluminous look.
My daughter was at school the day I had time to film this tutorial, but we wanted to show you what this looks like on real human hair. I think it's so pretty!
This braid can be created on the side (as shown) or in the low center. Of course, this could also be placed in a high ponytail if you prefer, or even made as a half up hairstyle or wrapped into a bun.
This will work best with medium length or long hair and would be adorable with curly or wavy hair as well as straight. If your hair is longer than the tool, you can extend the braid all the way to the end of your ponytail with a regular fishtail braid if you prefer, or you can stop at the last bead like we did.
As mentioned in our video, this kit comes in several different colors. I have seen the beads in silver, gold, and black. I tried searching online for a link to this kit and did not find it, even on Amazon (I think it is too new.) But, it can be found in most discount and drug stores (we purchased ours at Walmart.) I am including a picture of the packaging (below) so that you can hopefully find if it if you are wanting one.
Waterfall Braid Maker Tutorial & Review
This week we are trying out the "waterfall braid maker" by Conair. We noticed this product a few months ago while browsing the "hair aisle" at Walmart and were immediately intrigued. I know there are many people who struggle with making the waterfall braid, and I was curious to see how helpful this would be. After quickly looking over the instructions on the back of the package at the store, I was thinking it looked pretty overwhelming and overly complicated... but decided to give it a try. After some trial and error (and almost and hour later) I did finally figure out how to use this tool! And as you can see, it does make a pretty braid.
I decided to do a step by step tutorial showing how to use this product, along with a review (for those of you who are visual learners like me.) Maybe between our video tutorial and the written instructions on the package, you will have an easier time figuring this out than I did! ;) Enjoy!!
Waterfall Braid Maker Tutorial and Review: (Click here to watch the video directly on YouTube.)
*Link to our video tutorial showing a regular waterfall braid without using this tool: Waterfall braid hairstyle.
*The "waterfall braid maker" on Amazon. (Affiliate.) This can also be found in stores, including Walmart & Target.
Pinwheel Bun Shortcut Tutorial
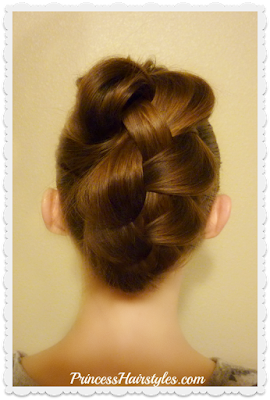
Today we are showing a quick and easy "hack" for creating one of our all time favorite hairstyles, the "pinwheel bun." My daughter loves to wear the pinwheel bun to dance class and occasionally to school or church. But, the one complaint we have with our original method is that it can be quite time consuming. Not to mention, it is a bit of a hassle to take the bun down when you are done wearing it. This new variation (shown in our video today) is quick, easy, and comes out effortlessly when you are done.
The idea for this "shortcut" came to us a few months ago when my daughter had a dance competition and we were using "the perfect bun" to make her standard performance hairstyle (shown in our latest tutorial.) We wondered how the bun would turn out if we braided her hair first, and loved that the end result looked almost identical to a braided variation of the pinwheel bun (also known as the "bun of braids.")
Of course, there are several variations of the pinwheel that can be created using this technique. If you want the bun to be more of a twisted texture (like the original) I would suggest utilizing twist braids (or rope braids) instead of standard 3 strand braids in your ponytail. You could really do any type of braids you want for many different options and variations of this updo.
Pinwheel Bun Shortcut Video Tutorial: (Click here to watch the video directly on YouTube.)
As mentioned in our video, the number of braids you will need to cover the bun foundation is going to depend on your specific hair texture and length. The longer your hair is, the more times the braids will be wrapping around the foundation to provide more coverage.... so you will need less. And obviously, thicker hair is going to cover more of the surface area, which means less braids will be needed as well. If your hair is on the thinner side, I would suggest stretching the braids out before you wrap them up to help cover more area. Also, if you find a "perfect bun maker" close to the color of hair you are working with, it's not going to matter as much if some of it shows through.
Supplies needed to recreate this bun:
- 2 ponytail holders or hair elastics
- Alligator clip or temporary hair ties to keep the braids from unraveling while you work.
- Several bobby pins
- A bun foundation as shown in our video. The one we used is called "the perfect bun" and can be found online or in stores. (affiliate.)
- Finishing hairspray (optional)
This bun would be a great hairstyle for dance, gymnastics, ballet, figure skating and sports, or for formal events such as prom, homecoming, weddings, holidays, and church.
Disney's Descendents Hairstyle Tutorial - Evie
Our hair tutorial this week (and our first Halloween Hairstyle of the season) is inspired by a fun style we saw on Disney's new show "Descendants" which was worn by "Evie" ie Sofia Carson.
In the original style, Evie is wearing a blue/purple woven or braided headpiece (which sort of resembles a crown or tiara) sitting atop her classic dark blue hair. We wanted to create a DIY of something similar, as well as something simple and inexpensive for anyone who is planning on dressing up as Evie for Halloween... or for anyone else just because it's a cute style!
Descendants "Evie" Hairstyle Video Tutorial: (Click here to watch the video directly on YouTube.)
P.S. If you are wanting to make some curls or waves to go with your headpiece (like Evie is wearing) feel free to watch our curling wand tutorial.
As shown in our video tutorial (above) we braided our headpiece right into "the Princess's" hair. This is not actually necessary. If your hair is too short, or if you would rather make the headpiece on its own and bobby pin it into place, you definitely can. We just thought it would be a fun way to keep the headpiece in place without having to use bobby pins or clips and worry about it falling out while trick-or-treating!
You may have noticed in our photos and video that we are showing 2 different ways to finish this style. Depending on your personal preference, you can either leave the braids sitting on top of the hair (as shown above) or you can drape some hair over the back/center of the headpiece to hide the elastic and give the hairstyle more of an authentic look to the original style (shown below.)
Supplies needed to recreate this look:
- Ribbon: We found the 2 rolls of ribbon shown in our tutorial at our local craft store in the discount bin for 50 cents each. You can really use any ribbon you want, but I would suggest finding some that is around 1/2 inch thick to easily create the "point" in the front of the headpiece. We used around 3 feet of each roll.
- If you have beads, you could thread the beads onto the ribbon and randomly add them throughout the braid for added bling and sparkle.
- If you really want to make this hairstyle authentic, you could actually dye or spray your hair dark blue! Or you could look for a blue wig, which would be less messy. ;)
- Curling iron/wand or other curling method if you are wanting curls.
- 1 medium/clear elastic.
- Finishing hair spray (optional)
- Hot glue gun
- Scissors
Genie Hairstyle, Halloween Hairstyles
A fun genie ponytail and DIY headpiece
Now that October is here, we are super excited to kick off our Halloween Hairstyles tutorial series today with a cute genie hairstyle and DIY veil / headpiece! Anyone planning on being a Genie for Halloween?
Did you watch "I dream of Jeannie" back in the day? I sure did! You may remember that Jeannie wore her hair like this, but with a thick braid wrapped around the base of the ponytail (in front of the fabric ponytail holder.) You could easily add a braid to this style if you want more of an "I dream of Jeannie" look! If your hair is not long enough or thick enough to do that, I have also seen synthetic braided ponytail holders
This costume accessory and hairstyle could work for a "generic genie" as well as a Jasmine inspired Disney Princess costume. Of course, you can use any color of fabric you like. I would recommend finding fabric which is sheer and quite thin, as it will look more authentic and will lay nicer. ;) If you want to get creative, you can embellish this look by adding beads, glitter, sequins, or other fancy décor to your finished design!
This high ponytail hairstyle and "genie ponytail holder" are both super easy to make. No sewing is involved here, and the ponytail of course is nothing extravagant. Now all you need is a cute Genie costume to go with your hairstyle!
Supplies Needed:
- 1 strip of fabric, approximately 2 inches wide by 5 ft long
- 1 rectangle piece of fabric, approximately 2ft x 3ft
- Scissors
- 1 empty toilet paper (or paper towel) tube
- 2 small safety pins (or a hot glue gun)
- 1 hair elastic for the ponytail
- curling iron or wand (optional)
Genie Hairstyle and DIY Headpiece Video Tutorial: (Click here to watch the video directly on YouTube.)
Still looking for Halloween costume and hairstyle ideas? Click here to browse our Halloween Hairstyles playlist on YouTube which includes several Disney Princess hairstyles from Frozen (Elsa and Anna,) Aladdin, Beauty and the Beast, How To Train Your Dragon 2, and more!
Easy Hairstyles, Braid Wrapped Messy Bun
A Quick, Easy, And Cute Bun!
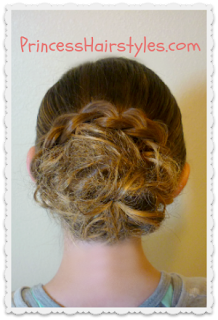
It's always nice to have a few quick and easy hairstyle ideas on hand. And this hair tutorial (below) shows how to make the easiest bun ever! I'm loving the different textures in this style. Mixing curls with braids always seems to turn out cute.
This bun would be great for many occasions: Dance, ballet, figure skating, cheerleading, sports, recitals, communions, baptisms, weddings, school, church.... any occasion really. Maybe even a cute Valentine's Day Hairstyle! The best part is that it literally only takes a few minutes to complete.
We love the effortless look of a messy bun, but as the princess's hair has gotten longer... making a messy bun is sometimes not so effortless! In fact, a messy bun usually takes us longer than most other types of buns (which kind of defeats the whole purpose.) So, as you will see in this tutorial, we have "cheated" just a little bit. ;) We went a different route and used a hairpiece
Of course, you can easily use this "fake hair" to form a standard bun or half up bun without the braid wrapped around it. We wanted to add the braid to make it a little bit more unique. We have also done this same style with a rope braid wrapped around the bun, as well as a four strand. Both variations turned out super cute.
Supplies needed:
- 1 medium sized hair elastic/ponytail holder
- 1 small clear elastic
- Several bobby pins
- 1 hairpiece (shown in our video below.) The one we purchased came from Sally Beauty Supply and is called a "hair twister" I believe it was around $3-$4. I have also seen them at Walmart and various drug stores.
I think the key to making this look as natural as possible is matching your real hair up to the hair piece as best as you can. I would recommend taking the person you are going to be using this for with you to the store when you buy it, so that you can match it closely to the natural hair color you will be working with.
DIY And Crafts - Pop Tab Headband
A cute headband made from soda can pop tabs and ribbon!
We saw a neat video on Pinterest a few months ago showing how to make a pop tab bracelet. The video (which is in Spanish) can be found here: pop tab bracelet video After watching the tutorial, we had an idea to try and make a pop tab headband. We love how the headband turned out and had so much fun making it that we wanted to share with you!  |
| Pop Tab Headband With Fishtail Braid |
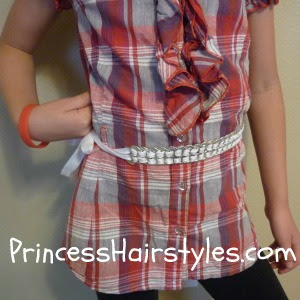
This is a great craft project for kids as well. The princess has been making what she calls "pop bracelets" as well as this darling pop tab belt! The only problem we have found is finding enough pop tabs to keep up with her. ;)
It's always fun to upcycle, or turn "trash" into "treasure." ;) I also love that this project is quite inexpensive as you don't need many supplies or any glue for these headbands.
The supplies you will need:
- 7-8 ft length of ribbon
- Approx 45 pop tabs
- 2 small safety pins (You could also use a sewing needle, but I find the safety pins are better since they won't fall off.)
- Scissors
- Approx 20 minutes
Pop Tab Headband Instructions:
Of course, we would love to see pictures of your pop tab creations on our facebook page!
PS: We have had quite a few requests/Youtube comments asking for a tutorial on the hairstyle shown at the very end of this video. We will do our best to get to it soon. ;)
Fishtail Braid Headband Hairstyle, Dancing With The Stars
Quick and Easy Hairstyles: Fishtail Braid Headband Cheat
 We have done a few hairstyles in the past using the Princess's actual hair to make a braided headband. These are some of our favorite styles and I love the look of braids crossing over her cute head! I do realize though, that fairly long hair is needed to create a style like that and it can be difficult for some to arrange the braids (and keep them in place throughout the day.) This is a fun cheat!
We purchased this cute fish tail aka fish bone / herringbone braided headband at "Sally Beauty Supply." I believe it is synthetic hair. The brand is Bellissima and is part of the "Dancing With The Stars" hair collection. I'm sure similar headbands can be found in most stores that carry hair accessories, or at Amazon here: Braided Headband
This headband can be incorporated into many hairstyles as an accent to add an adorable bohemian, hippie look. This "cheat" is so much easier and faster than braiding your own hair and can work even if you have short hair! My daughter has been wearing this non stop since we got it. I think it's one of our favorite accessories!
This has been great for us on school mornings... a 5 minute, easy hairstyle. ;) I actually have worn it myself a few times as well! It can work for every age (girls, tweens, teens, and adults) every hair type, and every hair length!
*This is not a sponsored post. We purchased the headband and thought it was so cute, we just wanted to share.
Subscribe to:
Posts (Atom)


