
Pull-Throughs
Showing posts with label Pull-Throughs. Show all posts
Showing posts with label Pull-Throughs. Show all posts
How To Wrap Hair Around A Ponytail
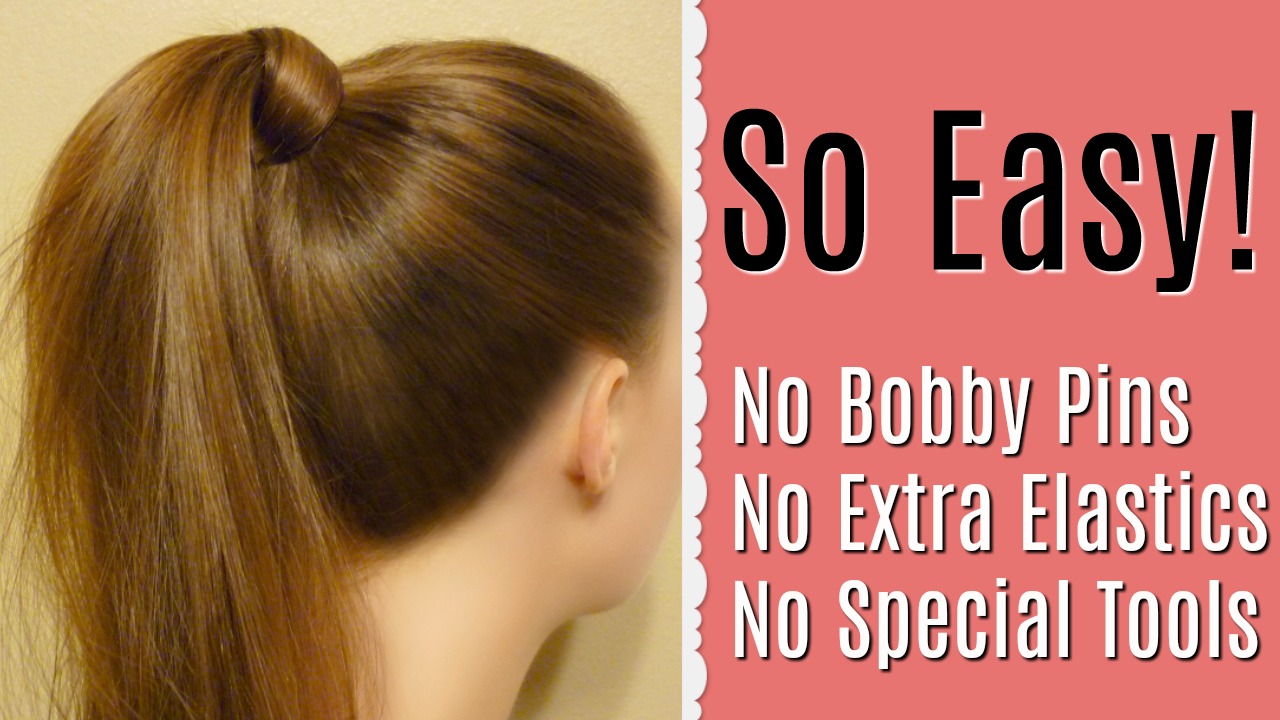
Hair Wrapped Ponytail - Fool Proof Method
A useful hair hack! Today's hair tutorial shows how to hide your hair tie by wrapping hair around it, the easy way. This classic hair trick uses no bobby pins, extra elastics, or special hair tools (such as a topsy tail, clips, bungees, etc.) We call this the "fool proof" or no fail method because it works for us every time and is super easy and quick.How To Hide A Hair Tie By Wrapping Hair Around It - Video Tutorial
(Click here to watch the video directly on YouTube.)Tips and tricks for getting the perfect hair wrapped ponytail:
1. The strand of hair you are using to wrap around the top needs to be not too thick and not too thin. If you are having trouble, you might need to add some hair to your strand, or take some out.
2. When initially making the ponytail, make sure your hair tie is tight enough to hold the ponytail in place, but not too tight so that you can't get your fingers through or pull the hair through it.
3. Use our video as a guide showing the points of reference and the direction the hair should be going. IE grabbing the strand from underneath the ponytail, wrapping the hair completely one time, pulling the hair back over in the opposite direction, etc. These steps are very simple, but if you don't follow them exactly, it may not work.
4. If you want the wrapped hair to stay sleek and clean looking, use hair product before you start to help control flyaways.


This simple ponytail look can be used for almost any occasion, from the most casual (school days, the beach, working out, shopping, etc) to the most formal or fancy. We've even seen girls wear a sleek hair wrapped ponytail to the Prom or for their wedding! This is probably the most timeless, popular, universal, and loved hairstyle of all time.
2 Easy Prom Hairstyles in 3 Minutes!
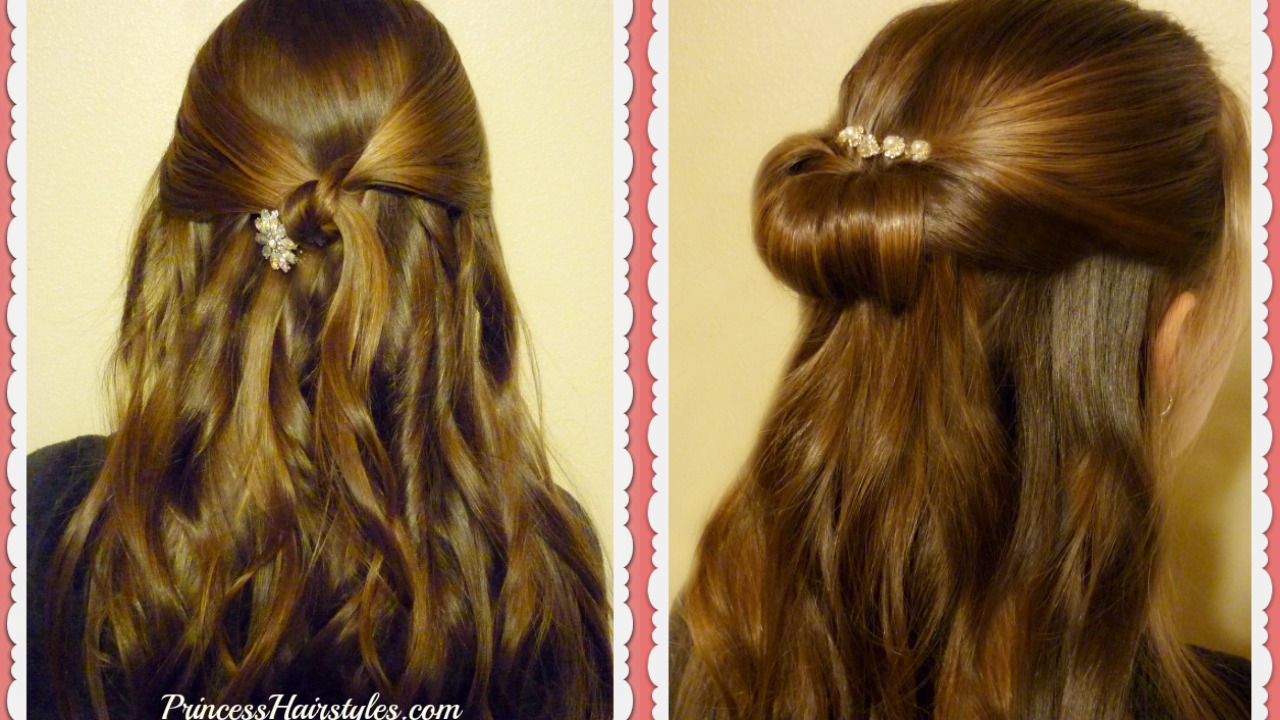
Today we are sharing 2 half up Prom hairstyles that are so easy you could do them yourself! These styles are both very simple and elegant.
2 Easy Prom Hairstyles, Video Tutorial:
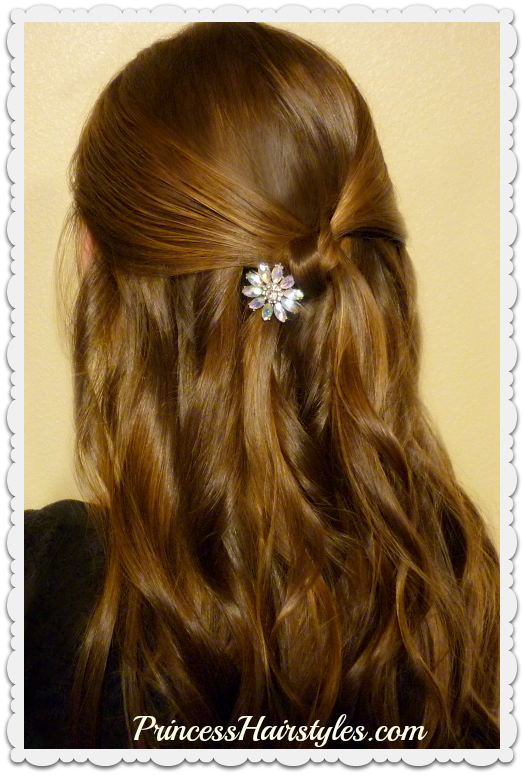
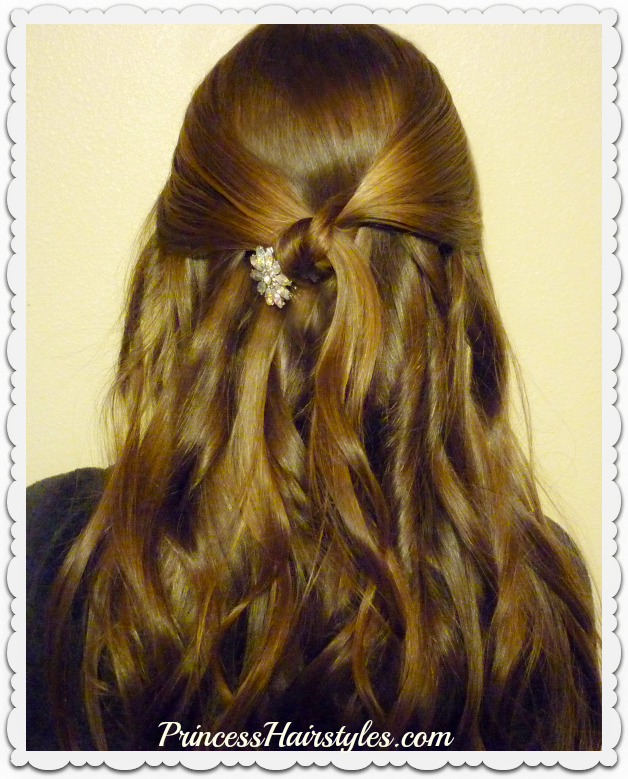
(Click here to watch the video directly on YouTube.)The 1st hairstyle is a half-up with the sides tied back into a standard knot. We have used a rhinestone clip to secure the knot on one side, adding some bling to the style. You could use a bobby pin to secure your knot if you don't want to use a clip.
The 2nd hairstyle is a half up, half down ponytail which we flipped under with a topsy tail (affiliate.) We then flipped the ends back through to form a voluminous loop. We added a bracelet which we found at a local discount store to spice up the style. You could find one that matches your earrings, necklace, or dress!
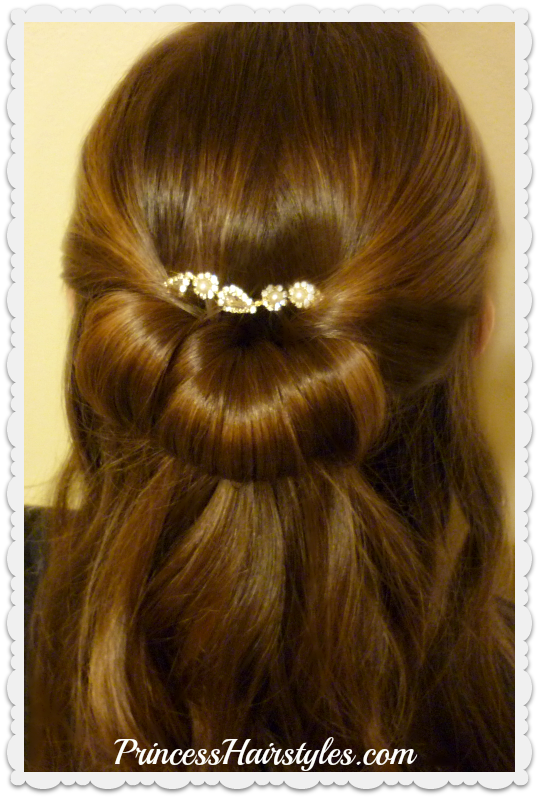
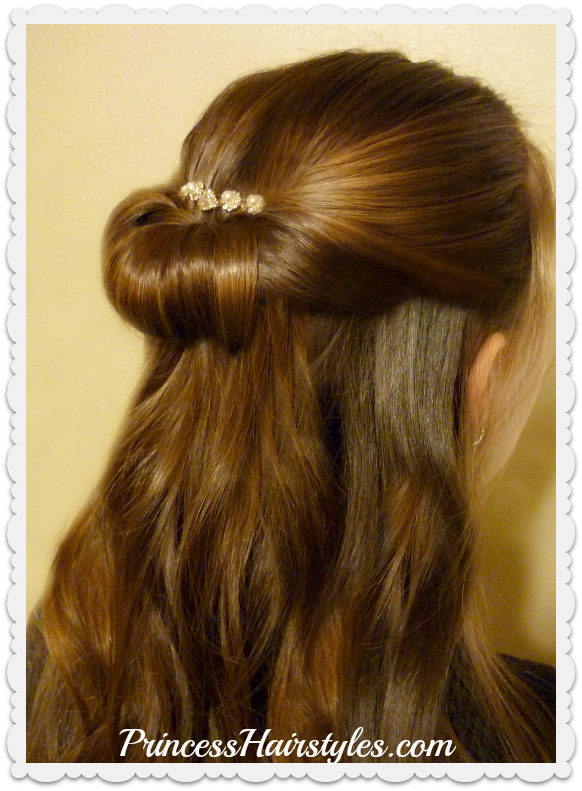
Both of these styles were created using 2nd day curls, which we originally did using a NuMe curling wand (affiliate.)
By the way, in case you are wondering which dress she chose in our last video... She chose dress #6 and had a great time at the dance!
Hope you are all excited for #prom season! #promhair #promhairstyle
Side Swept Formal Hairstyle For Prom
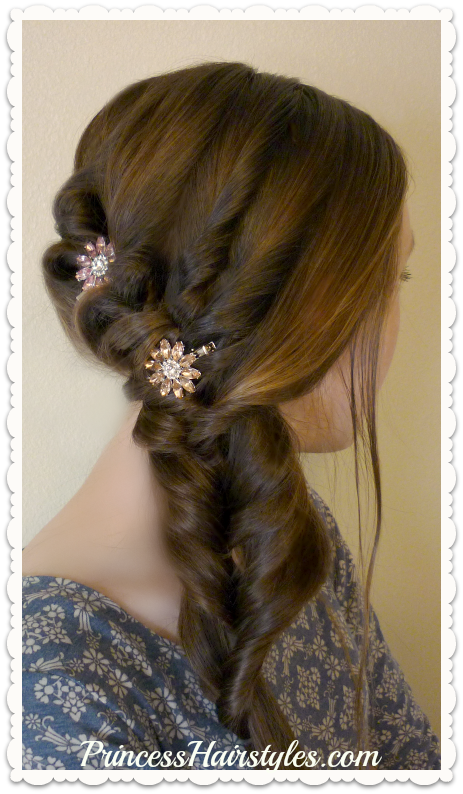
Side Swept Prom Hairstyle Video Tutorial: (Click here to watch the video directly on YouTube.)
My daughter just turned 16 and will be going to her first semi formal High School dance in a few weeks. We have been experimenting with several styles and she is trying to decide which one to wear. So many options! We love this one because it looks pretty from the front and the back. It would be great for pictures! We also love that this style is heatless, quick and easy, but looks like you spent a lot of time and effort on it. Since everything is held together with elastics, I would imagine that this style would hold up to dancing and not fall apart easily as well!
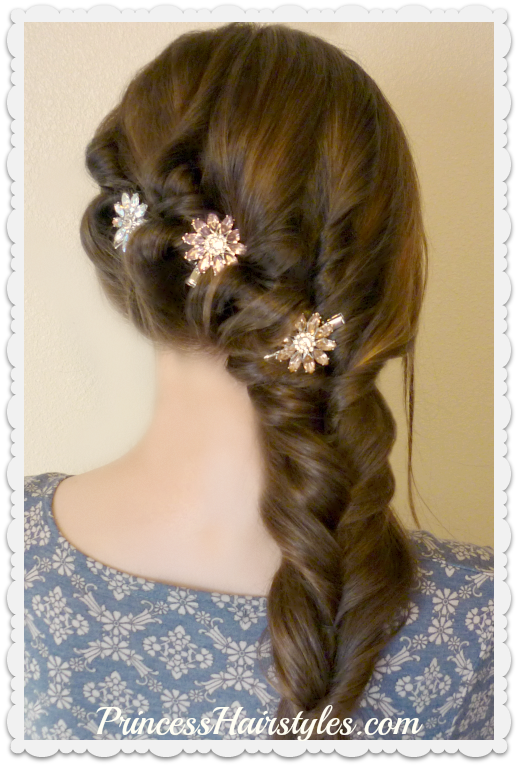
The trick to making this hairstyle soft, pretty, and slightly messy looking (in a good way) is by gently pulling the twists apart for extra volume and fluff (as shown in our video.) Your partings and placements of the elastics don't need to be perfect either. Any imperfections just add to the charm of the style! Leaving a few wispy strands of hair out around her face will also help soften the style.
We purchased the jeweled rhinestone flower hair clips shown at the end of our tutorial at our local Ross. Hair decorations or accessories can really make a formal hairstyle go from ordinary to extraordinary... and can help cover up any "mess ups" in the style as an added bonus. ;)
Supplies needed to recreate this hairstyle:
- Hair elastics (the amount needed will depend on the length and thickness of your hair.) I would suggest finding clear or elastics similar to your hair color.
- Optional hair accessories (clips, pins, jewels, etc.)
- Finishing hair spray.
Triple Tuck Heart Hairstyle For Valentines Day
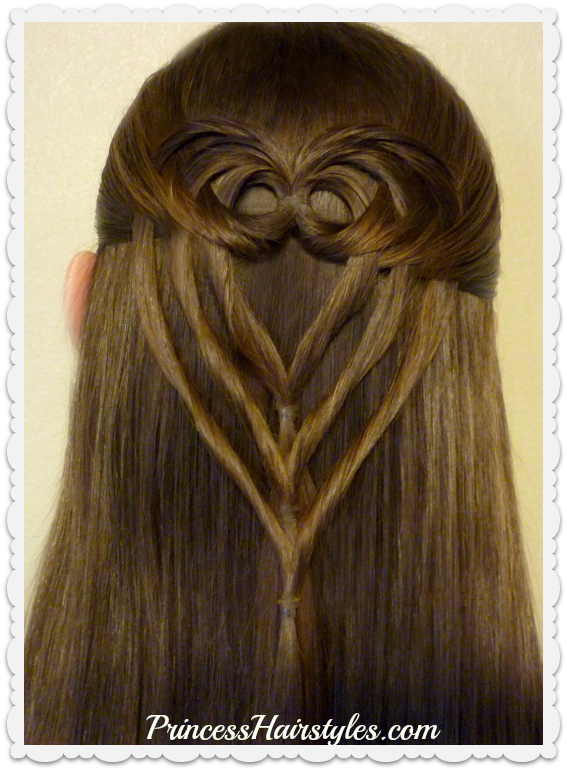
A cute and easy half up heart hairstyle, perfect for Valentines Day! We love that this triple tuck heart is a little more grown up for teens and women to wear, as well as for little girls of course.
This adorable heart style was inspired by a photo we saw on Instagram by "Pr3ttygirl79." This heart design was created using a simple flip and twist technique which we have used many times before in our heart hairstyles. But the way the 3 strands are stacked and tucked into the half ponytail is what makes this style unique! I love the woven look the "tucking" creates. So pretty. The best part? No braiding required!
Triple Tuck Heart Hairstyle Video Tutorial: (Click here to watch the video directly on YouTube.)


Supplies needed to recreate this hairstyle:
- The tool we used to bring the sections through is called a "topsy tail" (affiliate.) As annotated in our video tutorial, you will want to stagger where you are pulling the strands through to keep the sections separate. If you do not have a topsy tail, you could use your fingers.
- 4 small/medium hair elastics.
- Hair product to help with flyaways.
We have been "hair blogging" for 11 years now! And during each January/February of those 11 years, we have posted several heart shaped or heart themed hairstyles.... which adds up to a lot of hearts. I actually counted over 40 heart hairstyles on our site so far! So, if you are looking for more Valentine's hair ideas, click over to our Valentines Day Hairstyles collection to see more. (Some of them are from before we started doing YouTube and are picture tutorials only.)
Obviously this hairstyle would be cute for Valentine's Day, but could also be worn for other events. I'm thinking this would be adorable for a wedding (flower girls, bridesmaids, etc.) This would also be cute for a school dance, Prom, Homecoming, communion or other special occasions.
New Super Easy Way To Make Space Buns - No Bobby Pins!
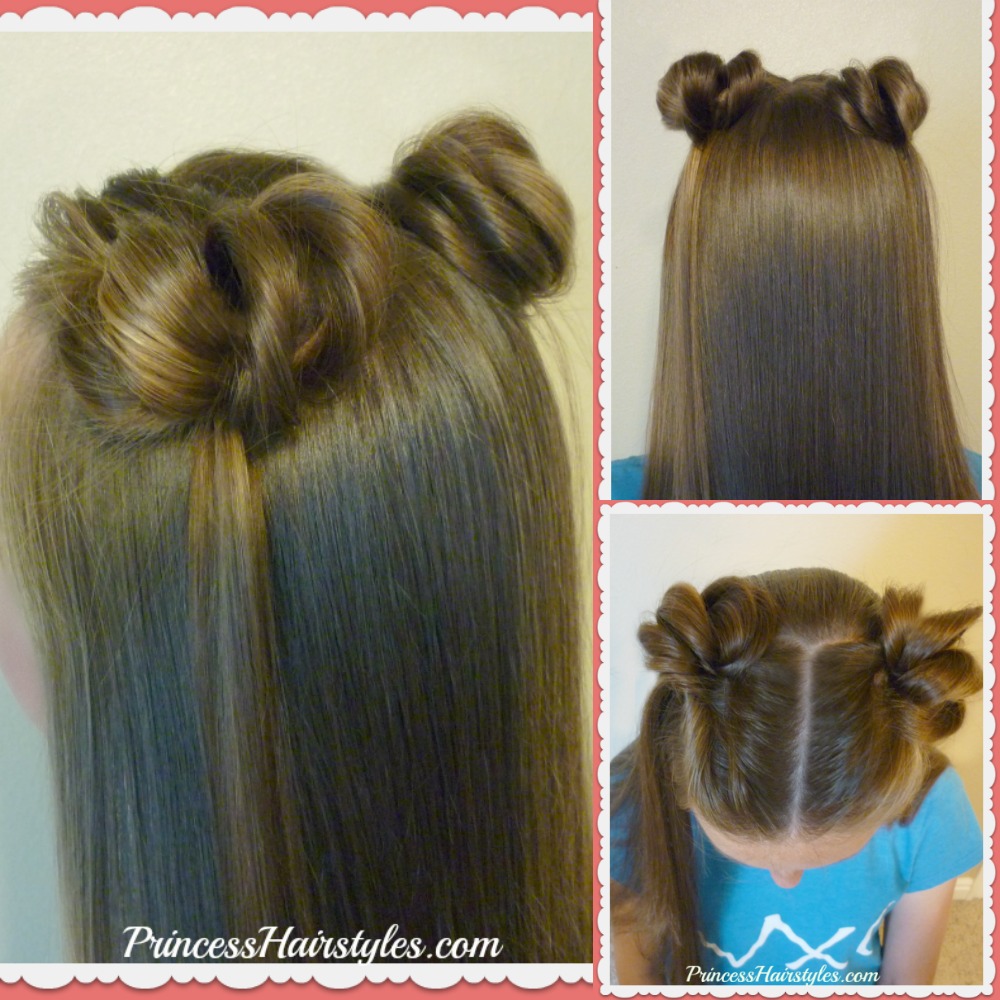
Today we are sharing a fun and easy new tutorial for making space buns. We love that this method requires no bobby pins!
This hairstyle is great for all ages and could be used for many occasions. We love that these double buns are popular and stylish for teens right now. So fun! And if you aren't super excited about the pigtail look, you could still use this method to create one bun in a half up style for a toned down variation.
Easy Space Buns Video Tutorial: (Click here to watch the video directly on YouTube.)
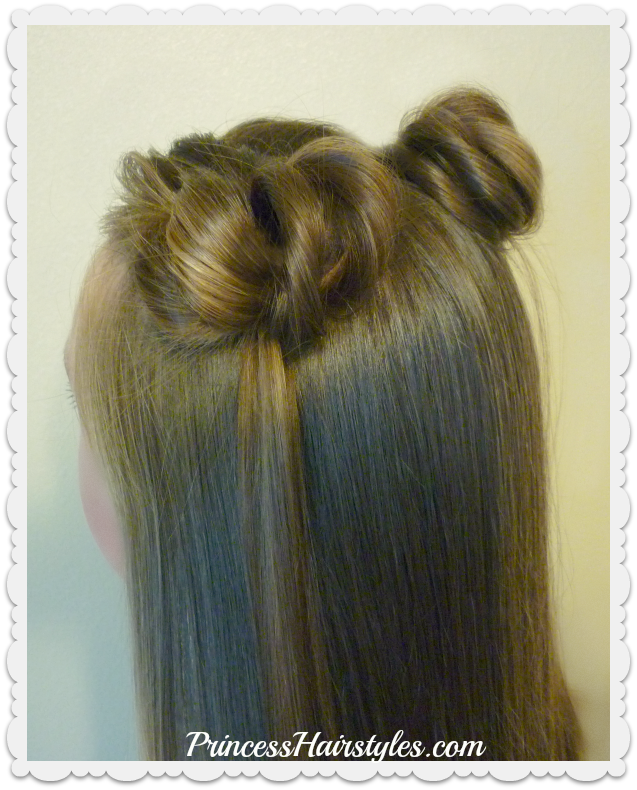

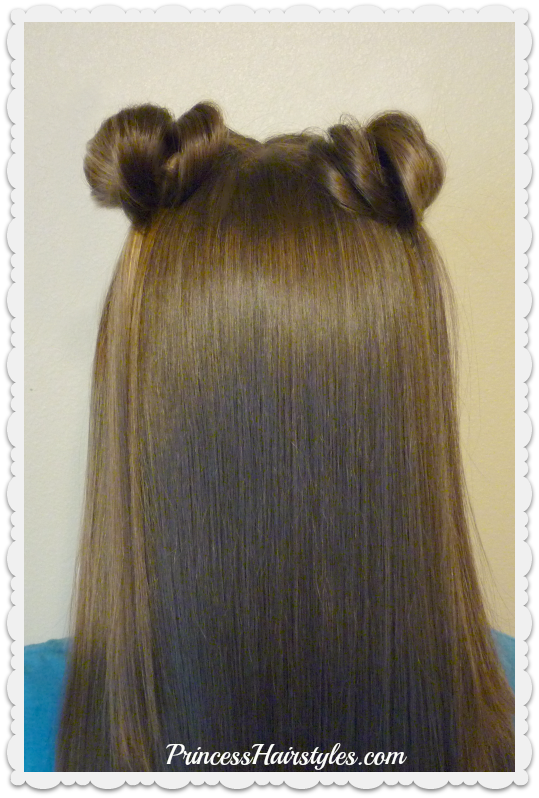
You may have noticed in our video (above) we used a "topsy tail" to create this style. This isn't absolutely necessary, but makes it much easier to pull the loops through the elastic. These tools can be found on Amazon (affiliate.)
This hairstyle will work for medium length, long hair, and even fairly short hair. If your hair is on the shorter side, we would recommend taking more sections, and only looping them one time each through the elastic.
With Halloween right around the corner, we were thinking these buns could even be used for several different Halloween costumes: Bears, mice, Minnie Mouse and Mickey Mouse, dogs, (basically any animals with ears!) You could also use them for rocker chick costumes, barbie, monster high, cheerleaders, fairies, etc, etc.
As mentioned in our tutorial, you can choose to make more of a loose, messy bun type of look, or keep the buns neater for a tight, sleek, coiled bun. It is up to you!
4th of July Hairstyle! Elastic Star And Pull Through Braid For Teens

Another star hairstyle for the 4th of July!
Our hair tutorial this week features a fun star design accent on one side of her head, combined with an edgy pull through braid faux hawk ponytail look using the rest of her hair.
Over the years we have shared many star hairstyles on this blog for the 4th of July. Most of these styles would be adorable for younger girls... "star pigtails" anyone? But today we wanted to show a star hairstyle that will hopefully work for teenagers too! I think this trendy look would be so cute for a barbecue, fireworks, watching a parade, or hanging out with friends and family.
4th Of July Hairstyle, Elastic Star And Pull Through Braid Video Tutorial: (Click here to watch the video directly on YouTube.)
As mentioned in our video, you can end the pull through braid at the base of her neck for a ponytail look like we did. Or, you can continue the braid all the way down to the ends of her hair if you prefer. Stretching out the edges of your braid will make this style very voluminous and beautiful. I would also recommend tugging slightly on the bangs area for more volume and style in the front (if you like the popular pompadour look.)

Supplies needed to recreate this hairstyle:
- Small elastics to create the star. We used Goody Ouchless Elastics (affiliate.)
- Medium size elastics for the pull through braid.
- Pomade, gel, hair wax, or other product to help control flyaways.
3 Strand Pull Through Braid Tutorial And 5 Ways To Wear It!

Today we are showing how to make a 3 strand pull through braid and 5 cute hairstyle ideas for finishing the style. We have shown a standard pull through braid tutorial as well as the reverse braid on our blog in the past, but have not filmed this 3 strand variation up until now. We first saw this awesome and original braid by @prettylittlebraids on Instagram. This is probably our favorite variation of the pull through braid since it looks so full, gorgeous, and voluminous! This edgy braid has the look of a "faux hawk" and would be great hairstyle for dance competitions and other sports. Since this braid is tethered with elastics all the way down, it holds up really well to most activities.
3 Strand Pull Through Braid Video Tutorial & 5 Ways To Style It: (Click here to watch the video on YouTube.)
This braid could be used to create many different hairstyles and can be worn along the scalp in a "french braid" look, or in a ponytail without adding in hair from the sides of the braid. We have included 5 tutorials in our video (above) for some of our favorite ways to wear this braid:
1. 3 strand pull through braid faux hawk with ponytail.

2. 3 strand pull through braid and flip braid combo.

3. Pull through and fishtail braid combo.

4. Pull through ponytail with micro braids.

5. Standard 3 strand pull through braid from top to bottom.

A few tips and tricks: If you prefer to use less elastics, it is possible to gather a new section at the same time you are securing the 3 strands. But, I have found it much easier to make all of the ponytails first and then double up on the elastics as you make the braid. Everything seems to turn out neater and smoother when I do it this way. Also, as mentioned in our video, the braid turns out better for me when I stretch out each individual section before moving on to the next (as it prevents the layer beneath the one you are working on from being disturbed as you are stretching the strands out.)
Supplies needed to recreate these hairstyles:
- Several medium size, clear (or similar to the color of hair you are working with) elastics. The amount will depend on the style chosen and the length of hair you are working with.
- Hairspray, gel, hair wax, etc. to help control flyaways.
Hair Hack! Make A Pull Through Braid Using Half The Elastics

Hey guys! We love the look of the pull through braid... but hate taking out all of those elastics at the end of the day. Today's tutorial or "hair hack" shows how to make a pull through braid ponytail hairstyle using only 1/2 of the elastics you would normally need! This will hopefully save you some time, frustration, and damage to your hair the next time you want to wear a pull-through braid.
How To Make A Pull Through Braid Using 1/2 The Elastics, Video Tutorial: Click here to watch the video directly on YouTube.


The trick to this hair cheat is adding elastics to only one strand of the braid instead of both strands (like you normally would.) As mentioned in our video (above) you will need to be careful to keep your strands separated and on the same side of the braid from the top to the bottom, or this will end up looking more like a regular 3 strand braid, and less like a pull through. We recommend stretching the sides of this braid for a more voluminous and glamorous look.
Hope you love this hack!
Prom & Wedding Hairstyle! Romantic Updo With Twists & Braids
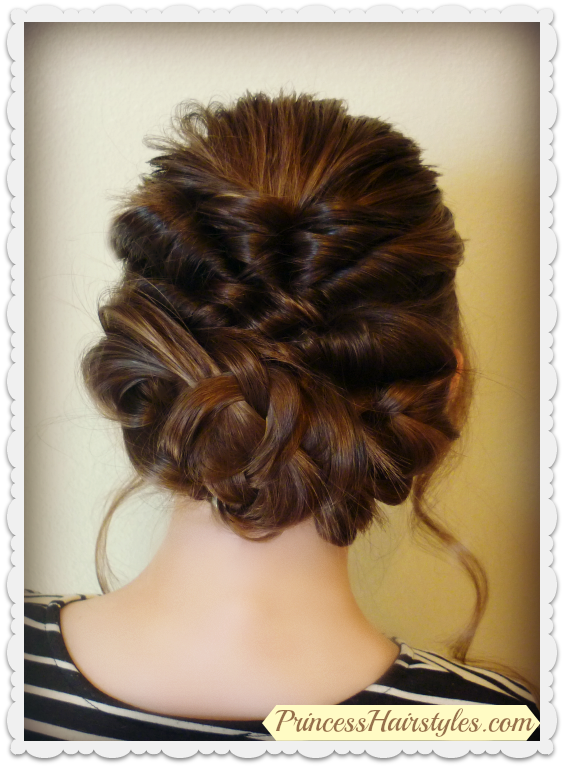
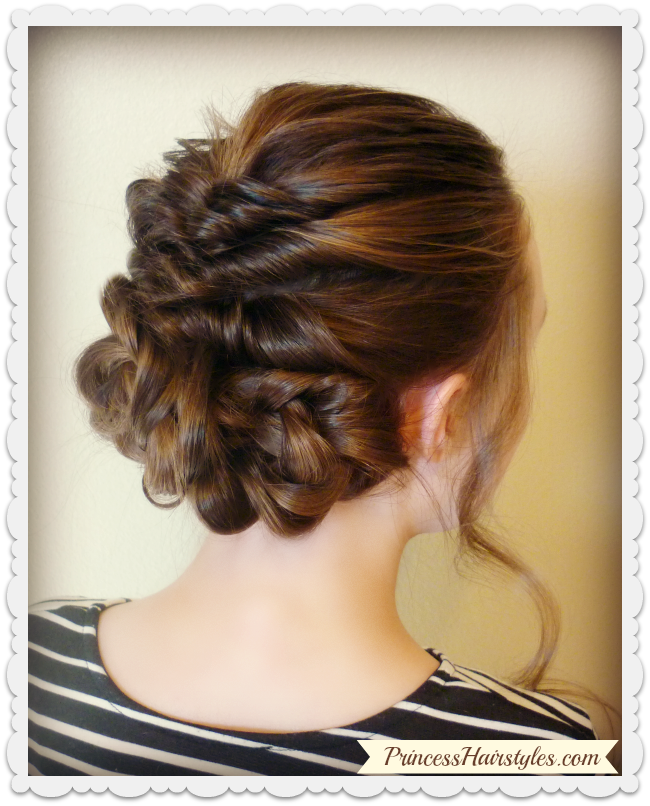
In today's hair tutorial we show an easy, elegant, and pretty updo for special occasions. This romantic hairstyle with twists and braids is glamorous, sophisticated, and fancy. Similar to something you might see on the red carpet, but can be created quite easily in your own home! This gorgeous style would be great for many occasions such as Prom, Homecoming, Weddings (bridal, bridesmaids, and flower girls) recitals, communions, holidays, date night, Instagram photos, etc.
Romantic Updo With Twists and Braids Video Tutorial: (Click here to watch the video directly on YouTube.)
In our step by step video tutorial (above) we use a topsy tail to create the first twisted section. These tools can be found online (affiliate.) This tool is optional, if you do not have a topsy tail, the twists can be made by pulling the hair through with just your fingers. As mentioned in our video, there really is no exact science for creating this hairstyle. After making the basic twists and braids, you can use your own creativity to loosen, pull, and pin up the final look and much of this will depend on the length and texture of the hair you are working with.
This up-style will work best on long hair and medium hair. Curly, wavy, or straight.
Supplies needed to recreate this hairstyle:
- Several small/medium clear hair elastics. (We used 5.)
- Bobby pins. Our favorite brand and best we have found for holding the hair in place is Sally Beauty Supply min pins (affiliate.)
- Topsy Tail (affiliate) (optional.)
- Finishing hairspray.
- Flat iron, curling wand, or curling iron for face framing curls.
Visit our Prom Hairstyles collection for more special occasion hair ideas!
Decorated Pull Through Braids! 3 Holiday Hairstyle Ideas
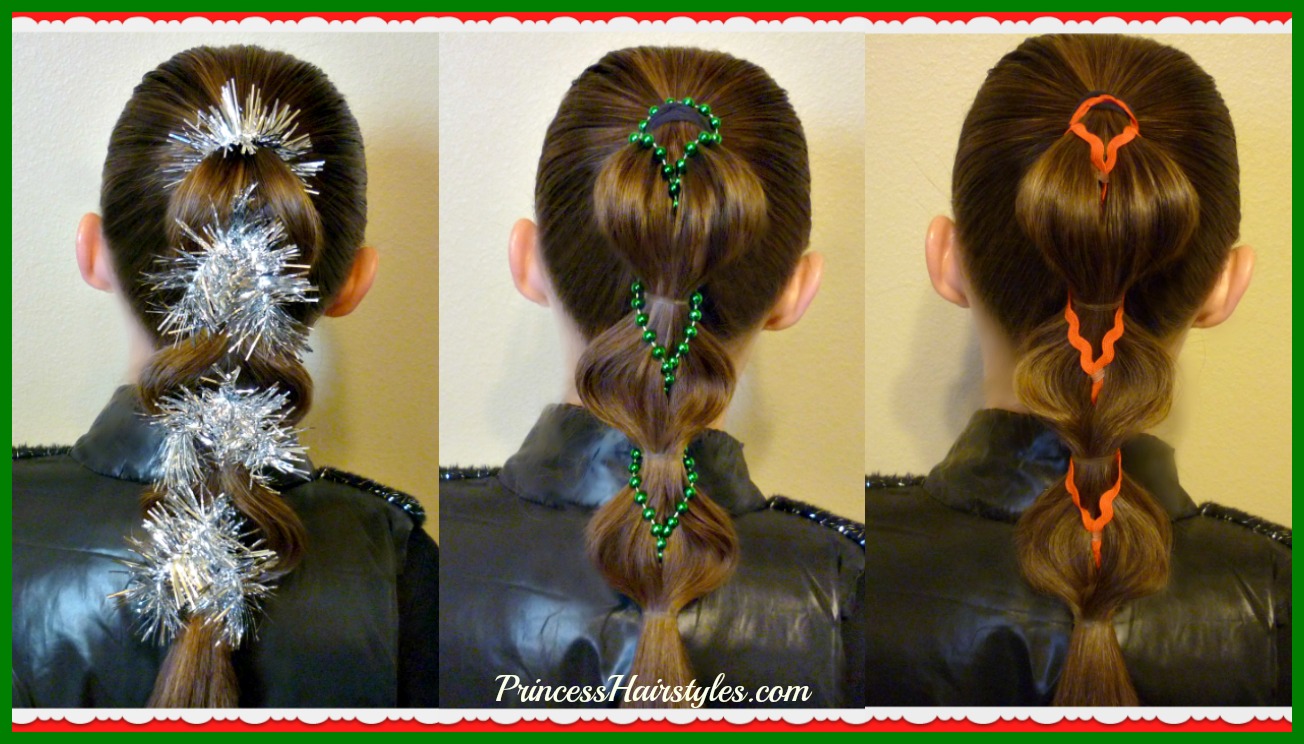
These 3 ponytail Christmas hairstyles would be great for many holiday parties and events this year! We are loving these "decorated pull-through braids" as they are festive and fun, but not overly crazy. I could see these styles working for little girls as well as teens and women. These 3 hairstyles could be worn to a Christmas party, any upcoming holiday event, to school or work, for New Years Eve, to church, or even a hairstyle to go with an ugly sweater contest. ;)
Decorated Pull Through Braids Video Tutorial: (Click here to watch the video directly on YouTube.)
In this video hair tutorial, we show 3 different techniques for creating the decorated pull through braids.
#1 Pull through braid with tinsel. This is the traditional method and most popular technique we have seen to make the braid (using garland as a substitute for the standard second section of hair in our decorated variation.)

#2 Bubble braid with pulled through beads. We came up with this method as we were experimenting and love it, as it halves the amount of elastics used in a traditional pull through style!

#3 Reverse pull through braid with ribbon. We have shared this inverted or reverse technique in the past. For this tutorial we replaced the second section of hair with holiday ribbon.

Of course, these hairstyles can be worn for many occasions year round and not just for Christmas!
Supplies needed to recreate these styles:
- 1 large elastic or hair tie for the top of the ponytail.
- Several medium size clear elastics (the amount will depend on the length of hair you are working with as well as the technique chosen.)
- Decor for your pull through braid. You could really add any type of ribbon, garland, beads, lace, yarn, etc. for all 3 of the techniques shown. We found all of our supplies at the Dollar Store.
- Scissors to cut your decor to desired length.
- You could definitely add some ornaments or lights to these styles (if that is the look you are going for.) I'm thinking some jewels or other hair accessories placed at each elastic would also be lovely if you are wanting some added sparkle.

Woven Pie Crust Hair Tutorial, Holiday Hairstyles

This pretty holiday hairstyle doesn't have to be just for Christmas, Thanksgiving, New Years, etc. but we thought it would be fun to name it something festive since we are in the midst of the holiday season (hence the name our boys came up with) the "woven pie crust hairstyle!"
Woven Pie Crust Hairstyle, Video Tutorial: (Click here to watch the video directly on YouTube.)

As mentioned in our hair tutorial, I would recommend adding pomade, gel, or other hair product before starting. You may find it easier to create this hairstyle using wet or damp hair (depending on the texture you are working with.) Also, we mentioned a trick using rubber bands to help hold the style in place (towards the end of the video) for those of you with fine or silky hair.
Supplies needed to recreate this hairstyle:
- Small clip (to help hold the hair while you are working.)
- 2 medium, clear rubber bands or hair elastics.
- Topsy tail (optional)
- Pomade, gel, or other hair product to help prevent flyaways.
Homecoming Hairstyles, Flower Pull Through Side Braid
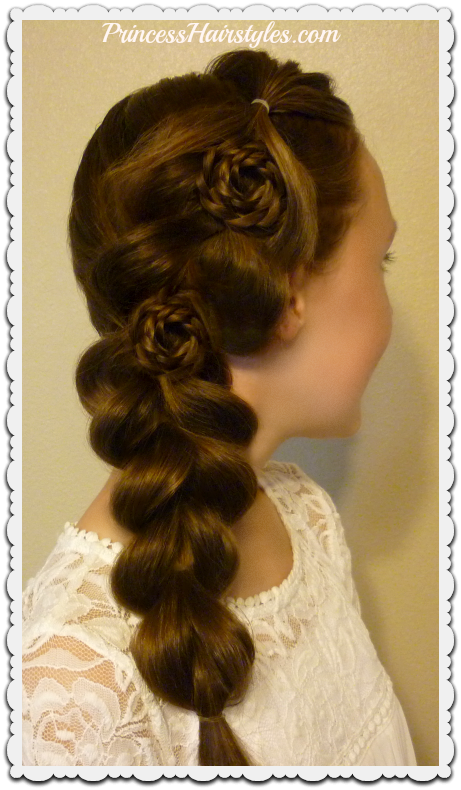
Looking for a hairstyle for Homecoming? You'll love this beautiful side pull-through braid style with braided rose accents! This hairstyle may even be easy enough to do on yourself as a DIY Homecoming or Prom hairstyle! We know many of you will be going to the Homecoming dance in the near future, so we thought it would be fun to do a formal hairstyle tutorial this week. If you are looking for more Homecoming hair ideas, we have shown several fancy updos and half up styles in the past. Feel free to look through our Prom hairstyles for more ideas!
Flower Pull-Through Side Braid Video Tutorial (Click here to watch the video directly on YouTube.)
We have fallen in love with the look of the ever popular pull through braid and especially love it swept loosely to the side with the edges stretched out voluminously. We decided to take this glamorous style to the next level by adding some rolled flower braid accents to the center of the braid. Of course, you can add as many braided roses as you wish. If you wanted even more glam, you could incorporate jewels, other hair jewelry, or accessories to the finished braid, or in the center of your rosettes.
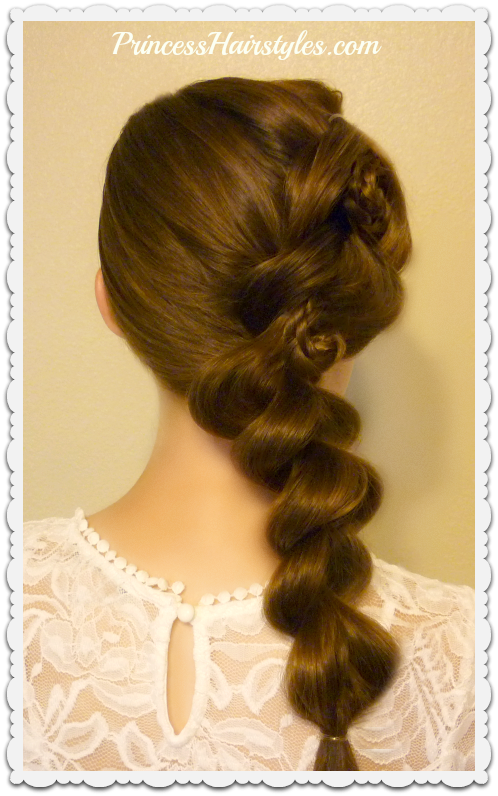
This hairstyle turned out so beautiful and would look stunning with a fancy Homecoming dress, for the Prom, or other formal events such as a wedding (for the bride, bridesmaids, flower girls or guests.) Although this style is quite simple, I think it is really gorgeous and would stay in place through lots of dancing and look great in photos!
Supplies needed to recreate this hairstyle:
- Several small or medium size, clear elastics. (The amount will depend on your hair length and thickness of sections.)
- Bobby pins. We prefer using miniature pins (affiliate) when we are creating the rosettes as they are easier to hide.
- Finishing hair spray.
Easy Faux Mermaid Braid Hair Tutorial

This mermaid braid hairstyle is so pretty and surprisingly easy to create using a french braiding hack shown in our video tutorial below!
You may recognize the faux braiding technique used in the beginning of this video if you watched our hair tutorial last week (the cross bow hairstyle.) These 2 hairstyles start with the exact same steps (even though they turn out completely different.)
Faux Mermaid Braid Hairstyle, Video Tutorial: (Click here to watch the tutorial directly on YouTube.)
We have always loved mermaid hairstyles and I think this one is so gorgeous with the triple braids and signature mermaid look featuring the delicate strands laying on top of the hair. P.S. These braids are not just for mermaids! This hairstyle could also be considered in the "warrior braid" category... or medieval, renaissance, or fairy tale princess! Of course, it would also be cute for regular old school, work, a date, church, school dances, etc.

Supplies needed to recreate this hairstyle:
- 3 small hair elastics
- Topsy tail (affiliate) (optional)
Faux French Braids and Braided Bow, Cross Bow Hairstyle Tutorial

An adorable braided half up hairstyle without having to know how to french braid!
In today's hair tutorial we are showing how to create a braided bow made out of your own hair, in the center of 2 crossing faux french braids. We thought this style turned out so pretty and feminine looking. A true princess hairstyle!
Cross Bow Hairstyle, Video Tutorial: (Click here to watch the video directly on YouTube.)
We love half up hairstyles for teens and girls of all ages, and this one is just so cute. This style is easy, even for those who don't know how to french braid. Of course, if the bow is too much for you, you could leave it off for more of a simple, but still unique braided look as well.

The faux lace braids on each side are made by pulling the hair through a regular 3 strand braid, which can be accomplished with a topsy tail tool (affiliate) or just your fingers. We have shown this faux braiding technique on our blog before, and both methods seem to work equally well. This hairstyle would be a cute back to school hairstyle, or could be used for special occasions such as Prom, Homecoming, communions, weddings, church, recitals, etc.
Supplies needed to recreate this hairstyle:
- 2 small, clear hair elastics
- 1 medium size, clear hair elastic.
- Topsy Tail (affiliate) optional.
3 Quick and Easy Hairstyles For School Using Headbands
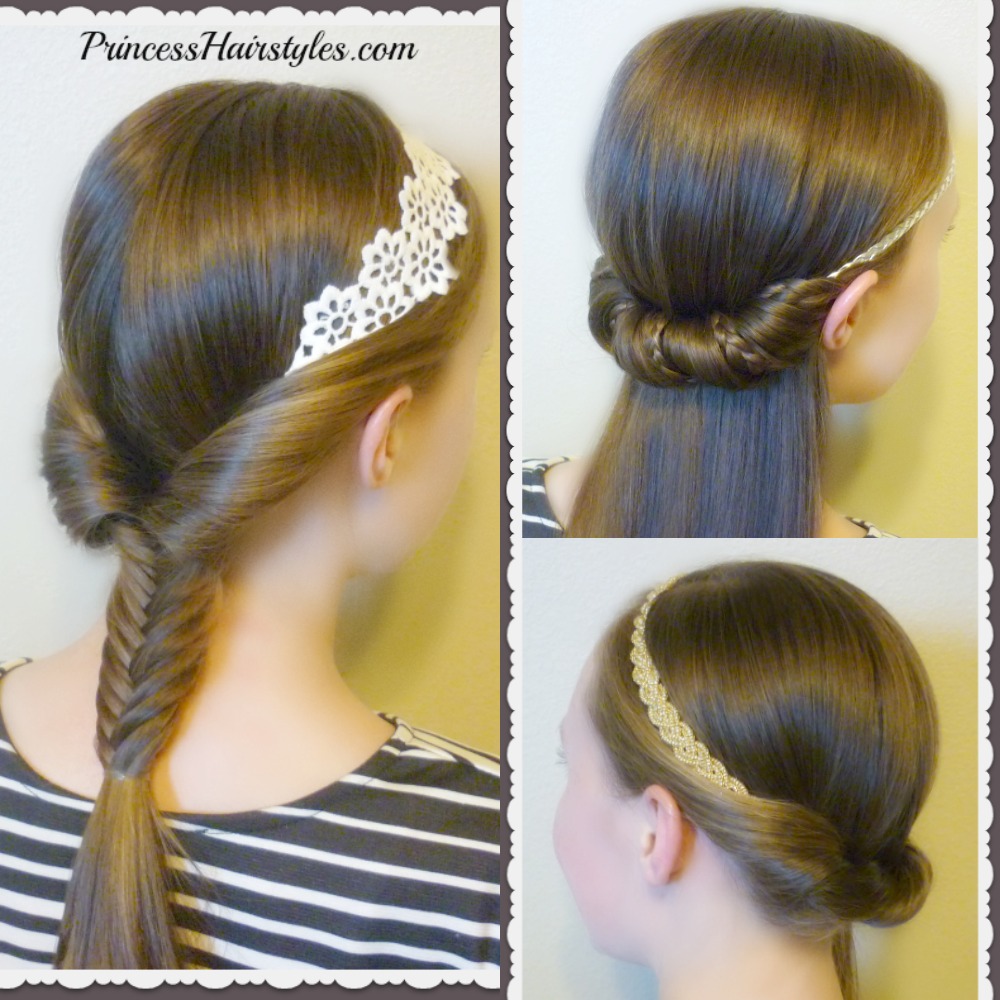
Some cute and simple no-heat headband hairstyles for every day!
Hey guys! We are always looking for easy and quick hairstyles for school mornings. I'm guessing you are too? These 5 minute hairstyles are all super easy and still fashionable even though they take very little effort! The headbands used to create each look add a stylish touch and of course can be matched to your outfit of the day.
Easy Headband Hairstyles Video Tutorial: (Click here to watch the video directly on YouTube.)
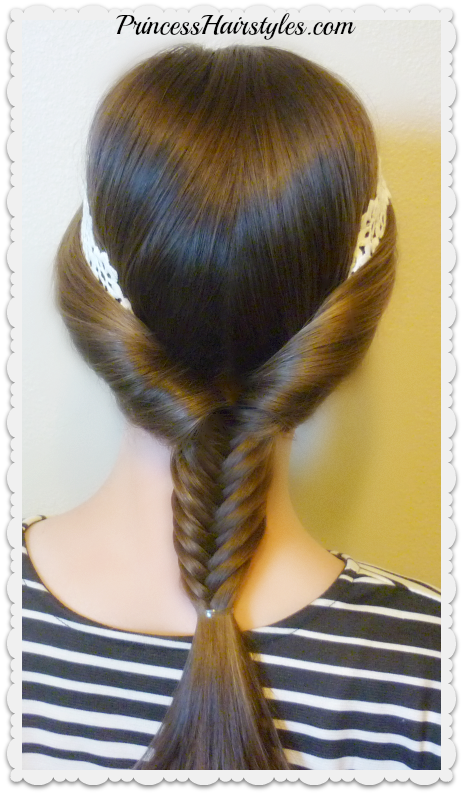
Hair tutorial #1 in this video features an elegant twist on each side, finishing in a low fishtail braid.

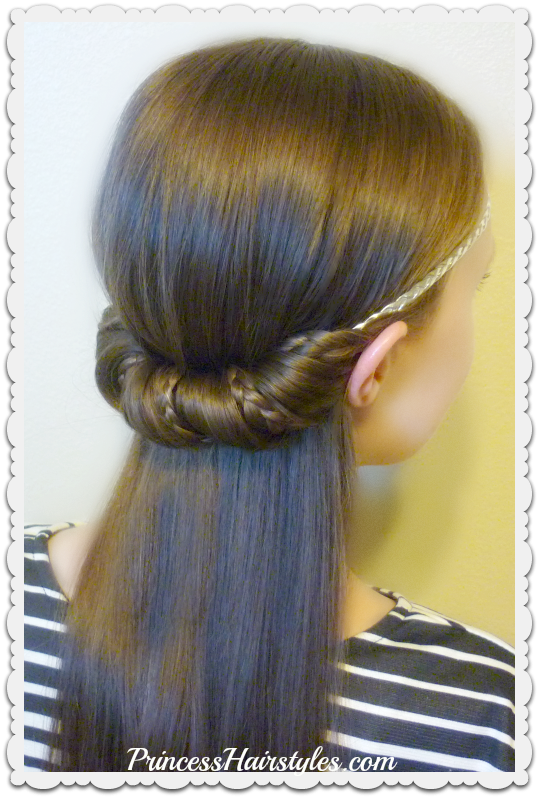
Hairstyle #2 is a trendy half up hairstyle with hidden micro braids wrapping around the braided headband placed at the top of her forehead.

Hairstyle #3 is the easiest of all! A fancy side ponytail with a twist wrapping around the back.

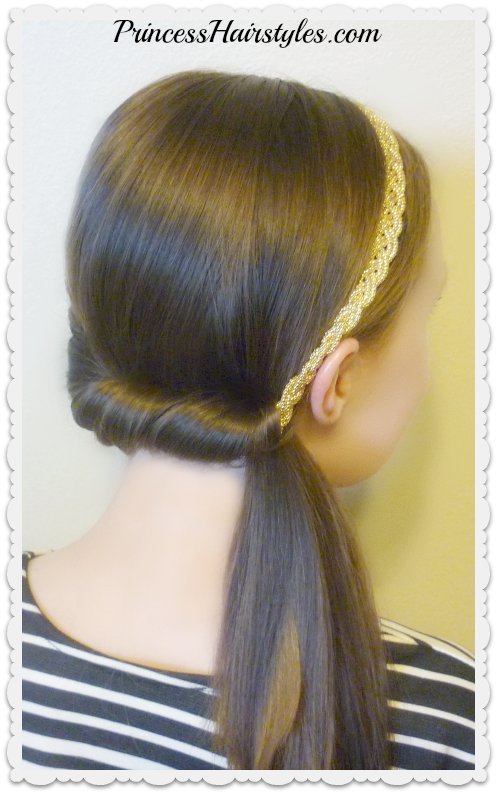
Supplies needed to recreate these hairstyles:
- Clear hair elastics.
- A headband of your choice! A few cute headbands we found online: Double layer braided boho headband, celtic knot headwrap, brown flower headband. (affiliates)
- A topsy tail (affiliate) as shown in hairstyle tutorial #2.
- Finishing hairspray or hair product.
Subscribe to:
Posts (Atom)


