
2 Strand Braid
Showing posts with label 2 Strand Braid. Show all posts
Showing posts with label 2 Strand Braid. Show all posts
Fishtail Updo Hairstyle For Parties, Prom, Wedding | Fancy Hair Tutorial
Today's hairstyle tutorial is a beautiful updo style created using a simple fishtail braid!

Our step by step video instructions (below) show how to make a simplified french fishtail braid, transitioning into a standard fishtail, then wrapping and tucking the finished braid into a pretty updo hairstyle. This formal hairstyle is quite easy even though it doesn't look like it would be!
Fishtail Updo Hairstyle Video Tutorial:
(Click here to watch the video directly on YouTube.)This hairstyle would be great for many special occasions: The Prom, Homecoming, weddings (hairstyles for the bride and bridesmaids as well as guests) parties, dinners, church, etc.

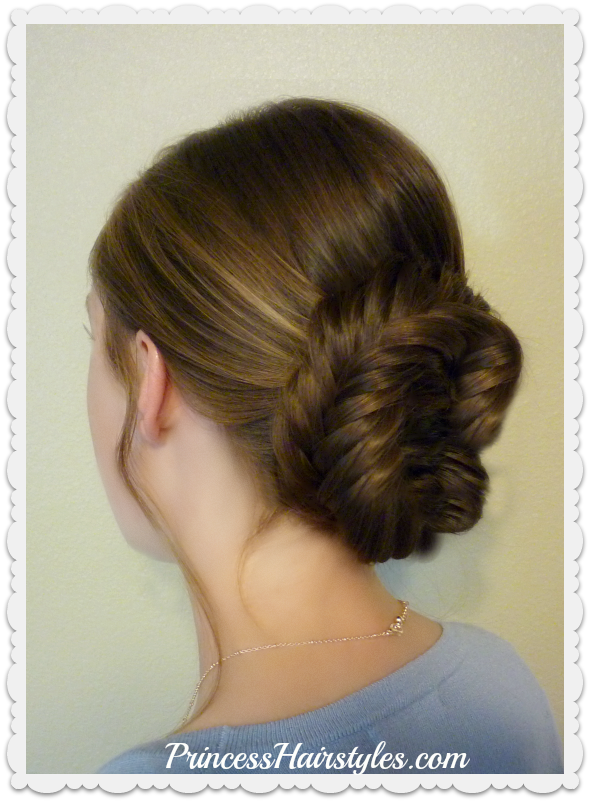
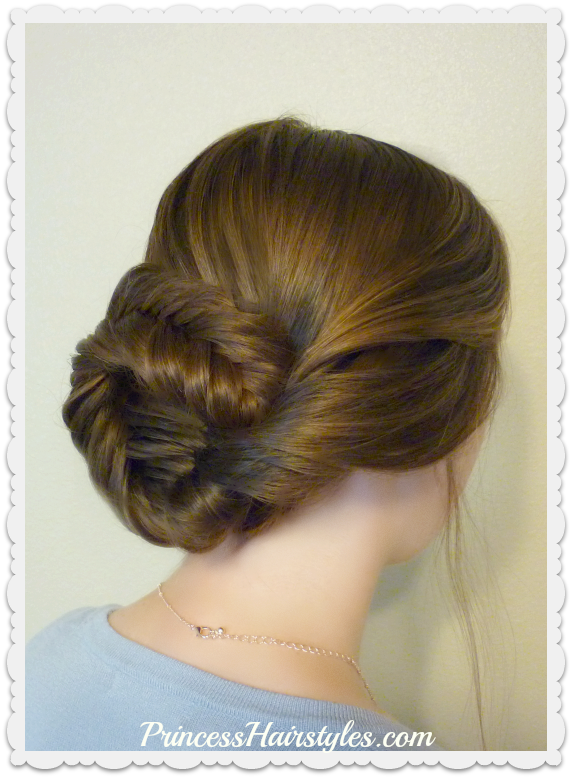
As mentioned in our video, the braid can also be left down for another adorable look!
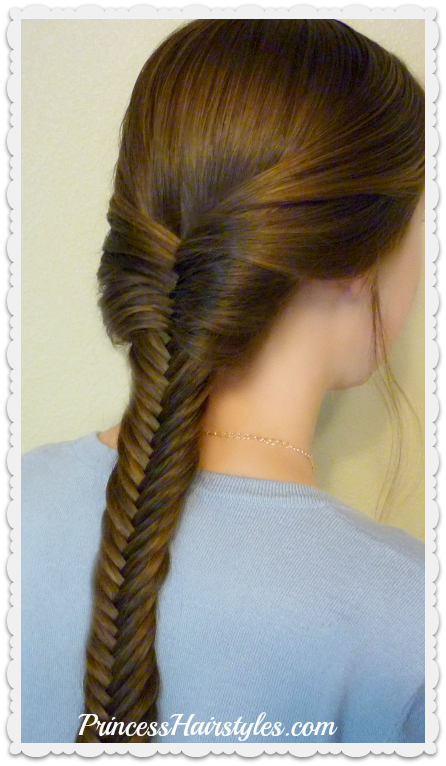
Tips and tricks:
- Use hair product to help prevent flyaways while you are creating the fishtail and for the finishing touches.
- Stretch the edges of your braid for a more voluminous final look.
- Miniature bobby pins (affiliate) are easier to hide in styles like this.
- You may want to loosen the hair at the crown of her head before you wrap up the braid for a softer and more effortless look.
Spiral Twist Fishtail Braid Hair Tutorial

Our hair tutorial today shows how to create a pretty "spiral twist fishtail braid" ponytail hairstyle.
This braid is very simple to create, but will leave people wondering how you did it! We love that this braid gives sort of a 3D illusion. It is hard to tell where the braid starts and where it ends... with a fishtail running along the top, as well as twisting along each side of the braid, and crossing over the front. So fun!Spiral Twist Fishtail Braid Video Tutorial (Click here to watch the video directly on YouTube.)
As shown in our video above, strategic stretching along the edges of the braid really makes this style pop. Also, it is optional but placing a few bobby pins to hold the braids together as we did will help create the illusion of it being one braid instead of 2.

This ponytail style will work best with long and medium length hair. Big, loose, messy, and disheveled braids are trending right now. So feel free to stretch, fluff, loosen and twist to your hearts content!
Supplies needed to recreate this hairstyle:
- 1 medium size hair tie for the top of the ponytail
- 2 temporary hair ties or clips for the ends of the braids
- 1 medium size hair elastic for the end of the braid
- Several bobby pins (optional)
- Hair product to help prevent flyaways
If you love fishtail braids as much as we do, check out a few more of our favorite hairstyles using fishtails:
Double fishtail stitched braid
Twisted edge fishtail braid
How To Make A Fishtail Chain Braid Ponytail Hairstyle

Today's hair tutorial is a beautiful and easy braided ponytail hairstyle that we have been seeing all over Instagram recently. We fell in love with it when we first saw it and have had a few requests for a tutorial, so we knew we wanted to do a video on this style!
This ponytail is so pretty and unique looking and the best part is that it is much easier to make than it looks. If you want to cut down on some time, you could use regular 3 strand braids or twist braids instead of fishtail braids (as they are so gorgeous, but a little more time consuming.)
Fishtail Chain Braid Ponytail Video Tutorial: (Click here to watch the video directly on YouTube.)
This ponytail style would be great for casual occasions as well as formal events. For a more polished look, hair could be wrapped around the top of the ponytail before you start braiding.

Supplies needed to recreate this hairstyle:
- 1 medium size hair tie for the top of the ponytail.
- Several medium/small hair elastics. The amount will depend on the length of hair you are working with and how many loops or links you will be making in the chain braid.
- Hair spray, wax, gel, or other product to help with flyaways.
Some amazing Instagram accounts we remember seeing this hairstyle on and were inspired by: _ardo_ardo_, tojashair, goudhaartje.nl, ymbook, ryt_rs, my_babygirlshair, hair_glamour1, mita_p_akbari, braidymom, trencitajohnson
Braided Edge Reverse Banded Fishtail Braid

Today we are sharing a fun new braid! The Braided Edge Reverse Banded Fishtail.
We love this braid because it is easy, even for beginning braiders, but looks so unique and intricate. It is also less time consuming than most fishtail braids.
Braided Edge Reverse Banded Fishtail Video Tutorial: (Click here to watch the video directly on YouTube.)
You may remember the "twisted edge fishtail braid" we posted several years ago? This was one of our favorite creations and one of the braids we are most proud of on our blog! This braided edge banded braid is sort of a variation of the twisted edge fishtail.

This braid can be done in a ponytail style (as shown) or as a half up. As mentioned in our video, you could also make this using a regular fishtail technique instead of a reverse fishtail (which we hope to show in an upcoming tutorial.)
We love this braid left together as more of a tight and sleek braid. Or lifted and stretched for a more voluminous look, which accentuates all of the details of this braid.
Easy Spider Web Hairstyle
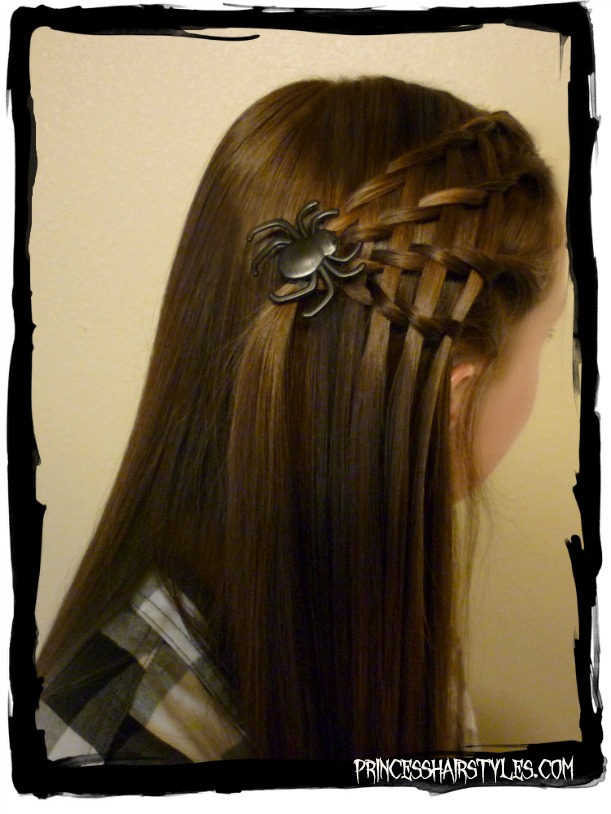
Oh no! A spider has spun a web in her hair! ;)
Hey guys! We love Halloween and look forward to posting Halloween hairstyles each October. This year we wanted a spiderweb hairstyle that would work for teenagers as well as little girls. You could even wear this style to school or work without being too obnoxious. Without the plastic spider, this hairstyle would be cute all year round!
Easy Spider Web Hairstyle, Video Tutorial: (Click here to watch the video directly on YouTube.)
This Halloween hairstyle is created by using a series of waterfall twist braids. We love that it only takes a few minutes to spin these braids into a spider web hairstyle. And the best part... only one elastic to take out when you are done!


Supplies needed to recreate this spider hairstyle:
- 1 medium size hair elastic
- Plastic spider (optional.) We have found that spider rings work great!
- Temporary clip to hold the braids while you are working.
- Hair product to help control flyaways.
Looking for more Halloween hair ideas? Browse through our Halloween Hairstyles featuring several more spider hairstyles, candy corn hairstyles, Disney Princess hairstyles, a unicorn hairstyle, trolls hair, wonder woman hairstyle, etc.
How To Make A Faux Hawk Fan, Half Up Hairstyle

Our hairstyle tutorial this week features a trendy dutch braid faux hawk look with twist braid "fans" feeding into each side of the half up braid.
This would be a great style for all ages (teens included) and would be cute for many occasions: School, work, concerts, dances, dates, church, etc.
This hairstyle is inspired by a similar braid we posted on our blog back in 2014 called the "shooting star" which is still one of our all time favorite hairstyles. This time we wanted to go for more of an edgy look!
Faux Hawk Fan Video Tutorial: (Click here to watch the tutorial directly on YouTube.)


Tips for recreating this hairstyle: Stretch the sides of the main braid for a more voluminous faux hawk. Also, you may need to tighten the accent braids as you go (to prevent them from slipping out and becoming loose.) I would recommend applying hair product before making the micro braids for a smoother finish. This style can also be made using all of your hair in a full dutch braid instead of a half up style if you prefer.
Supplies needed to recreate this style:
- 3 small hair elastics
- Temporary hair ties or clips to hold the braids while you are working
- Hair product to help prevent flyaways
Greek Goddess Ladder Braid, Wedding and Prom Hairstyles
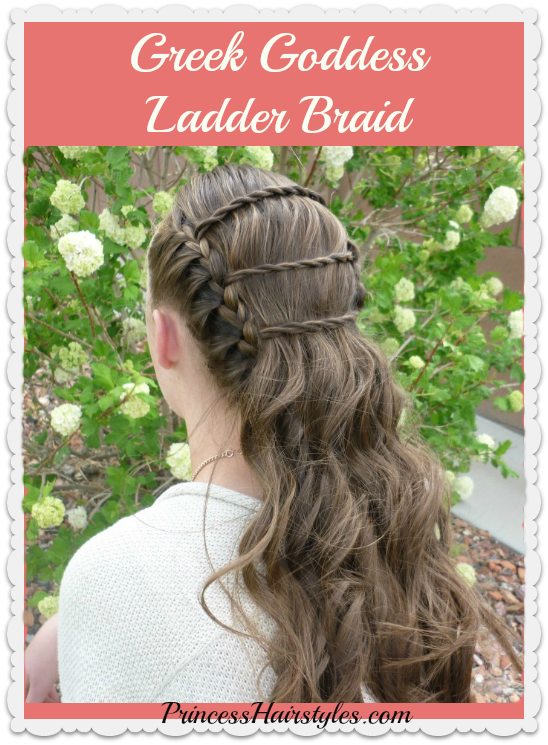
Today we are sharing a beautiful "Greek Goddess" inspired hairstyle tutorial featuring braids, twists, and curls, creating a lovely Princess Hairstyle! This would be a pretty hairstyle for weddings, Prom, Homecoming, recitals, school dances, church, communions and other special occasions.
Greek Goddess Ladder Braid, Video Tutorial: (Click here to watch the video directly on YouTube.)
We have combined a lace french braid feathering technique with rope braids (or twist braids) to create the vertical ladder braid on this half up hairstyle. We love how simple and elegant this style turned out.
As mentioned in our video, we used our curling wand to create her loose curls for this hairstyle. Click here for our curling wand tutorial. You could also crimp or wave your hair if you desire to achieve texture and volume. If you want your style to be more voluminous, you could tease her hair before placing the ladder braid. A bubble effect between the braids could be achieved by using a rat tail comb as shown in our video tutorial (above.) Bobby pins placed under the twists would help to hold your bubbled hair in place if you decide to go for that look.
Supplies needed to recreate this hairstyle:
- 1 medium size, clear hair elastic
- Several clips or hair ties to temporarily section and hold the hair while you are working.
- Finishing hairspray
- Curling wand, crimper, waver, etc. (affiliate)
Hair Hack! Make A Pull Through Braid Using Half The Elastics

Hey guys! We love the look of the pull through braid... but hate taking out all of those elastics at the end of the day. Today's tutorial or "hair hack" shows how to make a pull through braid ponytail hairstyle using only 1/2 of the elastics you would normally need! This will hopefully save you some time, frustration, and damage to your hair the next time you want to wear a pull-through braid.
How To Make A Pull Through Braid Using 1/2 The Elastics, Video Tutorial: Click here to watch the video directly on YouTube.


The trick to this hair cheat is adding elastics to only one strand of the braid instead of both strands (like you normally would.) As mentioned in our video (above) you will need to be careful to keep your strands separated and on the same side of the braid from the top to the bottom, or this will end up looking more like a regular 3 strand braid, and less like a pull through. We recommend stretching the sides of this braid for a more voluminous and glamorous look.
Hope you love this hack!
Decorated Pull Through Braids! 3 Holiday Hairstyle Ideas
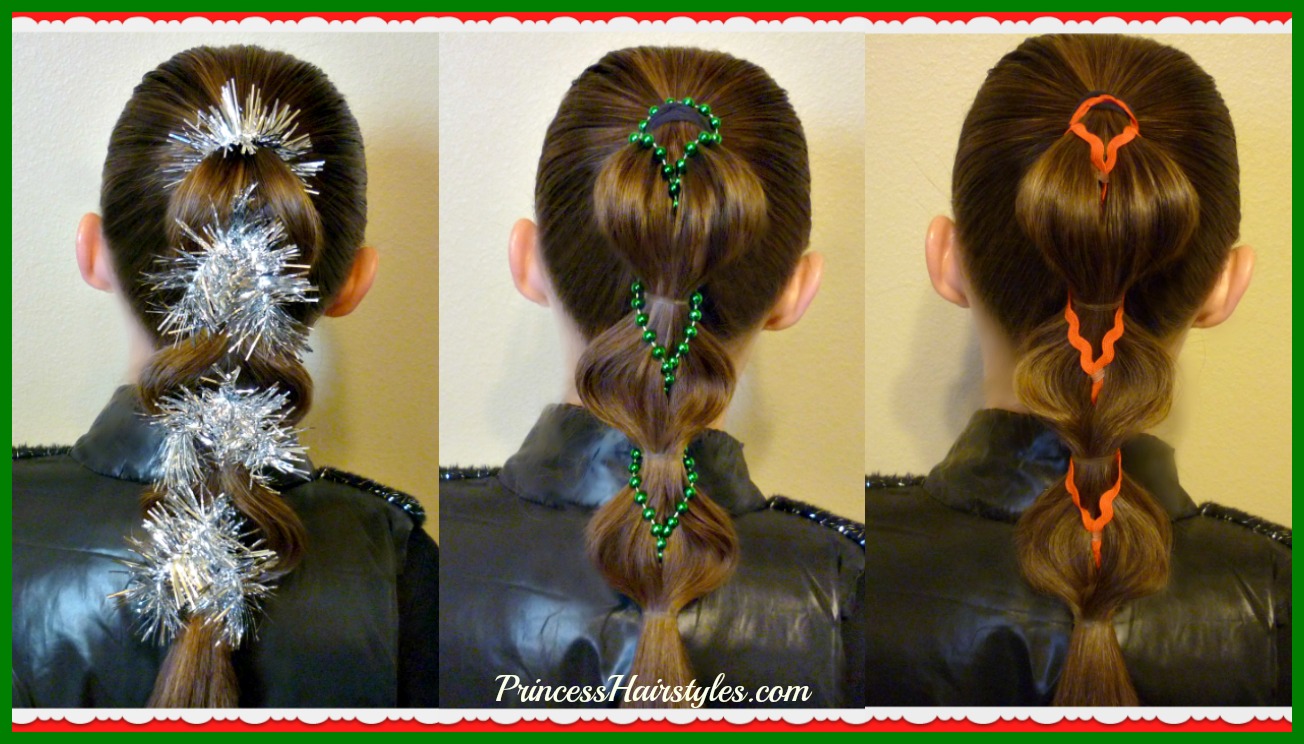
These 3 ponytail Christmas hairstyles would be great for many holiday parties and events this year! We are loving these "decorated pull-through braids" as they are festive and fun, but not overly crazy. I could see these styles working for little girls as well as teens and women. These 3 hairstyles could be worn to a Christmas party, any upcoming holiday event, to school or work, for New Years Eve, to church, or even a hairstyle to go with an ugly sweater contest. ;)
Decorated Pull Through Braids Video Tutorial: (Click here to watch the video directly on YouTube.)
In this video hair tutorial, we show 3 different techniques for creating the decorated pull through braids.
#1 Pull through braid with tinsel. This is the traditional method and most popular technique we have seen to make the braid (using garland as a substitute for the standard second section of hair in our decorated variation.)

#2 Bubble braid with pulled through beads. We came up with this method as we were experimenting and love it, as it halves the amount of elastics used in a traditional pull through style!

#3 Reverse pull through braid with ribbon. We have shared this inverted or reverse technique in the past. For this tutorial we replaced the second section of hair with holiday ribbon.

Of course, these hairstyles can be worn for many occasions year round and not just for Christmas!
Supplies needed to recreate these styles:
- 1 large elastic or hair tie for the top of the ponytail.
- Several medium size clear elastics (the amount will depend on the length of hair you are working with as well as the technique chosen.)
- Decor for your pull through braid. You could really add any type of ribbon, garland, beads, lace, yarn, etc. for all 3 of the techniques shown. We found all of our supplies at the Dollar Store.
- Scissors to cut your decor to desired length.
- You could definitely add some ornaments or lights to these styles (if that is the look you are going for.) I'm thinking some jewels or other hair accessories placed at each elastic would also be lovely if you are wanting some added sparkle.

Homecoming Hairstyles, Flower Pull Through Side Braid
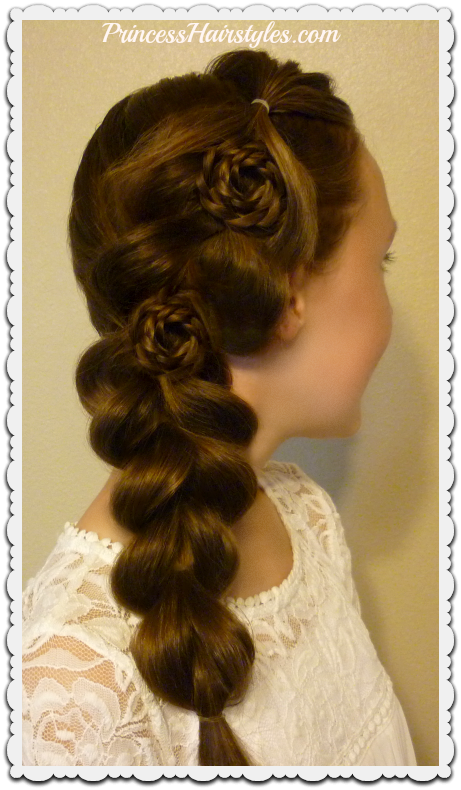
Looking for a hairstyle for Homecoming? You'll love this beautiful side pull-through braid style with braided rose accents! This hairstyle may even be easy enough to do on yourself as a DIY Homecoming or Prom hairstyle! We know many of you will be going to the Homecoming dance in the near future, so we thought it would be fun to do a formal hairstyle tutorial this week. If you are looking for more Homecoming hair ideas, we have shown several fancy updos and half up styles in the past. Feel free to look through our Prom hairstyles for more ideas!
Flower Pull-Through Side Braid Video Tutorial (Click here to watch the video directly on YouTube.)
We have fallen in love with the look of the ever popular pull through braid and especially love it swept loosely to the side with the edges stretched out voluminously. We decided to take this glamorous style to the next level by adding some rolled flower braid accents to the center of the braid. Of course, you can add as many braided roses as you wish. If you wanted even more glam, you could incorporate jewels, other hair jewelry, or accessories to the finished braid, or in the center of your rosettes.
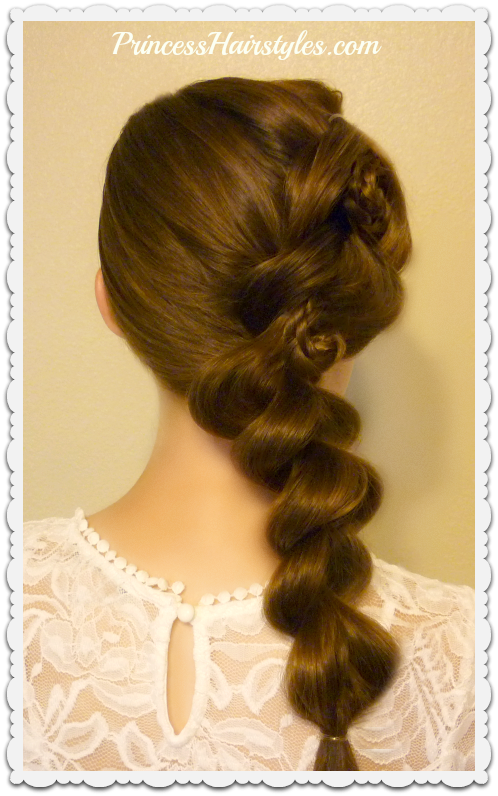
This hairstyle turned out so beautiful and would look stunning with a fancy Homecoming dress, for the Prom, or other formal events such as a wedding (for the bride, bridesmaids, flower girls or guests.) Although this style is quite simple, I think it is really gorgeous and would stay in place through lots of dancing and look great in photos!
Supplies needed to recreate this hairstyle:
- Several small or medium size, clear elastics. (The amount will depend on your hair length and thickness of sections.)
- Bobby pins. We prefer using miniature pins (affiliate) when we are creating the rosettes as they are easier to hide.
- Finishing hair spray.
14 Easy Hairstyles For School Compilation! 2 Weeks Of Heatless Hair Tutorials
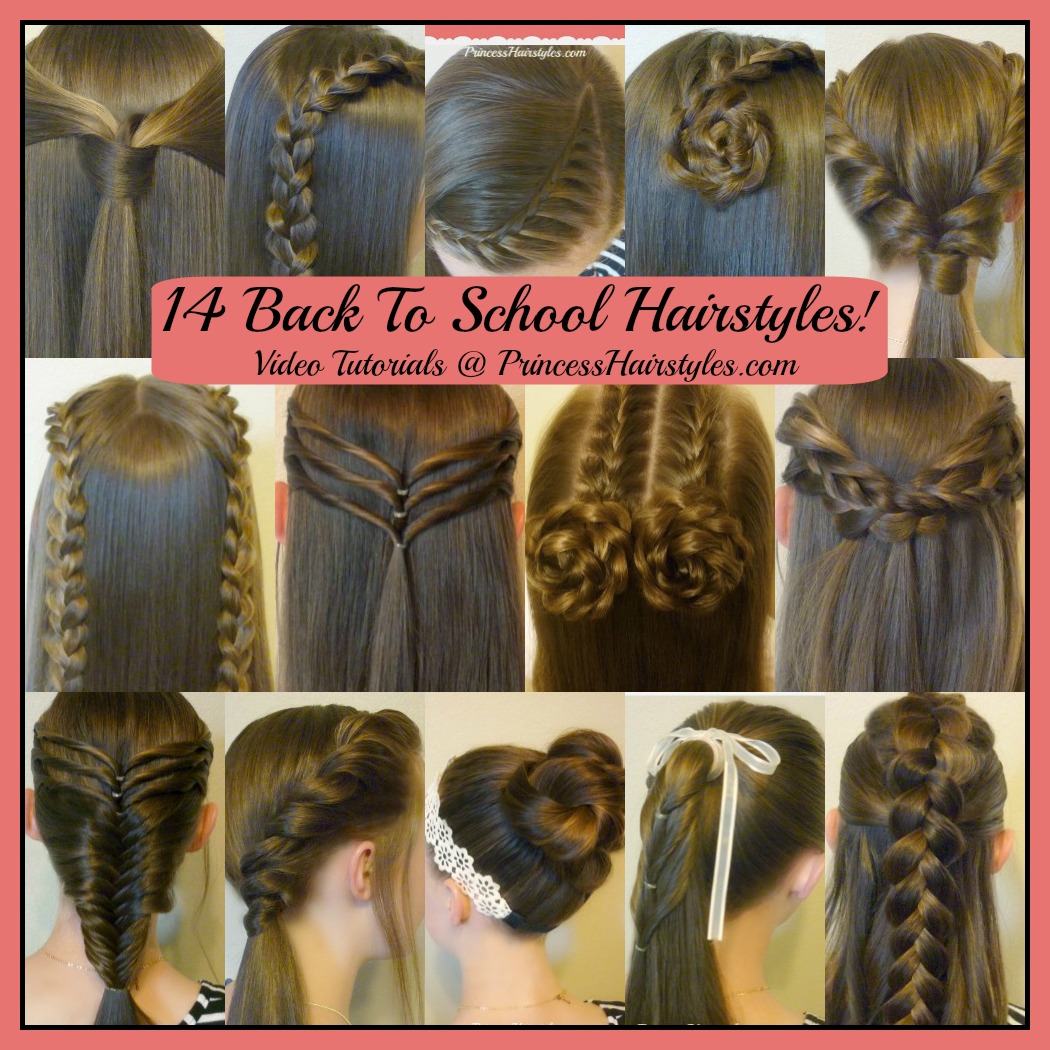
Today we are sharing 14 cute and easy back to school hairstyles. 2 weeks of hairstyle ideas all in one video! Trendy and popular braided hairstyles, twists, messy buns, and half up hairstyle ideas for school. These are all heat-less, 5 minute hairstyles for medium length and long hair.
This hair tutorial video is a compilation of hairstyle ideas for the 2017 - 2018 school year. We had a request to put our simple styles from our "back to school series" all in one place (to make it easier to find a specific hairstyle in the morning) and we thought it was a great idea! All of the tutorials in this video show DIY hairstyles and quick styles that my teen daughter wears on a regular basis. A fun collection of every day hair styles for busy school mornings.
14 Back To School Hairstyles, Compilation Video: (Click here to watch the video directly on YouTube.)
Hairstyles featured in the video (above) with timestamps for quick searching:
Part 1:
#1 Windsor tie half up knotted hairstyle. (Inspired by Sam Villa) 0:17
#2 Single lace french braid 0:57
#3 Side lace braid rose 1:42
Part 2:
#1 Side twist ponytail 2:15
#2 Double twist ponytail 3:13
#3 Double lace braid hairstyle 4:01
Part 3:
#1 Double French braid space buns, messy buns, or top knots 5:43
#2 Dutch braid faux hawk half up hairstyle 6:48
#3 Triple twist half up hairstyle 7:43
#4 Triple twist fishtail braid 8:26
Part 4:
#1 Boho braids and twists half up hairstyle 9:52
#2 Lace braid part line hairstyle 11:11
#3 Ponytail cascade 12:35
#4 Triple twist messy bun w/ headband 13:23
We didn't feel like any of these hairstyles needed super detailed step by step instructions, but just a quick overview showing the partings and basic process of creating the styles. We do have several videos on our YouTube channel showing how to french braid, fishtail braid, and dutch braid if you are wanting more detailed tutorials.
These hairstyles would be great for middle school, high school, and college students, although any age could wear them.
3 Easy Back To School Hairstyles, Part 2
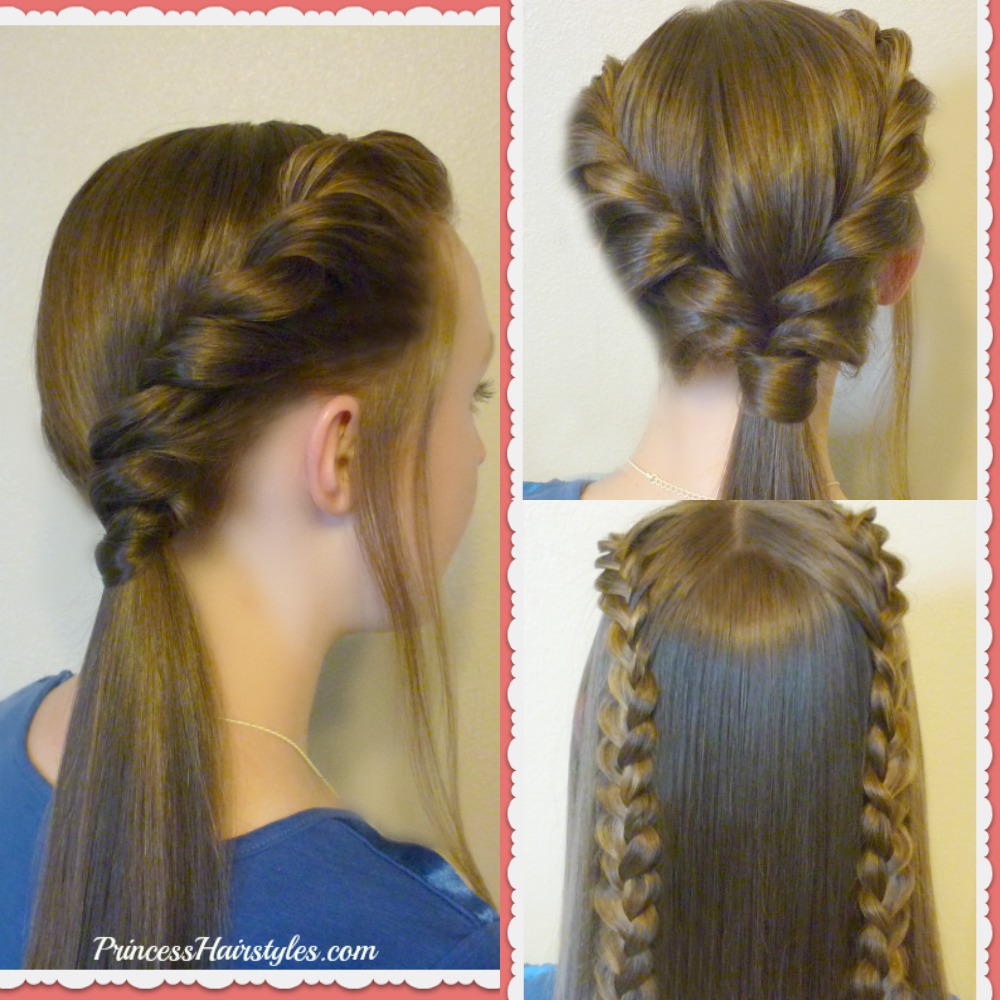
3 more cute and easy back to school hairstyles! Trendy and popular braids, twists, and ponytail hairstyle ideas for school. These are all heat-less, 5 minute hairstyles!
This hair tutorial video is part 2 of our back to school hair ideas series for the 2017 - 2018 school year. To watch part 1, click here. We will be posting several more videos featuring lots of easy and simple hairstyles in the upcoming weeks! All of these videos will be showing DIY hairstyles and quick styles that my teen daughter wears on a regular basis to school. Nothing super creative or extravagant, but a fun collection of hairstyle ideas and every day styles for busy school mornings.
3 Easy Hairstyles For School Part 2, Video Tutorial: (Click here to watch the video directly on YouTube.)
Hairstyles featured in today's video:
#1 Simple side twist ponytail
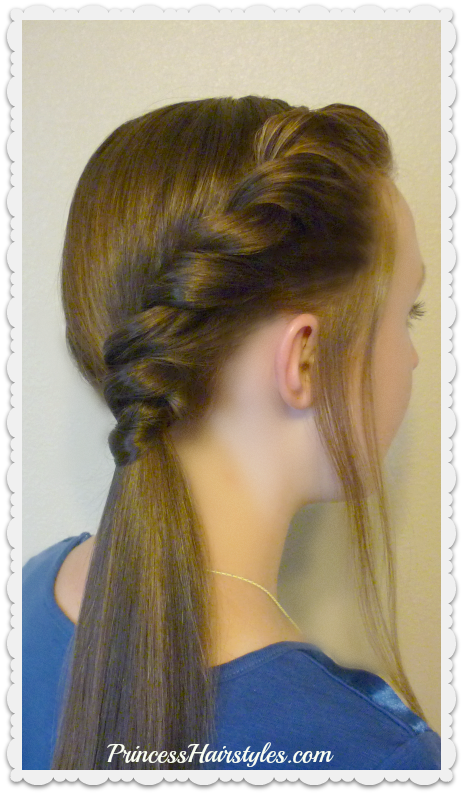
#2 Double twist ponytail

#3 Double lace braids hairstyle

We didn't feel like any of these hairstyles really needed detailed step by step tutorials, but just a quick overview showing the partings and basic process of creating the styles. We do have several videos on our blog showing how to french braid and twist braid if you are wanting more detailed instructions for those braids.
These hairstyles would be great for middle school, high school, and college students, although any age could wear them.
Hope you guys like these back to school hairstyles. See you next week!
Easy Fishtail Braid Hack! Snap Braid Half Up Hair Tutorial

Have you struggled with learning how to french fishtail braid? Or dislike how long these intricate braids can take to create? Then you will love this braiding hack!
For today's hair tutorial we are showing a braiding tool called the "snap braid." We found ours a few years ago on Amazon (affiliate.) This tool is great for creating half up fishtail hairstyles (as shown) or full length fishtail braids.
Snap Braid Half Up Fishtail Braid Hairstyle Video Tutorial: (Click here to watch the video directly on YouTube.)
Fishtail braids have gained popularity over the years and are "on trend" with braided hairstyles in general. Of course, this braid can be made to look tight and neat, or a little more loose and messy. If you have wavy or curly hair, I think this style would look so beautiful and more textured / voluminous. We are loving the carefree boho look of this braid.

Supplies needed to recreate this look:
- A "snap braid" braiding tool (affiliate.)
- If you are making a full length braid, you will need a hair tie or elastic to tie the braid off at the end.
- Finishing hair spray, gel, etc.
3 Quick and Easy Hairstyles For School Using Headbands
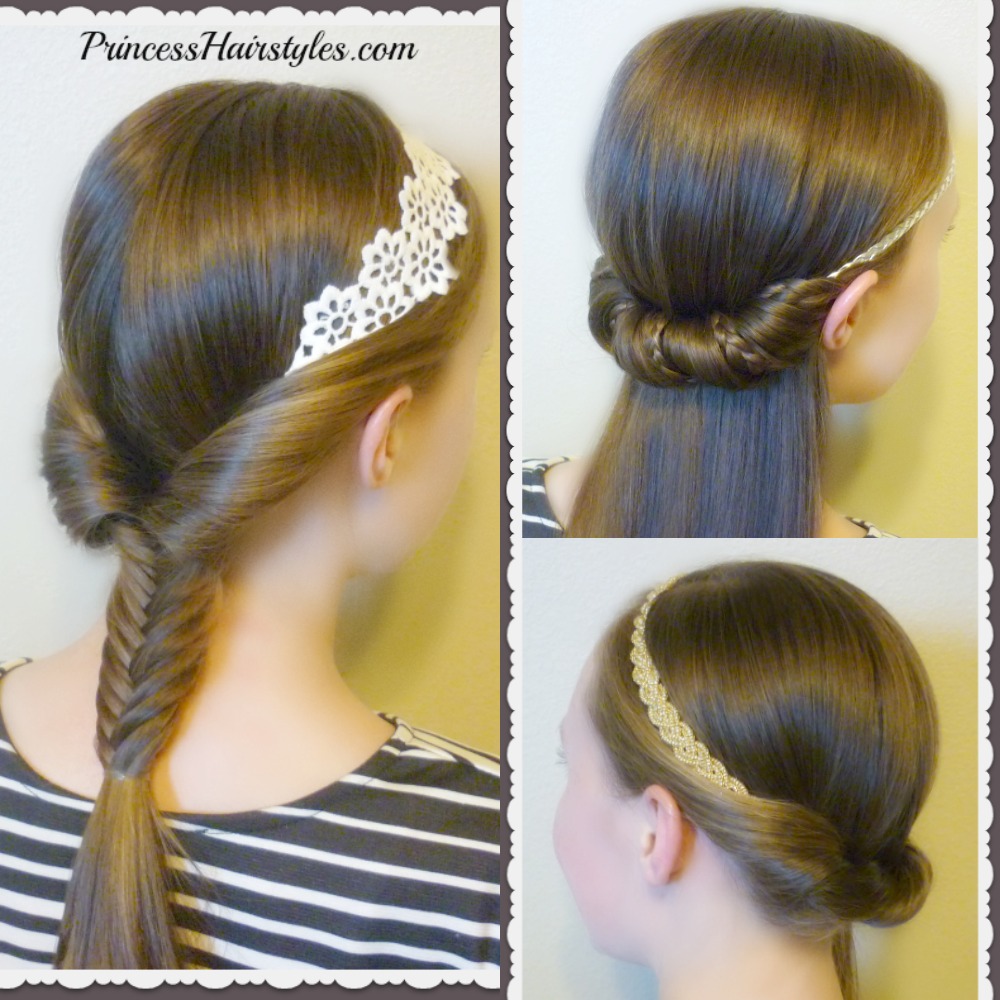
Some cute and simple no-heat headband hairstyles for every day!
Hey guys! We are always looking for easy and quick hairstyles for school mornings. I'm guessing you are too? These 5 minute hairstyles are all super easy and still fashionable even though they take very little effort! The headbands used to create each look add a stylish touch and of course can be matched to your outfit of the day.
Easy Headband Hairstyles Video Tutorial: (Click here to watch the video directly on YouTube.)
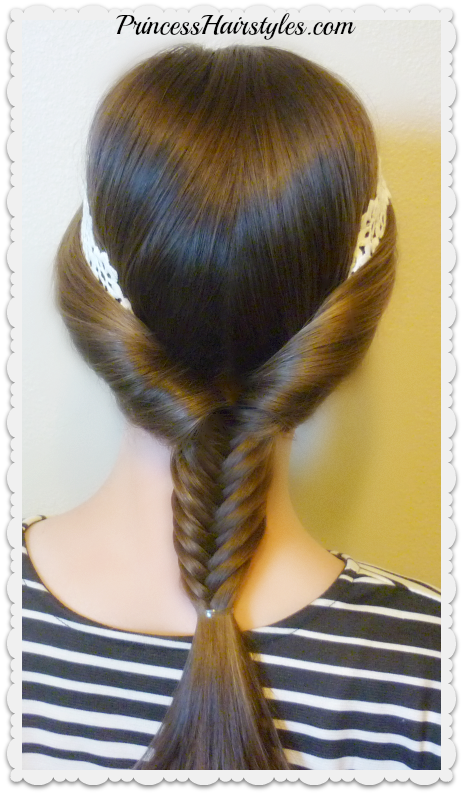
Hair tutorial #1 in this video features an elegant twist on each side, finishing in a low fishtail braid.

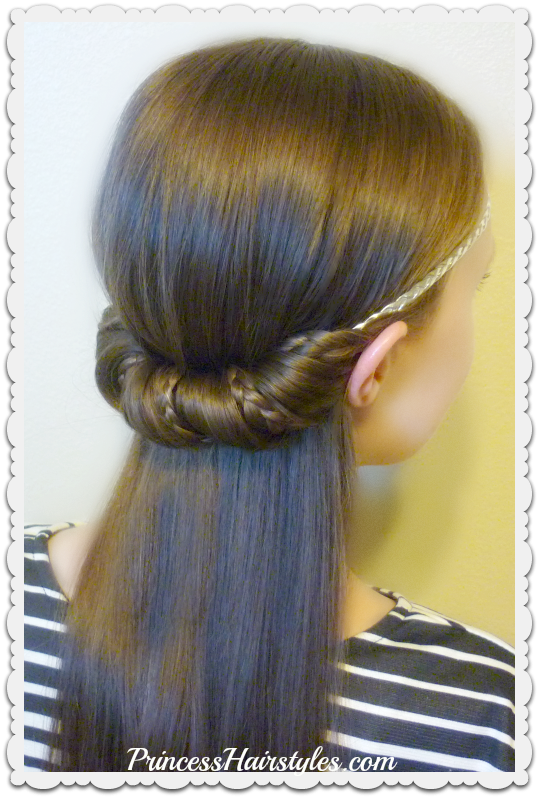
Hairstyle #2 is a trendy half up hairstyle with hidden micro braids wrapping around the braided headband placed at the top of her forehead.

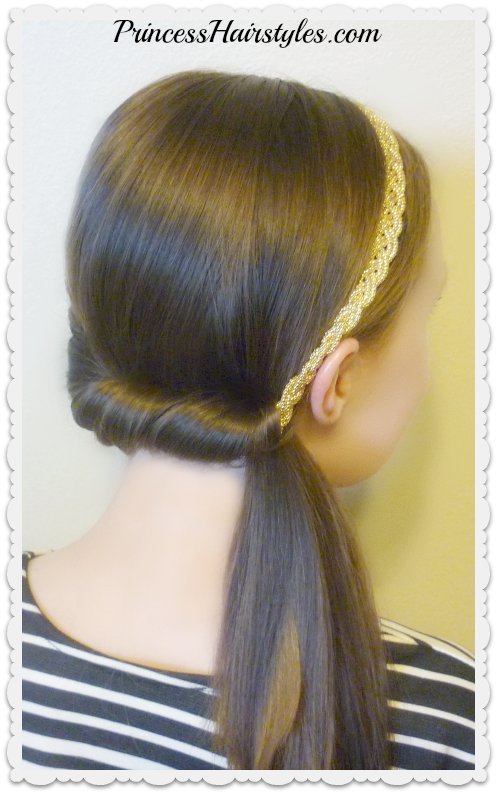
Hairstyle #3 is the easiest of all! A fancy side ponytail with a twist wrapping around the back.

Supplies needed to recreate these hairstyles:
- Clear hair elastics.
- A headband of your choice! A few cute headbands we found online: Double layer braided boho headband, celtic knot headwrap, brown flower headband. (affiliates)
- A topsy tail (affiliate) as shown in hairstyle tutorial #2.
- Finishing hairspray or hair product.
Cute Braided Hairstyle! The Twisted Wheel Hair Tutorial

We hope you'll love this fun and unique half up braided hairstyle with twists!
You may recognize the first few steps in this hairstyle tutorial if you watched our video from a few weeks ago (the braided dream catcher.) Today's tutorial is a variation (or part 2) of our "dream catcher" hairstyle. We have taken rope braids (or twist braids) and created a double twist in the center of our lace braids before braiding them back into the hairstyle to form a twisted knot design.
Twisted Wheel Hairstyle Video Tutorial: (Click here to watch the video directly on YouTube.)

We thought the end result looked a lot like a wheel with braided spokes! This style could also be used around Halloween time as a fun spider web hairstyle. ;)

This half up, half down hairstyle would be a cute hairstyle for school, for recitals, dances, church, communions, special occasions, etc.
Supplies needed to recreate this hairstyle:
- 2 medium size hair elastics
- Several temporary hair ties or clips to hold the twists/braids while you are working.
- Hairspray, gel, etc.
- This hairstyle will work best on long hair or medium length hair.
Easter Hairstyles, Braided Dream Catcher Hair Tutorial

For today's hair tutorial we have utilized lace braids, rope braids (or twist braids,) a feather braid technique, and a basket weave criss cross webbing pattern to create a fun dream catcher design.
This half up hairstyle would be great for many occasions (not just Easter!) You could wear this style to school, church, for weddings, the Prom/Homecoming, recitals, communions, etc. I think this would make an adorable flower girl hairstyle as well.
Braided Dream Catcher Hairstyle, Step By Step Video Tutorial: (Click here to watch the video directly on YouTube.)

You'll notice we made a "pompadour" with her bangs area by gently pulling the hair forward after placing the elastic in the front section of her hair. We wanted some volume in the front, but of course this step is optional.


If you prefer, you could use lace dutch braids instead of french braids around the outside of the dream catcher (and switch out any type of braids you want for the weaving in the center as well.)
Supplies needed to recreate this hairstyle:
- 2 small or medium size hair elastics, (clear or similar to the color or hair you are working with.)
- Temporary hair ties or clips to hold the braids while you are working (we used 8.)
- Hair products: pomade, gel, hair spray, etc.
Subscribe to:
Posts (Atom)


