How To Make A Fishtail Chain Braid Ponytail Hairstyle
Today's hair tutorial is a beautiful and easy braided ponytail hairstyle that we have been seeing all over Instagram recently. We fell in love with it when we first saw it and have had a few requests for a tutorial, so we knew we wanted to do a video on this style!
This ponytail is so pretty and unique looking and the best part is that it is much easier to make than it looks. If you want to cut down on some time, you could use regular 3 strand braids or twist braids instead of fishtail braids (as they are so gorgeous, but a little more time consuming.)
Fishtail Chain Braid Ponytail Video Tutorial: (Click here to watch the video directly on YouTube.)
This ponytail style would be great for casual occasions as well as formal events. For a more polished look, hair could be wrapped around the top of the ponytail before you start braiding.
Supplies needed to recreate this hairstyle:
- 1 medium size hair tie for the top of the ponytail.
- Several medium/small hair elastics. The amount will depend on the length of hair you are working with and how many loops or links you will be making in the chain braid.
- Hair spray, wax, gel, or other product to help with flyaways.
Some amazing Instagram accounts we remember seeing this hairstyle on and were inspired by: _ardo_ardo_, tojashair, goudhaartje.nl, ymbook, ryt_rs, my_babygirlshair, hair_glamour1, mita_p_akbari, braidymom, trencitajohnson
Ribbon Chain Braid Holiday Hairstyles
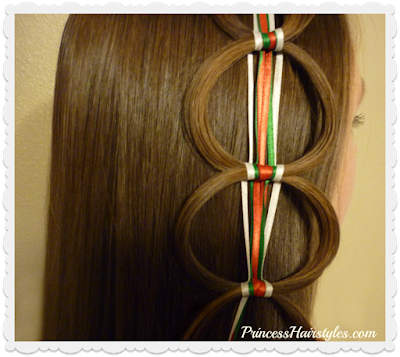
Hey guys! Today we are sharing another fun Christmas hairstyle idea. Although, this technique can really be used for any time of the year. Just change up the color of ribbons for your event, school colors, or holiday!
This ribbon chain braid is relatively easy to make and would be a pretty accent for tons of hairstyles. You could add this braid to an updo, a half up hairstyle, a side braid, ponytail, etc. We have shown this ribbon chain braid with a fishtail braid in our video (below) as an example.
Ribbon Chain Braid Video Tutorial: (Click here to watch the video directly on YouTube.)
Some tips and tricks: Try to keep the ribbons flat as you are wrapping them around. If they twist, it won't look as tidy. Also, tying them all the same way will keep things neater. You can mix different widths, colors and textures of ribbon for different patterns. You can make the hair loops larger or smaller depending on the look you are going for. And... pomade, gel, wax, or hairspray will help with flyaways.
We have shown several chain or loop hairstyles in the past, dating back to 2008! If you like this concept, you can browse through more chain braids and hairstyle ideas using chains here.
Waterfall Chain Braid Tutorial
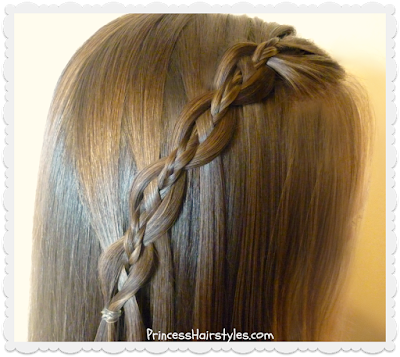
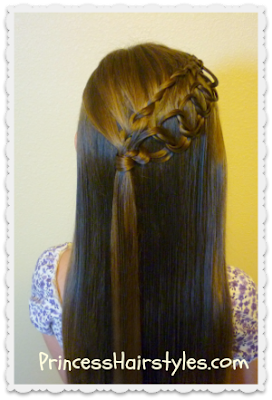
Our hair tutorial this week is showing how to make a chain waterfall braid! We have seen pictures of this beautiful braid floating around the interwebs for awhile now, and have fallen in love with it. We have not seen a video tutorial, so we decided to take on the challenge of figuring out how to create it by studying a photo of the braid. At first glance, this braid looks quite similar to a 4 strand waterfall. But, I think you will find this tutorial is much easier. The steps for making this braid are actually quite simple for such an intricate look, in my opinion.
Waterfall Chain Braid Video Tutorial: (Click here to watch the video directly on YouTube.)
As mentioned in our video tutorial (above) the center strand of this braid can be changed out for ribbon, a micro braid, a regular strand of hair... or anything else you would like to use. We love the look of the hair "chain" with the center strand weaving through the cascading sections in this unique waterfall braid.
We created the hairstyle shown in our tutorial at a diagonal for a loose, carefree look. This braid can also be made straight across horizontally, as shown in our photo variations (above.) As you might have noticed, the horizontal placement seems to show off the pattern of this braid more fully.
This braid would be great for many occasions and could accent hairstyles for casual or formal settings: School, church, weddings, prom, homecoming, the beach, recitals, communions, etc.
Supplies needed to recreate this hairstyle:
- 1 clear elastic to tie off the braid at the end.
- Pomade, hair wax, gel, or other product to help with flyaways.
- Ribbon or other item to use as an alternate center strand (optional.)
Interlocking Floating Bubble Braid Hairstyle
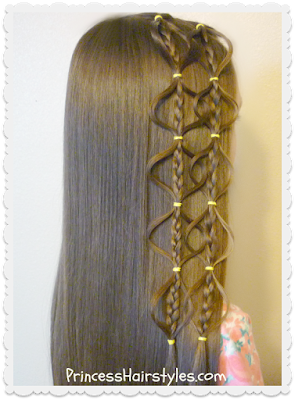
Our hairstyle tutorial this week is partially inspired by a braid we saw on Instagram by @pr3ttygirl79 We took the original "floating bubble braid" and tried interlocking a second braid for a fun and different variation. We love the intricate "swirly" design that was formed when the 2 braids came together. So pretty!
This would be a cute back to school hairstyle for girls or teens. If you prefer wearing your hair up for school, you could try making this braid in a ponytail, or you could pull all of her hair into a low bun, ponytail, or braid (after making the accent braids on top like we did.)
We love that this hairstyle looks unique, but is still super easy and fairly quick to create!
Interlocking Floating Bubble Braid Hairstyle, Video Tutorial: (Click here to watch the video directly on YouTube.)
As mentioned in our video, if you would rather stick with one braid, it looks adorable alone! Here, we have wrapped a "floating bubble braid" around her head forming a crown braid look.
And, an example of the style with a single accent braid. So many different hairstyles could be made using this basic concept, the possibilities are endless!
Supplies needed to recreate this braid:
- Several small hair elastics (the amount will depend on hair length.)
- Pomade, gel (or other product) to help control flyaways.
Formal Half Updo Hairstyle, Cascading Curls and Chains
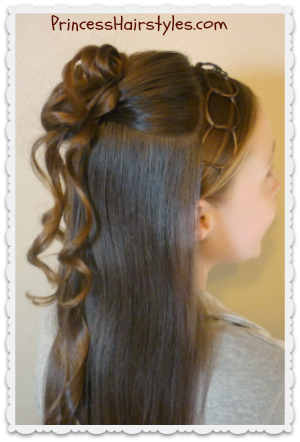
We wanted to create a formal half up half down hairstyle for our tutorial this week. I'm sure many of you will be attending holiday parties, formal dances, recitals, concerts, church, winter weddings, Christmas celebrations, Hanukkah, New Years Eve (among other fancy schmancy events) this season. This fancy hairstyle would be perfect for many of these special occasions and is actually quite easy to recreate. Yay!
One of our all time favorite hairstyling techniques (and one of the very first posts we ever placed on this hair blog) is the "chain braid." It has been quite awhile since we have shown this technique in a hairstyle, so we wanted to add a chain to this elegant style today. The Princess always receives compliments when she is wearing chains (as they are quite unique looking.) I'm sure you will too!
As you can see, we placed a chain on just one side of this hairstyle and left the other side plain. If you prefer, you can add a chain to both sides.
Since the Princess doesn't have any bangs, we used the hair in the very front to create our headband made of hair.... which we refer to as "Barbie bangs." If your daughter has bangs (or fringe) cut, you can make the headband directly behind the bangs and it should work just fine.
And then of course, what would a half updo be without some cascading curls? We love the "princessy" look of this hairstyle and the glamorous volume created with these curls. Beyond the holidays, I could see this working for Prom, Homecoming, or maybe even a bride.
Supplies needed to recreate this style:
- 3 small elastics
- Several bobby pins
- Water, gel, or pomade to help control flyaways
- Curling iron or curling wand
I would plan on about 15 minutes to complete this pretty hairstyle (depending on how much of the hair you choose to curl.) As shown in our video below, we only curled the hair in the half ponytail, which did save some time.
Cascading Curls and Chains Half Up Hairstyle Video Tutorial: (Click here to watch the video directly on YouTube.)
Feather Chain Braid Hairstyles
The first hair style (shown in the photos above and below) does not require french braiding skills. Yay! If you can do a standard 3 strand feather braid and tie a simple knot, you can do this. The Princess commented that these braids tied together draping at the back of her head remind her of a fancy lace wedding veil! I have to agree, and can see this working as a bridal hairstyle, or for a flower girl. This style also has a medieval, renaissance, princessy feel to it.
We both love this hairdo, but I would recommend using it only for "low activity" days. As I'm sure most of you have found, any hairstyle which uses braids laying over the head and connected at the back usually ends up with the hair underneath (and above the braids) trying to escape, tangle, and pop up! We usually save styles like this for church and other special occasions.
This second hairstyle idea (shown below) is quicker to make and will hold up much better, but does require some french braiding skills (or lace braiding to be exact.) As the princess is now a "tween" she loves half up styles, as they seem more grown up to her. I love that the chains add a cute twist to a classic lace braid style. Something unique and a little different is always fun! I'm thinking adding a few curls to the ends of her hair would be really pretty and add a finishing touch to the hairstyles as well.
P.S. Please excuse her damp hair in these pictures. Both of these styles would obviously look better with dry hair, but we didn't have time to wait for her hair to dry before taking these pics, as we were headed out. ;) We started with wet hair in the first place because the chains are much easier to make while the hair is wet. Depending on your hair texture, you could try wet hair, or add some product such as gel or pomade before you begin.
Feather Chain Braid Video Tutorial:
By the way, if you would rather wear your hair up... of course, you could always add a ponytail, braid, or bun to either style!
Honeycomb Headband Hairstyle Tutorial
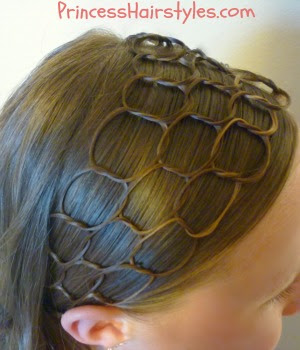
This honeycomb headband hairstyle is a variation of our "chain link headband" which we posted a couple of years ago. The chain headband we made in the past used only one chain instead of several. After finishing this style, we decided the connected circles of the chains looked just like a honeycomb!
This hairstyling technique (which we call chain braiding) can be used to make a variety of interesting and intricate styles. The trick to making the "circles" neatly is to get the hair wet before you begin, or use hair product to prevent flyaways. I prefer water over product because I have found that gel tends to makes her hair sticky and tangled the next day. But, definitely do what works best for you. I know that some hair textures will not stay shaped this way without some type of gel or pomade. It is also helpful to use very small or thin strands of hair to create the knots in the chains.
The way we made our headband hair style in the video tutorial below will require long hair. This style can be adapted for shorter hair though. Instead of tying the chains underneath her head (as shown in our video) you could tie each side with a section of hair behind her ears. Or, you could use these chains to make a completely different hairstyle. The other day we made some chains in the front section of her hair and pulled them back into a half ponytail (which was super cute.)
How to make a "multi chain" hairstyle video tutorial:
Easy Messy Bun, Updo Hairstyles
In my opinion, the longer your hair gets, the harder it is to make a standard messy bun. And, as you may have noticed, The Princess's hair is getting quite long!
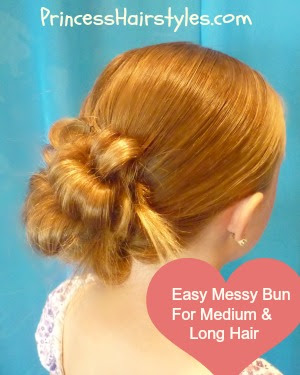
I'm so excited we stumbled upon this method, because this messy bun (shown in our video tutorial below) is super easy and fun to make! We have tried lots of different ways of making messy buns and I think this is our favorite for long hair & medium hair.
I love the "rolled" look of this bun without all of the effort that these types of updos usually require. I'm thinking this bun is casual enough for every day wear, or could even work for a special occasion like a Homecoming or Prom hairstyle. In the photo above, we accessorized the bun with a cute flower clip. I think this would look adorable with a headband or other accessory as well.
Easy Messy Bun Video Tutorial:
As I mentioned in our video, we actually came upon this bun quite by accident. The Princess was wearing a "flip braid" one day before a soccer game and wanted all of her hair up and out of the way for the game. So, instead of taking the flip braid out, we wrapped it all up into a bun and this hairstyle was born!
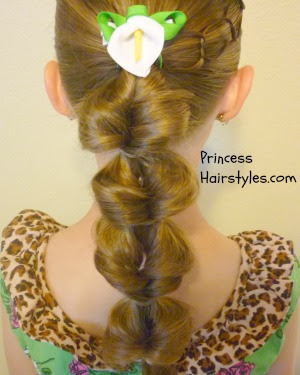
Of course, if you would rather leave the hair down in the ponytail, the flip braid is super cute on it's own. Or, you can stretch it out as shown in our video for a fun "Princess Jasmine like" bubble ponytail! In the picture below, the Princess is wearing a flip braid (stretched out) along with a chain on the side. If you don't know how to make a chain, a video can be found here: Chain Hairstyle
Chain Link Braid Headband Hairstyle
 This unique "chain link french braid" is sort of a spin off of one of our favorite hairstyle techniques: Chains. This braid is somewhat similar to a 2 strand knotted braid but we changed things up a bit with a new fun twist (as you'll see in our video.) In my opinion, the plaiting on this braid is actually easier to complete than a regular french braid, so if you are having trouble french braiding.... this might be one to try.
There are many variations and hairstyles that can be made with this braid. Instead of braiding a headband across her head, you could make a braid on each side of her head to form pigtails, or one braid down the middle, or a braid swept across the back of her head. Lots of possibilities!
 Chain Link Braid Video Tutorial:
 Btw, the technique we used in this video (of leaving out the strands and adding them in later) can also be applied to a regular french braid or dutch braid. At some point I hope to post a video of this because it actually turns out really neat. But as of right now we are completely backed up on videos lol. I have a handful sitting in drafts that I need to get posted, so it may be a little while. ;)
Chain Link Headband Hairstyle

 We haven't done anything with chains for awhile. Although this is one of our very favorite hair techniques! I love this hairstyle because it's easy, quick, and simple but looks so unique. Every time the Princess has chains in her hair, she always gets tons of compliments.
We've had a few requests for a video tutorial on chains as well, so here you are.......
In case you are wondering, the cute brown/floral headband came from Every Little Detail.
For another fun hairstyle idea using these chains, click on this link: Chain link hairstyle - half ponytail
Olympic Hair
Make 4 ponies on the corners of her head, and a low pony in the middle.


Ta-da! Olympic rings.
This actually turned out a little better in person, the lighting in this picture is weird and doesn't show all 5 rings very well. Whatever!
(If you need instructions for the chains, visit "chains" in my labels.)
Chains With A Half Pony


 Make a chain on the other side too, while you leave the first chain hanging.
 Bring both chains back to the half pony and tie them in with another elastic.
 Add a bow. And of course, some curls.
 Now, you may be wondering why I start these chains on the top of her head instead of in the front/side area. I've tried them in the front and it looks cute, but my princess has some baby hairs in this area that are hard to keep under control when they're in chains. If your daughter's hair is thicker, you could probably get away with it.
Chain Gang Hairstyle
Start by making a part from ear to ear. Put this in a temporary elastic. Pull the rest of the hair back into a ponytail. Take the hair out of the temp and divide into as many sections as you want, (I did 7.) Make a chain in each section, and add to the ponytail. For full chain instructions, visit my label for chains. Now, you can make a messy bun, that's it.


 This one is actually much cuter in person. It's hard to see the full detail from the pics. Try it on your own princess and you'll see what I mean.


