
Waterfall Braid
Showing posts with label Waterfall Braid. Show all posts
Showing posts with label Waterfall Braid. Show all posts
Easy Spider Web Hairstyle
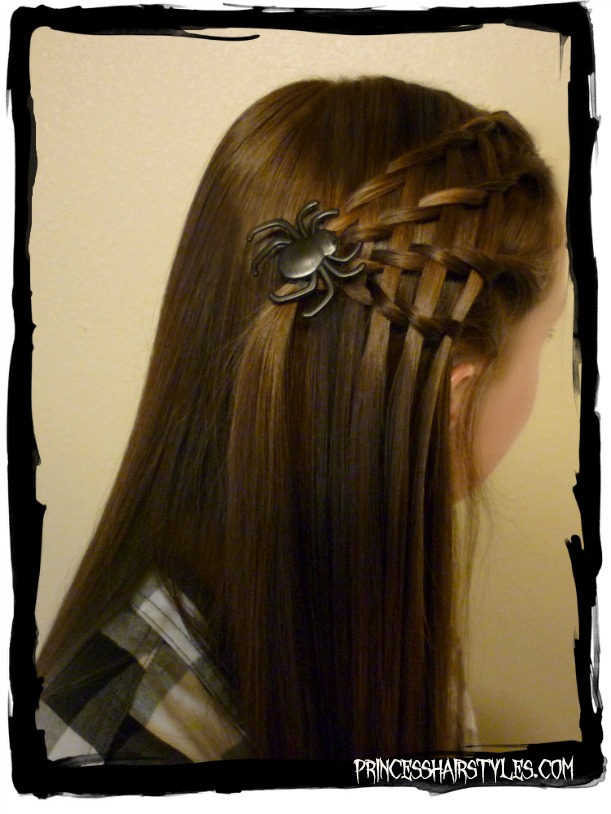
Oh no! A spider has spun a web in her hair! ;)
Hey guys! We love Halloween and look forward to posting Halloween hairstyles each October. This year we wanted a spiderweb hairstyle that would work for teenagers as well as little girls. You could even wear this style to school or work without being too obnoxious. Without the plastic spider, this hairstyle would be cute all year round!
Easy Spider Web Hairstyle, Video Tutorial: (Click here to watch the video directly on YouTube.)
This Halloween hairstyle is created by using a series of waterfall twist braids. We love that it only takes a few minutes to spin these braids into a spider web hairstyle. And the best part... only one elastic to take out when you are done!


Supplies needed to recreate this spider hairstyle:
- 1 medium size hair elastic
- Plastic spider (optional.) We have found that spider rings work great!
- Temporary clip to hold the braids while you are working.
- Hair product to help control flyaways.
Looking for more Halloween hair ideas? Browse through our Halloween Hairstyles featuring several more spider hairstyles, candy corn hairstyles, Disney Princess hairstyles, a unicorn hairstyle, trolls hair, wonder woman hairstyle, etc.
Woven Pie Crust Hair Tutorial, Holiday Hairstyles

This pretty holiday hairstyle doesn't have to be just for Christmas, Thanksgiving, New Years, etc. but we thought it would be fun to name it something festive since we are in the midst of the holiday season (hence the name our boys came up with) the "woven pie crust hairstyle!"
Woven Pie Crust Hairstyle, Video Tutorial: (Click here to watch the video directly on YouTube.)

As mentioned in our hair tutorial, I would recommend adding pomade, gel, or other hair product before starting. You may find it easier to create this hairstyle using wet or damp hair (depending on the texture you are working with.) Also, we mentioned a trick using rubber bands to help hold the style in place (towards the end of the video) for those of you with fine or silky hair.
Supplies needed to recreate this hairstyle:
- Small clip (to help hold the hair while you are working.)
- 2 medium, clear rubber bands or hair elastics.
- Topsy tail (optional)
- Pomade, gel, or other hair product to help prevent flyaways.
Double Woven Waterfall Braid Tutorial, 2 Braided Hairstyles
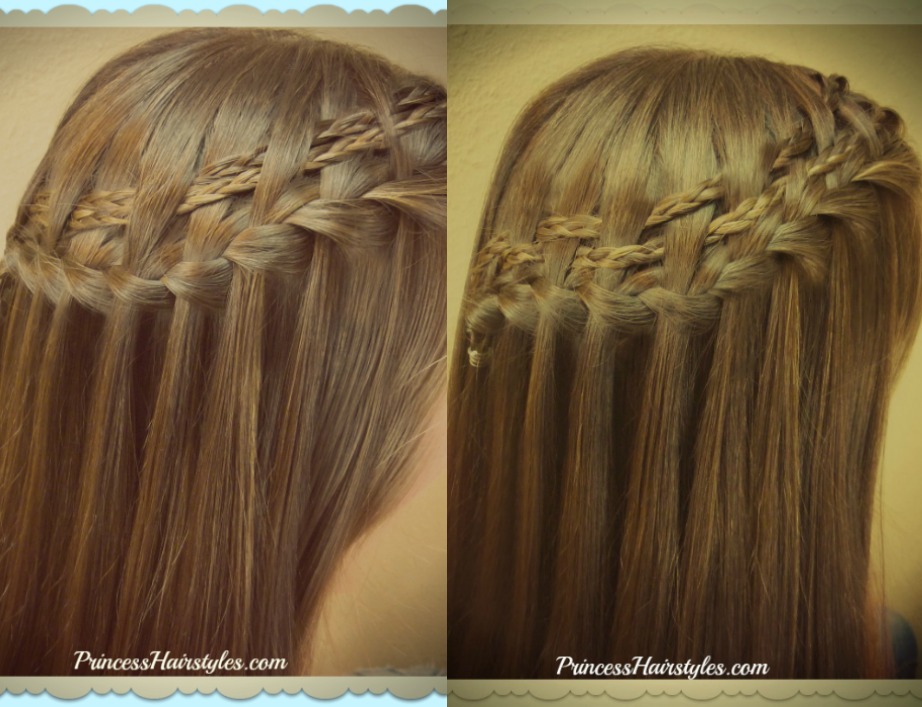
Today's hair tutorial shows how to make a gorgeous waterfall braid variation! Learn to create two unique braided hairstyles by weaving double micro braids through the top of a waterfall braid in 2 different ways.
The classic waterfall braid has always been one of our favorites and is so beautiful and perfect for many occasions. Depending on what you wear, this braid can be dressed up for formal occasions (Prom, weddings, Homecoming) or is casual enough for the beach or school.
These 2 woven variations of the classic waterfall braid add a little something extra to an already gorgeous hairstyle. And although people may wonder how you created such intricate looking patterns, the topsy tail trick shown in our video (below) is so easy and quick!
Double Woven Waterfall Braids, Video Tutorial: (Click here to watch the video directly on YouTube.)
This hairstyle tutorial is similar to a video we posted previously, just taken up a notch or 2! If you love this look but want to start with an easier version first, check out that tutorial here: The micro woven waterfall twist braid.
Which of these is your favorite waterfall braid hairstyle?


Supplies needed to recreate these hairstyles:
- Clear hair elastics
- Pomade, gel, or hair wax to help control flyaways
- Topsy tail tool (affiliate.) If you are needing a topsy tail, they can be found in some beauty supply stores as well as online.
Micro Woven Waterfall Twist Braid Tutorial

One of our all time favorite braids is the classic waterfall twist. We love how simple, quick and gorgeous it is. Waterfall braids in general are so beautiful with the cascading strands flowing through the braid! We have an older video (dating back to 2011) showing how to make the original waterfall twist braid if you want to check that out.
This week we decided to try a new idea by weaving a micro braid along the top of the twists of our waterfall. We love the unique checkerboard pattern which was created!
Micro Woven Waterfall Twist Braid Video Tutorial: (Click here to watch the video directly on YouTube.)


This braid could be worn for both casual and formal occasions: Weddings, Prom, Homecoming, school, work, recitals, communions, Easter Sunday, etc.
Supplies needed to recreate this braid:
- 2 small, clear elastics
- As mentioned in our video, a topsy tail is not required to create this braid, but it does make it easier. (Affiliate.)
- Decorative hair clip (optional.)
Streaming Heart Hairstyle For Valentine's

Hey guys, this week our hair tutorial is on this beautiful "streaming heart" hairstyle. We have combined a feather braid (you could use a waterfall braid if you prefer) and a braided heart to create this lovely half up design.
This style would be great for Valentine's day, school, a formal dance (Prom / Homecoming) church, weddings, special occasions, anytime during February, flower girls, etc. We created this look with older girls and teens in mind, although it would be adorable for little girls as well. I would not recommend this hairstyle for high activity days or sports as it is quite delicate. ;) If you want to make this style more "activity friendly" you could always add a bun, ponytail, or braid with the remaining hair at the bottom of the heart (instead of leaving her hair mostly down.)
Streaming Heart Hairstyle, Video Tutorial: (Click here to watch the video directly on YouTube.)


Supplies needed to recreate this heart hairstyle:
- 2 medium size hair elastics
- Temporary hair ties or clips
- Pomade, gel, or hair wax
- Finishing hairspray
Waterfall Chain Braid Tutorial

Our hair tutorial this week is showing how to make a chain waterfall braid! We have seen pictures of this beautiful braid floating around the interwebs for awhile now, and have fallen in love with it. We have not seen a video tutorial, so we decided to take on the challenge of figuring out how to create it by studying a photo of the braid. At first glance, this braid looks quite similar to a 4 strand waterfall. But, I think you will find this tutorial is much easier. The steps for making this braid are actually quite simple for such an intricate look, in my opinion.
Waterfall Chain Braid Video Tutorial: (Click here to watch the video directly on YouTube.)
As mentioned in our video tutorial (above) the center strand of this braid can be changed out for ribbon, a micro braid, a regular strand of hair... or anything else you would like to use. We love the look of the hair "chain" with the center strand weaving through the cascading sections in this unique waterfall braid.


We created the hairstyle shown in our tutorial at a diagonal for a loose, carefree look. This braid can also be made straight across horizontally, as shown in our photo variations (above.) As you might have noticed, the horizontal placement seems to show off the pattern of this braid more fully.

This braid would be great for many occasions and could accent hairstyles for casual or formal settings: School, church, weddings, prom, homecoming, the beach, recitals, communions, etc.
Supplies needed to recreate this hairstyle:
- 1 clear elastic to tie off the braid at the end.
- Pomade, hair wax, gel, or other product to help with flyaways.
- Ribbon or other item to use as an alternate center strand (optional.)
Cookie Cutter Waterfall Braid Tutorial

For our braiding tutorial this week, we have combined a "cookie cutter braid" and a "waterfall twist braid" to create a beautiful and unique half up hairstyle design which we are in love with! The ever popular and fashionable "waterfall twist braid" is one of my daughter's favorite braids and she wears it often in a variety of hairstyles for school. Adding the whimsical cookie cutter design on one side of the head adds such an unexpected and eye catching element to this ordinarily simple style.
Although this hairstyle looks fairly intricate, as shown in our video tutorial (below) it is not difficult to create. This would be a cute hairstyle for school, church, special occasions, dances, recitals, proms, homecomings, weddings, etc.
Cookie Cutter Waterfall Braid Video Tutorial: (Click here to watch the video directly on YouTube.)


Of course, if you wanted to add more than one cookie cutter braid inside your waterfall twist, you definitely could. It would be fabulous to place several braids, evenly spaced across the top of her head like a headband! Or you could add 2 braids to the waterfall twist, one on each side of her head.
Supplies needed to recreate this hairstyle:
- 2 small, clear elastics
- 1 temporary hair tie or clip to keep your braid from unraveling while you work.
- Pomade, gel, or hair wax.
If you are wanting to wear this design for a more active event, I would suggest placing your remaining hair into a ponytail, bun, or other braid... instead of leaving it mostly down.
7 Quick & Easy Hairstyles For School
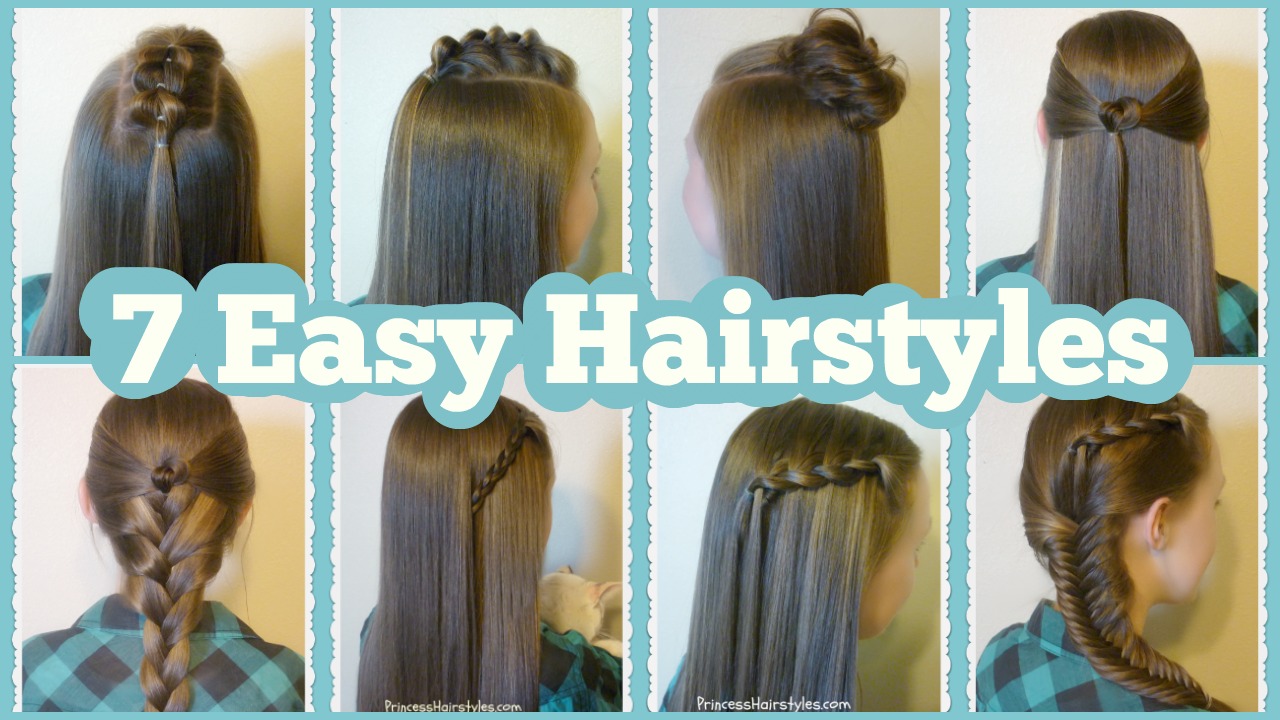
This week we are showing 7 quick, easy, and heatless hairstyle tutorials!
Since my daughter is now a teen in middle school aka junior high, she does her own hair before school every morning. She is always looking for cute, easy, (and most importantly) QUICK hairstyles that she can do herself (DIY.) For this video we have pulled together 7 of her "go to" hairstyles (one for each day of the week) that we think would be fashionable and simple for teens, tweens, or any age. These styles aren't anything super unique or intricate, but we are hoping this video will help add to your collection of every day hairstyle ideas.
7 Easy Hairstyles For School, Video Tutorial: (Click here to watch the video directly on YouTube.)
Hair tutorials included in this video:
*Pull-through braid on top

*Half up messy bun / top knot

*Knotted tie back

*"French knot" hairstyle

*Side braid accent
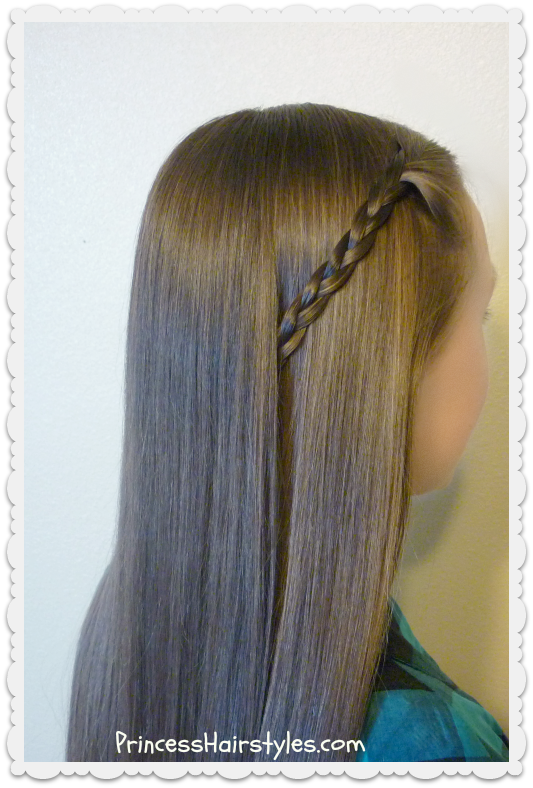
Faux waterfall braid / lace braid

*Faux lace braid & fishtail braid combo

Most of these styles will work with most hair types: Long hair, medium hair, short hair. Curly, wavy, or straight.
If you would like to see more 5 minute hairstyles like this, be sure to let us know. We can do a part 2!
Waterfall Braid Maker Tutorial & Review

This week we are trying out the "waterfall braid maker" by Conair. We noticed this product a few months ago while browsing the "hair aisle" at Walmart and were immediately intrigued. I know there are many people who struggle with making the waterfall braid, and I was curious to see how helpful this would be. After quickly looking over the instructions on the back of the package at the store, I was thinking it looked pretty overwhelming and overly complicated... but decided to give it a try. After some trial and error (and almost and hour later) I did finally figure out how to use this tool! And as you can see, it does make a pretty braid.

I decided to do a step by step tutorial showing how to use this product, along with a review (for those of you who are visual learners like me.) Maybe between our video tutorial and the written instructions on the package, you will have an easier time figuring this out than I did! ;) Enjoy!!
Waterfall Braid Maker Tutorial and Review: (Click here to watch the video directly on YouTube.)
*Link to our video tutorial showing a regular waterfall braid without using this tool: Waterfall braid hairstyle.
*The "waterfall braid maker" on Amazon. (Affiliate.) This can also be found in stores, including Walmart & Target.
Subscribe to:
Posts (Atom)


