
featured
Showing posts with label featured. Show all posts
Showing posts with label featured. Show all posts
How To Make A Fishtail Chain Braid Ponytail Hairstyle

Today's hair tutorial is a beautiful and easy braided ponytail hairstyle that we have been seeing all over Instagram recently. We fell in love with it when we first saw it and have had a few requests for a tutorial, so we knew we wanted to do a video on this style!
This ponytail is so pretty and unique looking and the best part is that it is much easier to make than it looks. If you want to cut down on some time, you could use regular 3 strand braids or twist braids instead of fishtail braids (as they are so gorgeous, but a little more time consuming.)
Fishtail Chain Braid Ponytail Video Tutorial: (Click here to watch the video directly on YouTube.)
This ponytail style would be great for casual occasions as well as formal events. For a more polished look, hair could be wrapped around the top of the ponytail before you start braiding.

Supplies needed to recreate this hairstyle:
- 1 medium size hair tie for the top of the ponytail.
- Several medium/small hair elastics. The amount will depend on the length of hair you are working with and how many loops or links you will be making in the chain braid.
- Hair spray, wax, gel, or other product to help with flyaways.
Some amazing Instagram accounts we remember seeing this hairstyle on and were inspired by: _ardo_ardo_, tojashair, goudhaartje.nl, ymbook, ryt_rs, my_babygirlshair, hair_glamour1, mita_p_akbari, braidymom, trencitajohnson
Side Swept Formal Hairstyle For Prom
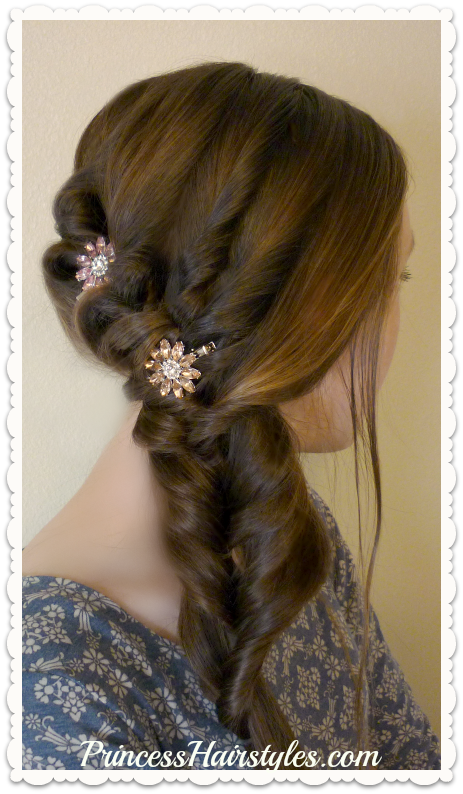
Side Swept Prom Hairstyle Video Tutorial: (Click here to watch the video directly on YouTube.)
My daughter just turned 16 and will be going to her first semi formal High School dance in a few weeks. We have been experimenting with several styles and she is trying to decide which one to wear. So many options! We love this one because it looks pretty from the front and the back. It would be great for pictures! We also love that this style is heatless, quick and easy, but looks like you spent a lot of time and effort on it. Since everything is held together with elastics, I would imagine that this style would hold up to dancing and not fall apart easily as well!
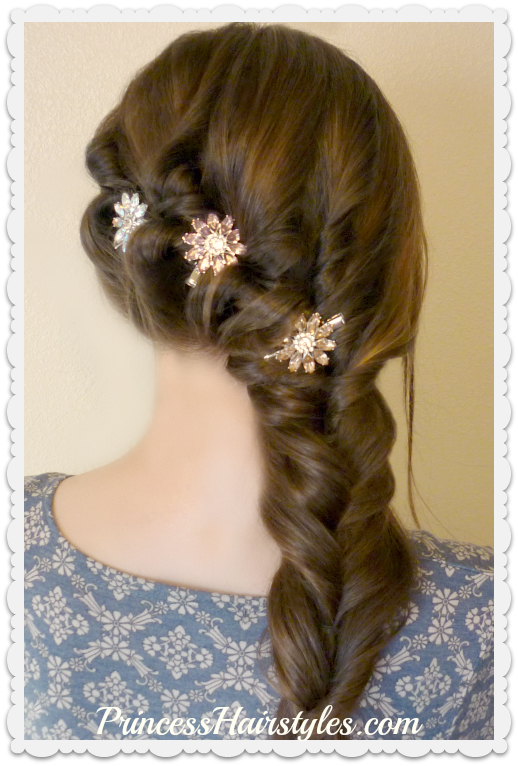
The trick to making this hairstyle soft, pretty, and slightly messy looking (in a good way) is by gently pulling the twists apart for extra volume and fluff (as shown in our video.) Your partings and placements of the elastics don't need to be perfect either. Any imperfections just add to the charm of the style! Leaving a few wispy strands of hair out around her face will also help soften the style.
We purchased the jeweled rhinestone flower hair clips shown at the end of our tutorial at our local Ross. Hair decorations or accessories can really make a formal hairstyle go from ordinary to extraordinary... and can help cover up any "mess ups" in the style as an added bonus. ;)
Supplies needed to recreate this hairstyle:
- Hair elastics (the amount needed will depend on the length and thickness of your hair.) I would suggest finding clear or elastics similar to your hair color.
- Optional hair accessories (clips, pins, jewels, etc.)
- Finishing hair spray.
Triple Tuck Heart Hairstyle For Valentines Day
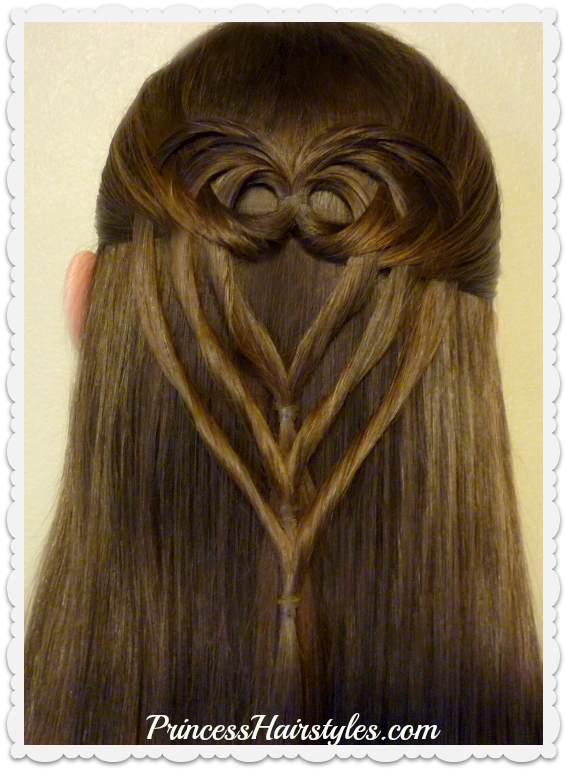
A cute and easy half up heart hairstyle, perfect for Valentines Day! We love that this triple tuck heart is a little more grown up for teens and women to wear, as well as for little girls of course.
This adorable heart style was inspired by a photo we saw on Instagram by "Pr3ttygirl79." This heart design was created using a simple flip and twist technique which we have used many times before in our heart hairstyles. But the way the 3 strands are stacked and tucked into the half ponytail is what makes this style unique! I love the woven look the "tucking" creates. So pretty. The best part? No braiding required!
Triple Tuck Heart Hairstyle Video Tutorial: (Click here to watch the video directly on YouTube.)


Supplies needed to recreate this hairstyle:
- The tool we used to bring the sections through is called a "topsy tail" (affiliate.) As annotated in our video tutorial, you will want to stagger where you are pulling the strands through to keep the sections separate. If you do not have a topsy tail, you could use your fingers.
- 4 small/medium hair elastics.
- Hair product to help with flyaways.
We have been "hair blogging" for 11 years now! And during each January/February of those 11 years, we have posted several heart shaped or heart themed hairstyles.... which adds up to a lot of hearts. I actually counted over 40 heart hairstyles on our site so far! So, if you are looking for more Valentine's hair ideas, click over to our Valentines Day Hairstyles collection to see more. (Some of them are from before we started doing YouTube and are picture tutorials only.)
Obviously this hairstyle would be cute for Valentine's Day, but could also be worn for other events. I'm thinking this would be adorable for a wedding (flower girls, bridesmaids, etc.) This would also be cute for a school dance, Prom, Homecoming, communion or other special occasions.
Bow Tie Braid Ponytail Hair Tutorial

This bow tie braid ponytail is so cute and unique, it's sure to bring you compliments!
You may remember the "bow tie braid hairstyle" we posted last year? This bow tie ponytail is a fun variation of that hairstyle. We are loving this ponytail method as it is easier and quicker than the original (since no french braids or dutch braiding is required.)
Bow Tie Ponytail Video Tutorial: (Click here to watch the video directly on YouTube.)
The day my daughter wore this hairstyle, she had so many people ask her how to do it. It is definitely an eye catcher! We think the bows running down the ponytail are absolutely adorable. This hairstyle is quickly becoming one of our all time favorites!


This style will work best with long or medium length hair. As mentioned in our video, you can adjust the number of bows you make (as well as the number of strands forming the bows) to the length and thickness of your own hair.
We used clear elastics for the center of our hair bows. Colored elastics could also be used for a fun twist. I think jewels or other hair bling would be so pretty placed in the center of the bows or over the elastics as well. And of course, if you want to hide the hair tie at the top of the ponytail, you could wrap it with hair before you start braiding.
The best trick we can offer for creating this style is the use of hair product. We used pomade on each strand before making the bows to keep the flyaways down and to help keep the overall look smooth and sleek.
This hairstyle would be great for school, church, or special occasions. Hope you enjoyed!
Half Up Hairstyle For Long and Medium Hair - Swirling Braids!

For today's hairstyle tutorial, we have combined a simple knotting technique and some braids to create a gorgeous and unique braided half up hairstyle for long and medium length hair.
We're loving the intricate "criss cross" look of these swirling braids! I could see this working as an everyday hairstyle for school, or for special occasions (Prom, Homecoming, recitals, church, weddings, communions, etc.)
Swirling Braids Hairstyle Video Tutorial: (Click here to watch the video directly on YouTube.)
This style is surprisingly easy and fairly quick to make and should hold up decently well, since it is secured with braids on both sides of the delicate knot.
As mentioned in our video tutorial (above) the trick to getting this hairstyle to look nice and to stay in place, is all in how you tie the knot and cross the strands underneath before you start braiding. We also suggest stretching the strands in the knot for a more voluminous and elegant looking style.


Supplies needed to recreate this hairstyle:
- 2 small hair elastics (preferably clear or similar to the hair color you are working with.)
- Temporary clip to hold hair while you are braiding.
- Depending on the texture of hair you are working with, you may want to add hair product before you start braiding to help prevent flyaways.

Quick and Easy Hairstyle For School - Simple Gathered Braids Tutorial

We love easy school hairstyles and hope you'll like this super quick "gathered braids" tutorial. (No french braiding skills required.) Braids are trendy and popular and so cute for elementary, middle, jr high, and high school students right now!
I have realized over the years that we sometimes forget to post some of our favorite and most simple hairstyles! We know many of you are always looking for back to school hair ideas and this is one that my daughter has been wearing for years.
Gathered Braids Video Tutorial: (Click here to watch the video directly on YouTube.)
This is a great DIY hairstyle for beginners. She has been able to do this style on herself since about middle school age. Nothing super creative or extravagant, but a fun every day style for busy school mornings. This style is also versatile in that it can be changed up if you know how to do different braids. You could use rope braids, fishtail braids, 4-strand/5-strand etc. (Instead of regular 3 strand braids). You can also stretch the braids out for a fuller/more voluminous look if you desire. My daughter's favorite way to wear this style is to add some curls in the hair underneath the braids using her curling wand. Since her hair is so fine, the curls help to make her hair look thicker when she wears her hair half up like this.


Supplies needed to recreate this hairstyle:
- 5 small/medium hair elastics. (Preferably clear or similar to your hair color.)
- Hairspray, gel, hair wax, or other product to help prevent flyaways.
Hope you enjoyed this princess hairstyle! See you all next week.
Prom & Wedding Hairstyle! Romantic Updo With Twists & Braids
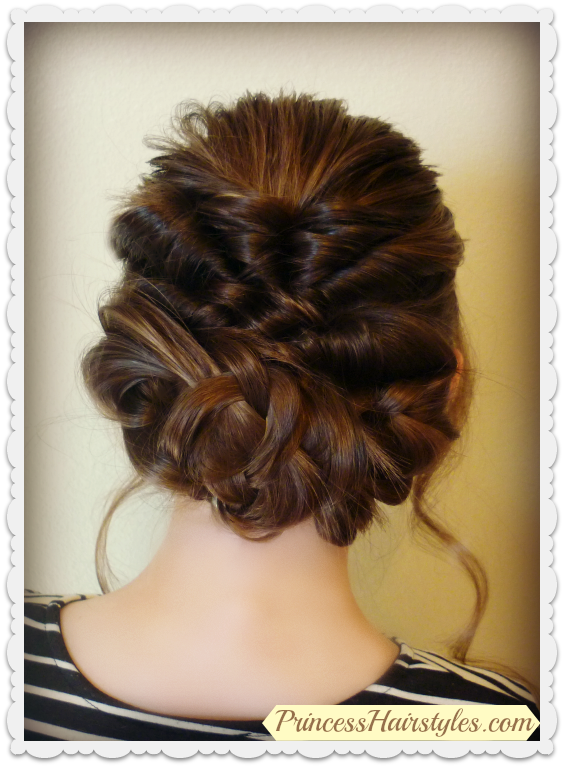
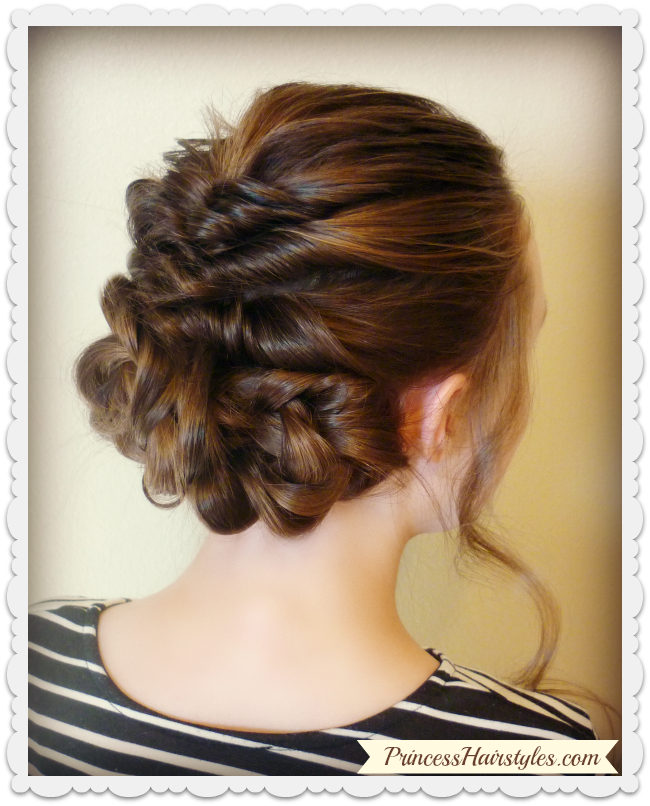
In today's hair tutorial we show an easy, elegant, and pretty updo for special occasions. This romantic hairstyle with twists and braids is glamorous, sophisticated, and fancy. Similar to something you might see on the red carpet, but can be created quite easily in your own home! This gorgeous style would be great for many occasions such as Prom, Homecoming, Weddings (bridal, bridesmaids, and flower girls) recitals, communions, holidays, date night, Instagram photos, etc.
Romantic Updo With Twists and Braids Video Tutorial: (Click here to watch the video directly on YouTube.)
In our step by step video tutorial (above) we use a topsy tail to create the first twisted section. These tools can be found online (affiliate.) This tool is optional, if you do not have a topsy tail, the twists can be made by pulling the hair through with just your fingers. As mentioned in our video, there really is no exact science for creating this hairstyle. After making the basic twists and braids, you can use your own creativity to loosen, pull, and pin up the final look and much of this will depend on the length and texture of the hair you are working with.
This up-style will work best on long hair and medium hair. Curly, wavy, or straight.
Supplies needed to recreate this hairstyle:
- Several small/medium clear hair elastics. (We used 5.)
- Bobby pins. Our favorite brand and best we have found for holding the hair in place is Sally Beauty Supply min pins (affiliate.)
- Topsy Tail (affiliate) (optional.)
- Finishing hairspray.
- Flat iron, curling wand, or curling iron for face framing curls.
Visit our Prom Hairstyles collection for more special occasion hair ideas!
Squiggle Knot Braid, Beautiful Half Up Hairstyle Tutorial

For today's hairstyle tutorial, we have combined a lace feather braid with a new knotting technique to create a gorgeous and unique braided half up hairstyle for long and medium length hair.
We're loving the intricate look of this squiggle braid! I could see this working as a bridal hairstyle or for many other special occasions (Prom, Homecoming, recitals, communions, etc.) The knotted lace or woven lattice pattern reminds me of something you would see on a medieval princess or at a renaissance fair!
Squiggle Knot Braid Video Tutorial: (Click here to watch the video directly on YouTube.)
This style is surprisingly easier than it looks and fairly quick to make (after you get the knot tying technique down) and should hold up decently well since it is secured with braids on both the top and bottom of the delicate knots.


Supplies needed to recreate this hairstyle:
- 2 small, clear, hair elastics,
- Pomade, gel, serum, or other hair product to help control flyaways.
Hope you enjoy!
Homecoming Hairstyles, Flower Pull Through Side Braid
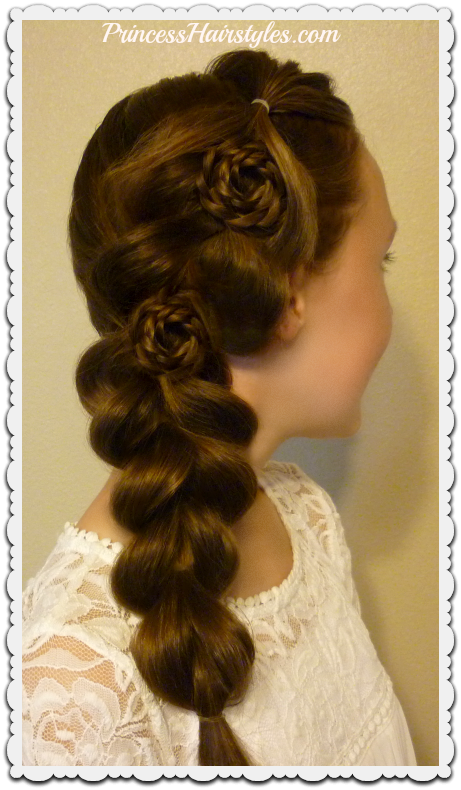
Looking for a hairstyle for Homecoming? You'll love this beautiful side pull-through braid style with braided rose accents! This hairstyle may even be easy enough to do on yourself as a DIY Homecoming or Prom hairstyle! We know many of you will be going to the Homecoming dance in the near future, so we thought it would be fun to do a formal hairstyle tutorial this week. If you are looking for more Homecoming hair ideas, we have shown several fancy updos and half up styles in the past. Feel free to look through our Prom hairstyles for more ideas!
Flower Pull-Through Side Braid Video Tutorial (Click here to watch the video directly on YouTube.)
We have fallen in love with the look of the ever popular pull through braid and especially love it swept loosely to the side with the edges stretched out voluminously. We decided to take this glamorous style to the next level by adding some rolled flower braid accents to the center of the braid. Of course, you can add as many braided roses as you wish. If you wanted even more glam, you could incorporate jewels, other hair jewelry, or accessories to the finished braid, or in the center of your rosettes.
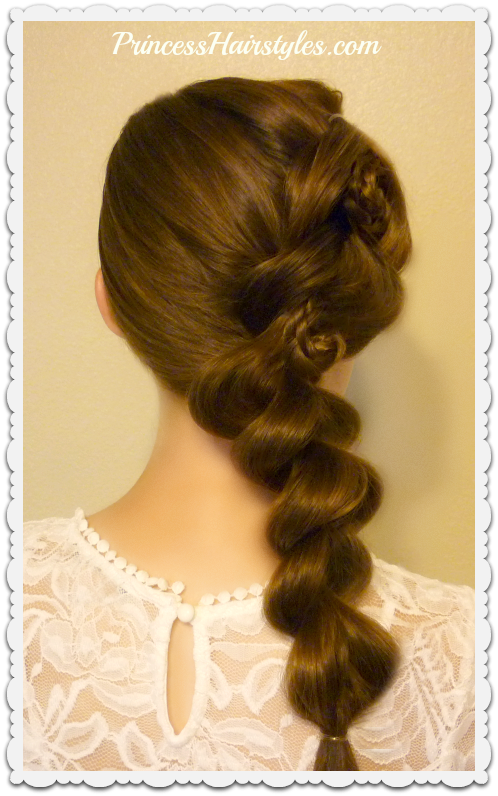
This hairstyle turned out so beautiful and would look stunning with a fancy Homecoming dress, for the Prom, or other formal events such as a wedding (for the bride, bridesmaids, flower girls or guests.) Although this style is quite simple, I think it is really gorgeous and would stay in place through lots of dancing and look great in photos!
Supplies needed to recreate this hairstyle:
- Several small or medium size, clear elastics. (The amount will depend on your hair length and thickness of sections.)
- Bobby pins. We prefer using miniature pins (affiliate) when we are creating the rosettes as they are easier to hide.
- Finishing hair spray.
Subscribe to:
Posts (Atom)


