
Easter
Showing posts with label Easter. Show all posts
Showing posts with label Easter. Show all posts
Side Swept Formal Hairstyle For Prom
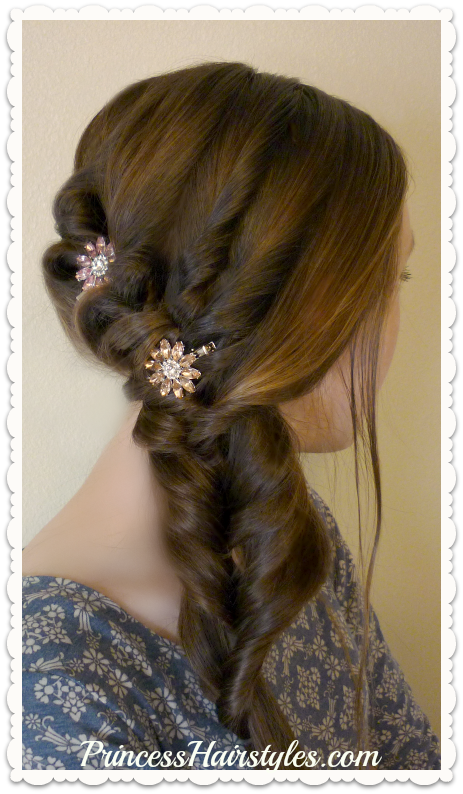
Side Swept Prom Hairstyle Video Tutorial: (Click here to watch the video directly on YouTube.)
My daughter just turned 16 and will be going to her first semi formal High School dance in a few weeks. We have been experimenting with several styles and she is trying to decide which one to wear. So many options! We love this one because it looks pretty from the front and the back. It would be great for pictures! We also love that this style is heatless, quick and easy, but looks like you spent a lot of time and effort on it. Since everything is held together with elastics, I would imagine that this style would hold up to dancing and not fall apart easily as well!
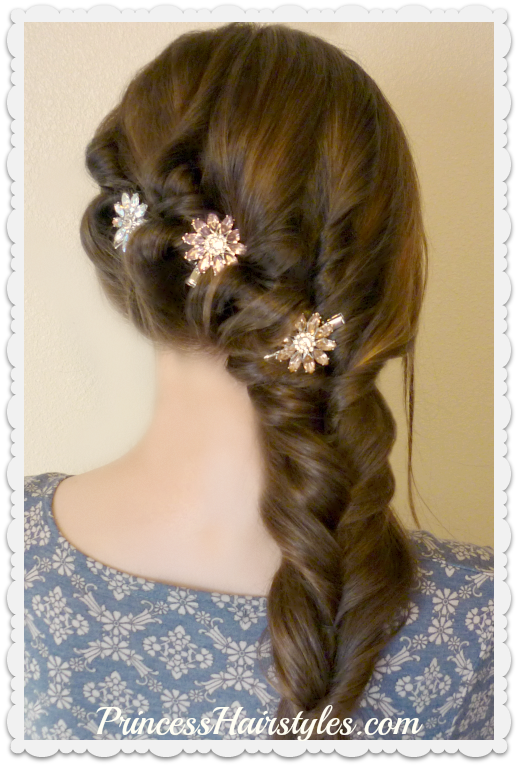
The trick to making this hairstyle soft, pretty, and slightly messy looking (in a good way) is by gently pulling the twists apart for extra volume and fluff (as shown in our video.) Your partings and placements of the elastics don't need to be perfect either. Any imperfections just add to the charm of the style! Leaving a few wispy strands of hair out around her face will also help soften the style.
We purchased the jeweled rhinestone flower hair clips shown at the end of our tutorial at our local Ross. Hair decorations or accessories can really make a formal hairstyle go from ordinary to extraordinary... and can help cover up any "mess ups" in the style as an added bonus. ;)
Supplies needed to recreate this hairstyle:
- Hair elastics (the amount needed will depend on the length and thickness of your hair.) I would suggest finding clear or elastics similar to your hair color.
- Optional hair accessories (clips, pins, jewels, etc.)
- Finishing hair spray.
8th Grade Dance Hairstyle Tutorial and Dress! Princess Hairstyles
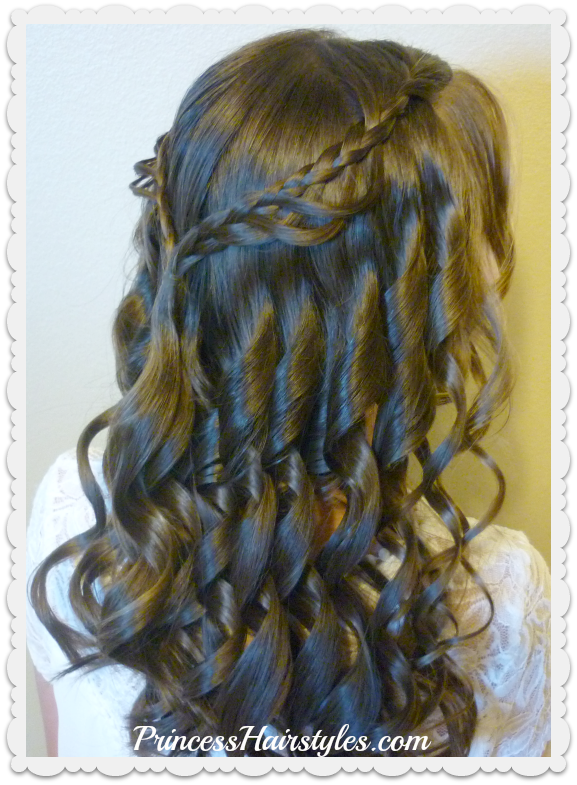
Today we are showing a hair tutorial and fashion video in one, featuring the pretty braided hairstyle and dress she wore to her eighth grade dance!
Recently my daughter went to the traditional end of middle school dance. This dance is typically a semi formal occasion in our area which some teens have nicknamed the "8th grade Prom" or "eighth grade graduation." This dance is the last celebration before entering High School as a Freshman!
She wanted a half up half down hairstyle with braids, so this is what we came up with. We have combined french braids, lace braids, feather braids, and a loop braid technique to create a delicate braided crown design. This hairstyle is fairly simple and classic, yet eye catching and elegant. Truly a "Princess Hairstyle" that could be worn for many special occasions: Communions, Homecoming, Prom, church, recitals, graduation, weddings (both for brides or flower girls hairstyles) etc.
8th Grade Dance Hair Tutorial And Dress Video: (Click here to watch the video directly on YouTube.)
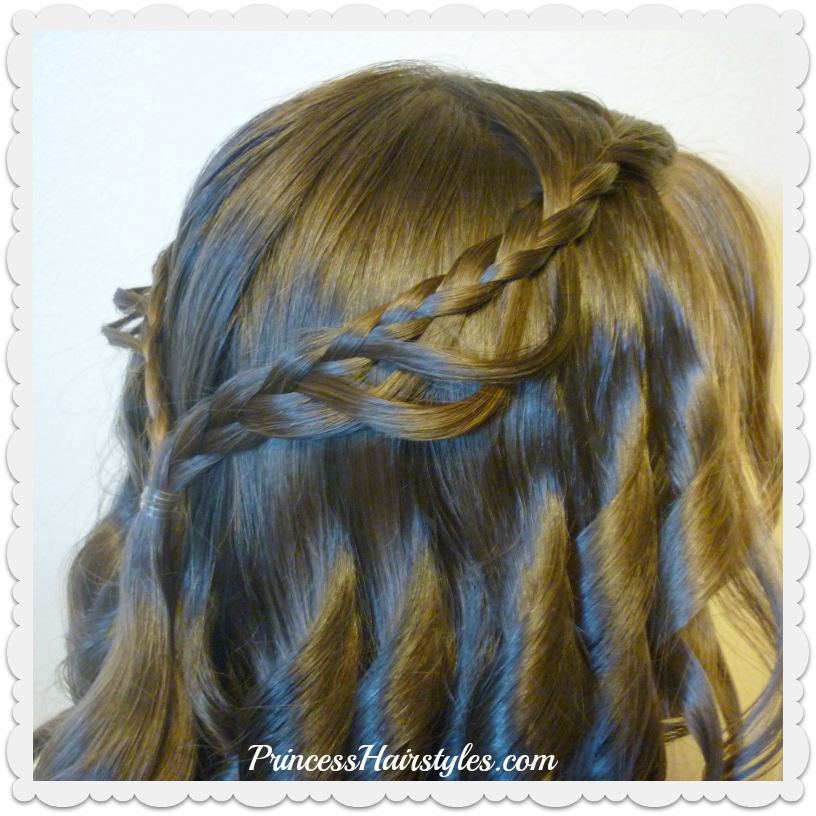
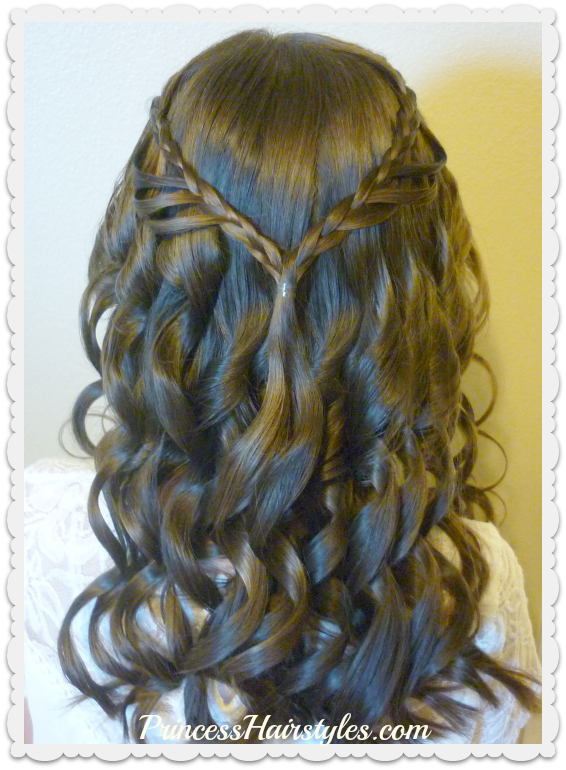
After creating her cute braided tie back hairstyle, we added some curls off camera. Our "Curling Wand Curls Tutorial" from a few years ago can be found here.
Supplies needed to recreate this hairstyle:
- Clip or hair tie to temporarily hold one side of the braid while you are braiding the other side.
- Hairspray, pomade, wax, or gel to help prevent flyaways.
- 1 medium size clear elastic.
- Curling wand, curling iron, rollers or other curling device (optional, if you want curls.)
She was hoping to find a dress that was fancy, but not too "over the top" formal. We both fell in love with the adorable and fashionable white chiffon shift dress shown in our video (above) from JCPenney. I could not find a link to the exact dress online, but here are a few very similar dresses on amazon (affiliate.)
Dress 1
Dress 2
Dress 3
Dress 4
Dress 5
The necklace shown with the dress in our video is also from JCPenney. Her ankle boots are from Old Navy.
Easter Hairstyles, Braided Dream Catcher Hair Tutorial

For today's hair tutorial we have utilized lace braids, rope braids (or twist braids,) a feather braid technique, and a basket weave criss cross webbing pattern to create a fun dream catcher design.
This half up hairstyle would be great for many occasions (not just Easter!) You could wear this style to school, church, for weddings, the Prom/Homecoming, recitals, communions, etc. I think this would make an adorable flower girl hairstyle as well.
Braided Dream Catcher Hairstyle, Step By Step Video Tutorial: (Click here to watch the video directly on YouTube.)

You'll notice we made a "pompadour" with her bangs area by gently pulling the hair forward after placing the elastic in the front section of her hair. We wanted some volume in the front, but of course this step is optional.


If you prefer, you could use lace dutch braids instead of french braids around the outside of the dream catcher (and switch out any type of braids you want for the weaving in the center as well.)
Supplies needed to recreate this hairstyle:
- 2 small or medium size hair elastics, (clear or similar to the color or hair you are working with.)
- Temporary hair ties or clips to hold the braids while you are working (we used 8.)
- Hair products: pomade, gel, hair spray, etc.
Micro Woven Waterfall Twist Braid Tutorial

One of our all time favorite braids is the classic waterfall twist. We love how simple, quick and gorgeous it is. Waterfall braids in general are so beautiful with the cascading strands flowing through the braid! We have an older video (dating back to 2011) showing how to make the original waterfall twist braid if you want to check that out.
This week we decided to try a new idea by weaving a micro braid along the top of the twists of our waterfall. We love the unique checkerboard pattern which was created!
Micro Woven Waterfall Twist Braid Video Tutorial: (Click here to watch the video directly on YouTube.)


This braid could be worn for both casual and formal occasions: Weddings, Prom, Homecoming, school, work, recitals, communions, Easter Sunday, etc.
Supplies needed to recreate this braid:
- 2 small, clear elastics
- As mentioned in our video, a topsy tail is not required to create this braid, but it does make it easier. (Affiliate.)
- Decorative hair clip (optional.)
Prom Hairstyle, Romantic Twist Half Up
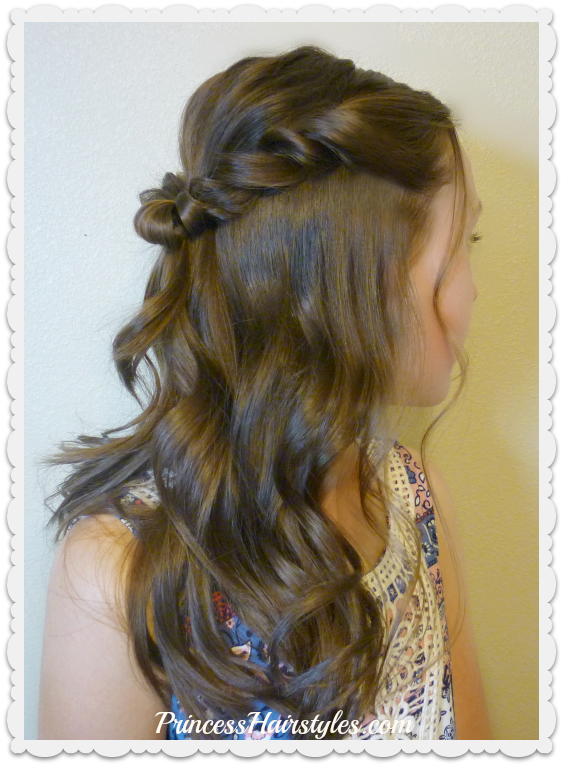
This gorgeous twisted crown hairstyle may be easy enough to do on yourself as a DIY prom hairstyle! No difficult braiding skills are required, just a simple twisting technique (that anyone can do) will create this glamorous princess hairstyle.
Our neighbor asked if I would do her hair for Prom recently and this was the style she requested in the form of a photo. The hairstyle turned out so beautiful on her and looked stunning with her Prom dress, so we thought we would share this Prom hair tutorial in case any of you are looking for a formal hairstyle to wear to your next dance, wedding, or fancy event! Although this style is quite simple, I think it is really gorgeous.
Romantic Twist Half Up Prom Hairstyle Video Tutorial: (Click here to watch the video directly on YouTube.)
You'll notice in our tutorial that we show a little trick to place volume at the crown of her head without having to tease her hair (which can be damaging and a pain to comb out later.) We also show how to cover the elastic in the center of the hairstyle in a way that blends in nicely with the twists and doesn't require any additional bobby pins or elastics.


Supplies needed to recreate this hairstyle:
- 2 medium size, clear hair elastics.
- To create natural looking, soft, loose curls, we used our "reverse curling wand" (affiliate.)
- Before applying heat, you may want to use heat protectant to help minimize the damage to your hair. The one we have been using and is shown in our video is from TRESemme (affiliate.)
- Finishing hairspray.
This hairstyle is similar to the Aurora hairstyle (inspired by Disney's "Maleficent") that we did over on the Disney Style YouTube channel a few years ago. If you love this look, you can check that out to see another technique for creating a twisted half up style.
Romantic Side Swept Braided Rose Hairstyle

"The Princess" was a flower girl in a wedding recently, so we thought it would be fun to show the pretty hairstyle that she wore for the event. This doesn't have to be just a hairstyle for flower girls though.... This glamorous hairstyle would also be great for brides and bridesmaids, prom, homecoming, Valentine's Day, communions, recitals, date night, church, etc.
Romantic side swept braided rose hairstyle, video tutorial: (Click here to watch the video directly on YouTube.)


We wanted some texture in her hair to help create a glamorous side swept look, so we started with some curling wand curls. Click here for a more detailed video showing how to curl your hair using a curling wand. After braiding in a lace French braid headband on top, we wrapped the end of the braid around and underneath her hair to help keep the curls contained and placed to the side of her head. Lastly, we added a braided rosette accent to the side.
Supplies needed to recreate this look:
- 2 small, clear elastics.
- Several bobby pins.
- Curling wand/iron, rollers, naturally curly hair (if you want curls.)
Ribbon Coiled Bun Hairstyle Tutorial

This week we are showing how to make a unique "coiled bun" updo hairstyle. This bun would be great for dance, ballet, figure skating, recitals, communions, weddings, (a cute flower girl hairstyle) for church, holidays, special occasions, etc.
The technique used to make this bun is fairly easy and quick. If you know how to make a rope braid and a slide-up braid (or snake braid) this should be a cinch for you. As mentioned in our video tutorial (below) there really is no exact science to creating this bun and some of it will depend on the length of hair you are working with. These coils can be manipulated somewhat to be stretched longer, or scrunched up shorter... and you can really arrange them however you want to form the updo.

We chose to tie our leftover ribbon into a bow at the side of the bun for a sweet "girlish" touch. The bow can also be placed at the bottom of the bun, or at the top of the bun (depending on how you arrange your coils.) Of course, If you prefer not to add a bow to your updo at all, you can clip your ribbon and tuck in the ends for more of a grown up look.


Ribbon Coiled Bun Video Tutorial: (Click here to watch the video directly on YouTube.)
Supplies needed to recreate this bun:
- 1 hair tie or elastic to make the initial ponytail.
- 4 medium size clear elastics.
- 2 pieces of ribbon. (Our ribbons were each about 4 feet long and 1 inch thick.)
- Several bobby pins.
We featured a similar technique several years ago in our "spring rings hairstyle" in which we used 2 thin strands of hair to make the rope braid and slide up. We used this technique to accent a simple half up style in that tutorial. With the original technique, you end up with one long stand of hair and one coiled strand, which isn't ideal for some hairstyles. We decided to try making the coils using ribbon (instead of hair) this time to eliminate the one long remaining strand of hair and ended up loving how the ribbon looks peeking through, especially when pinned up into a bun. The other perk of using ribbon instead of hair becomes apparent when the coils are taken down the next day, and all of your hair is curled into ringlets (instead of only half of it.) You could actually use this as a no heat curling method if you wanted to!
At the end of our video tutorial we show how to make a super easy 5 minute messy bun with the 2nd day coils. This is just an example of an endless amount of styles that could be made with these fun ringlets.


We first saw the original unique looking coiled braid accented on a style at a Renaissance Faire several years ago and have used it a few times since in a variety of styles. I think this ribbon bun variation is our favorite so far! We have also seen several pictures of hairstyles using the original technique to accent hairstyles on Pinterest and Facebook. Two accounts I have noticed who have used this braid in a variety of hairstyles are "cute and glossy" and "hair braiding" if you are looking for more ideas.
Braided Flower Corsage Hairstyle For Weddings and Prom
We are excited to share this fancy and unique half-up braided princess style with you today. I think this hairstyle would be perfect for a wedding (on a bride, flower girl, bridesmaid, or guest) for prom, homecoming, recitals, communions, and other formal occasions.

We have combined elements of a waterfall twist braid variation and a braided rose or flower to create this elegant and fancy half updo ponytail. I'm thinking this hairstyle has a slightly vintage, medieval or renaissance feel to it.

Although this style looks quite intricate, it is actually not extremely difficult to complete. If you can do a waterfall twist, a standard 3 strand braid, a bun, and a ponytail, you can do this.
My favorite part of this hairstyle is how the individual strands from the waterfall twist surround and showcase the braided flower bun in the center, which reminded us of a flower corsage. So beautiful!

Top view of the braided rosette....

Braided Flower Corsage Hairstyle Video Tutorial: (Click here to watch the video directly on YouTube.)
Supplies needed to recreate this hairstyle:

We have combined elements of a waterfall twist braid variation and a braided rose or flower to create this elegant and fancy half updo ponytail. I'm thinking this hairstyle has a slightly vintage, medieval or renaissance feel to it.

Although this style looks quite intricate, it is actually not extremely difficult to complete. If you can do a waterfall twist, a standard 3 strand braid, a bun, and a ponytail, you can do this.
My favorite part of this hairstyle is how the individual strands from the waterfall twist surround and showcase the braided flower bun in the center, which reminded us of a flower corsage. So beautiful!

Top view of the braided rosette....

Braided Flower Corsage Hairstyle Video Tutorial: (Click here to watch the video directly on YouTube.)
Supplies needed to recreate this hairstyle:
- 3 medium/small clear elastics
- 4-6 temporary hair ties or clips to keep things from unraveling while you work.
- Several bobby pins. We used miniature pins from Sally Beauty Supply.
- Pomade, wax, or gel to help with flyaways.
Butterfly Hairstyle
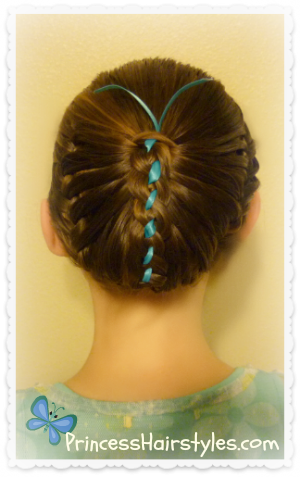
Our video this week is a highly requested tutorial for a cute braided butterfly hairstyle which we first saw on an Instagram account (pr3ttygirl79) a few weeks ago. You can see the original photo here. After reposting this fun spring style on our Instagram and Facebook pages, we had an overwhelming amount of requests for a tutorial. So, we decided to try and recreate it for you. I have to admit that our recreation did not turn out nearly as cute as the original! And I'm not exactly sure we did it the same way "pr3ttygirl79" did. But... an "A" for effort, right? ;) We had fun trying, and "the Princess" absolutely loved wearing this hairstyle. By the way, wouldn't this be a cute hairstyle for Easter?
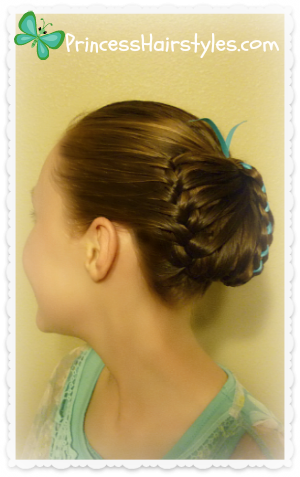
This one is definitely an "attention getter.". You can be certain that wherever you wear this hairstyle, you will receive many compliments and inquiries about it. I love that although it is clearly a butterfly, it's not super "over the top" or obnoxious. Without the antennas, the bun itself is actually quite classic looking and beautifully elegant.
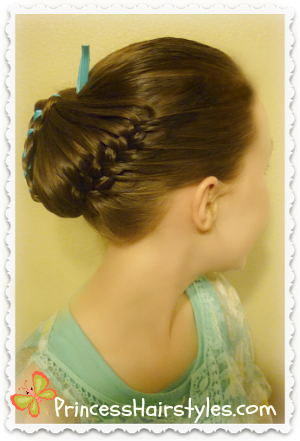
As shown in our video (below) we used part of the ribbon from our 4-strand braid to create the "antennas" for our butterfly. If you would rather use pipe cleaners or wire instead, feel free (and of course, if you don't want antennas in our hair, you don't have to add them at all.) Also, you can really use any type of braid you want for the center of the style. You can substitute the 4-strand for a 3-strand, fishtail, rope braid etc. It's up to you!
Supplies needed to recreate this hairstyle:
- 1 medium size elastic for the ponytail
- Ribbon (ours was approx. 2 feet long)
- 4 small, clear elastics
- Topsy Tail (optional)
- Several bobby pins
- Alligator or claw clips (temporary)
- Gel, pomade, or water for controlling flyaways (optional)
Butterfly Hairstyle Video Tutorial: (Click here to watch the video directly on YouTube.)
Subscribe to:
Posts (Atom)


