Top 12 Hairstyles Countdown! Princess Hairstyles 2016
Our annual tradition! Please enjoy a countdown of our top 12 favorite hairstyles posted on "Princess Hairstyles" this year.
Tutorial links for each of the hairstyles shown:
#12- Elastic Mermaid Braid
#11- Braided Lattice Pull Through Hairstyle
#10- Tear Drop Mermaid Braid
#9- Woven Braid Pull Back
#8- Criss Cross Waterfall Mermaid Braid
#7- Braided Faux Hawk With Cornrows
#6- Multi Strand Pull Through Braid
#5- Half Up 3D Heart Hairstyle
#4- Interlocking Floating Bubble Braid
#3- Melting Braid
#2- Umbrella Lace Hairstyle
#1- Unicorn Hairstyle
Check out our "top hairstyles countdown" videos from past years!
2015
2014
2013
2012
2011
Thanks so much for reading our blog and we'll see you all next year!!
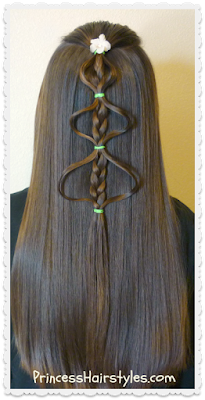
Easy Bubble Braid Christmas Tree Hairstyle Tutorial
Quick and easy bubble braid Christmas tree hairstyle. A last minute holiday hair idea!
Our Christmas tree braid tutorial this week is probably the easiest Christmas hairstyle we have done to date! To create this braided Christmas tree, we have utilized a "floating bubble braid" technique which we first saw on Instagram by "pr3ttygirl79." And combined it with a simple half up Christmas tree braid hairstyle idea which we recently saw on "babesinhairland." As shown in our video tutorial (below) the looped strands from the bubble braid are stretched out along each side of the braid in the center, gradually getting larger as we work our way down, to form an outline of a Christmas tree.
This hairstyle would be adorable for a Christmas party, school, Christmas day, Christmas Eve, meeting Santa, holiday photos, an ugly sweater contest, opening presents... along with many other holiday activities.
Bubble Braid Christmas Tree Hairstyle, Video Tutorial: (Click here to watch the video directly on YouTube.)
Supplies needed to create this easy Christmas tree hairstyle:
We hope you all have a wonderful holiday season, no matter how you celebrate. See you all next week!
Our Christmas tree braid tutorial this week is probably the easiest Christmas hairstyle we have done to date! To create this braided Christmas tree, we have utilized a "floating bubble braid" technique which we first saw on Instagram by "pr3ttygirl79." And combined it with a simple half up Christmas tree braid hairstyle idea which we recently saw on "babesinhairland." As shown in our video tutorial (below) the looped strands from the bubble braid are stretched out along each side of the braid in the center, gradually getting larger as we work our way down, to form an outline of a Christmas tree.
This hairstyle would be adorable for a Christmas party, school, Christmas day, Christmas Eve, meeting Santa, holiday photos, an ugly sweater contest, opening presents... along with many other holiday activities.
Bubble Braid Christmas Tree Hairstyle, Video Tutorial: (Click here to watch the video directly on YouTube.)
Supplies needed to create this easy Christmas tree hairstyle:
- 4 medium (or small) hair elastics. As you can see, we used green, you could also use red, white, brown, clear, etc.
- Pomade, gel, hair wax, or other product to help with flyaways and to keep your loops together and smooth.
- An accessory for the top of your tree (optional.) A star, angel, snowflake, or other sparkly or festive clip would be cute.
We hope you all have a wonderful holiday season, no matter how you celebrate. See you all next week!
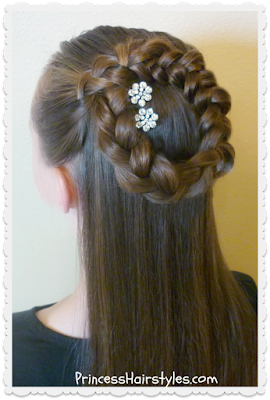
Side Braided Wreath Or Halo Braid Hairstyle
A cute braided hairstyle for Christmas (or anytime.) No bobby pins required!
Hey guys! This week we are showing a fun variation of the standard halo braid (or wreath braid) which is always a popular style this time of year. We have utilized an "off centered" dutch lace braid to create this halo on the side of her head, instead of in the center (which is more typical of this style.) We chose to leave most of her hair down for an elegant half up look. If you want to make this an updo, you could incorporate all of her hair into this side halo braid as well.
This would be a fabulous hairstyle for many formal or special occasions: Holiday parties, church, Christmas Eve, school dances, recitals, etc.
Side Braided Wreath or Halo Braid, Video Tutorial: (Click here to watch the video directly on Youtube.)
Supplies needed to recreate this hairstyle:
- 1 medium size clear elastic
- Hair product to help control flyaways
- We love that we were able to finish this style with no bobby pins! If you have fairly long hair, the braid should hold just fine on its own by using the topsy tail technique shown in our video. If your hair is shorter, you will most likely need a few pins to hold the end in place.
- Topsy Tail. These can be found in some stores where beauty supplies are sold, and online here (affiliate.)
- Decorative hair clips or pins (optional.) We purchased ours at Sally Beauty Supply. We found something similar online here (affiliate.)
Elastic Design Half Up Hairstyle
A decorated variation of the classic "half up" hairstyle, perfect for school and other occasions!
This elastic design half-up hairstyle is partially inspired by a cute updo hairstyle we saw on Instagram recently by "studiohilde." Lately my daughter has been wearing her hair mostly down with just her "bangs" pulled back for school, and we thought this would be a fabulous way to spice up her ordinary half up without putting in too much time or effort.
This style is easy enough to be a DIY, although your arms may tire of tying all of the little elastics, so it may be better if you have someone help you. As mentioned in our video (below) you can really do any elastic pattern you want... this is just an example and the possibilities you could come up with are endless! Of course, you can use a variety of different color combinations, or go for a more subtle look with clear elastics as well.
Elastic Design Half Up Hairstyle, Video Tutorial (Click here to watch the video directly on YouTube.)
This style is fairly versatile and can work will most hair types and lengths. If your hair is shoulder length to medium length, you could make a smaller/shorter pattern (example below.)
Supplies needed to recreate this hairstyle:
- Lots of small hair elastics. (We used Goody ouchless brand.)
- Product such as pomade or gel to help prevent flyaways.
As demonstrated below, you can stretch the design out as much or as little as you want for a slightly different look.
The Best Hair Wrapped Ponytail Tutorial
A "fool proof" and unique method to achieve the perfect hair wrapped ponytail. (No Bobby Pins required!)
Hey guys! We all love a cute and classic ponytail. And a popular, trendy, and well known "trick" of wrapping hair around the top of the ponytail makes it a much more polished and finished looking hairstyle. This simple technique can take an otherwise lazy or casual ponytail into being fancy enough to wear to a red carpet event, a prom, or a wedding! But, how many of us struggle with wrapping the hair around the ponytail and then getting it to stay? Maybe it is just us, but we don't love the "bobby pin method" as it never holds all of the ends tucked in, the pins end up sliding out... and it can hurt. We have also tried several methods using elastics and topsy tails, but none of them have worked perfectly for us and it usually ends up being a struggle (which kind of defeats the purpose of a seemingly effortless look.) We actually came across the method shown in our hair tutorial (below) when we filmed our "unicorn hairstyle" a few months ago. But, I'm guessing if you are wanting to do a simple hair wrapped ponytail, you most likely wouldn't think to look for instructions by way of a unicorn hairstyle video lol, so we wanted to make this separate tutorial for you today.
Easy Hair Wrapped Ponytail Video Tutorial: (Click here to watch the video directly on YouTube.)
We added a small french braid with the front/top section of her hair before adding it in to the ponytail. We also share a fun "hair hack" by pushing forward on the braid to create extra volume for more of a faux hawk look. (You will want to make your braid slightly loose for optimal results with this hack.) The french braid is optional and we do have a french braiding tutorial if you don't know how to do that. You could also bring her bangs straight back of you wanted, or you could add a pompadour in the front instead if you prefer.
Supplies needed to recreate this look:
- 1 medium size hair tie (large enough to contain all of your hair.)
- 1 small, clear elastic.
- 1 medium size clear elastic (if you are adding the french braid to the ponytail.)
- Pomade, gel, hair wax, finishing hairspray, etc.
Cookie Cutter Waterfall Braid Tutorial
For our braiding tutorial this week, we have combined a "cookie cutter braid" and a "waterfall twist braid" to create a beautiful and unique half up hairstyle design which we are in love with! The ever popular and fashionable "waterfall twist braid" is one of my daughter's favorite braids and she wears it often in a variety of hairstyles for school. Adding the whimsical cookie cutter design on one side of the head adds such an unexpected and eye catching element to this ordinarily simple style.
Although this hairstyle looks fairly intricate, as shown in our video tutorial (below) it is not difficult to create. This would be a cute hairstyle for school, church, special occasions, dances, recitals, proms, homecomings, weddings, etc.
Cookie Cutter Waterfall Braid Video Tutorial: (Click here to watch the video directly on YouTube.)
Of course, if you wanted to add more than one cookie cutter braid inside your waterfall twist, you definitely could. It would be fabulous to place several braids, evenly spaced across the top of her head like a headband! Or you could add 2 braids to the waterfall twist, one on each side of her head.
Supplies needed to recreate this hairstyle:
- 2 small, clear elastics
- 1 temporary hair tie or clip to keep your braid from unraveling while you work.
- Pomade, gel, or hair wax.
If you are wanting to wear this design for a more active event, I would suggest placing your remaining hair into a ponytail, bun, or other braid... instead of leaving it mostly down.
Elegant Elastic Christmas Tree Hairstyle & Bun
This week we are kicking off the holiday season with a festive Christmas tree hairstyle! And, I think this might be our favorite Christmas hairstyle that we have done to date. We love how easy and simple this pretty updo style is to create, yet it looks so unique, cute, sweet, and elegant. This X-mas hairstyle would be perfect for many occasions this holiday season: Christmas parties, meeting Santa, holiday photos, Christmas dinner, Christmas morning, holiday parades, school, church, recitals, concerts, Christmas shopping, making holiday treats, decorating the Christmas tree, making gingerbread men, a winter dance or wedding, etc.
Christmas Tree Hairstyle & Bun Video Tutorial: (Click here to watch the video directly on YouTube.)
You can create any type of bun that you want at the top of the tree (a donut bun, sock bun, messy bun, braided bun, twisted bun, rolled bun, etc.) We decided on a triple braided bun.
Of course, you can leave your tree "as is" or you can decorate it and make it more glamorous if you want. A star or angel at the top would be beautiful, as well as ribbon, ornaments, glitter, gems, or even lights.
You may remember a similar style we did on my little toddler niece several years ago as a "candy corn hairstyle" with the elastics on the side/top of her head going into a side ponytail. As mentioned in our video tutorial, this elastic tree positioned on the back of her head and bun combination is inspired by a "candy corn" hairstyle that has been trending on Instagram this Fall. The first thing I thought of when I saw this style was, not only is this adorable as a candy corn... but it would also make a fabulous Christmas tree! Many Instagramers have posted this candy corn hairstyle recently and I wanted to share a few awesome accounts that we saw it on: @pr3ttygirl79 @simplystranded @brownhairedbliss @twogirls_hairstyles @jespi09 @toddlerhairideas @prettyhstyle3029 @kares84 I know there are more and don't want to leave anyone out! If you posted this style, feel free to leave your Instagram in the comments and we will check it out. :)
Supplies needed to recreate this hairstyle:
- Several small, green elastics (the amount you will need will depend on the size of tree you make. We used 9 green and 1 yellow for the star at the top.) The brand we used is "goody ouchless."
- 1 ponytail holder, large enough to contain all of your hair.
- 1 medium size, clear elastic to hold the braids before you make the bun.
- Several bobby pins.
- Any optional accessories you want to decorate your tree with. (Decorative pins, gems, star clips, ornaments, ribbon, etc.)
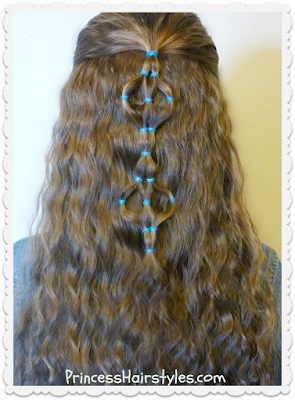
Spindle Top Ponytail Tutorial
A quick and easy hairstyle, perfect for school mornings!
Ponytails are a great DIY "go to" style and we all love how effortless and quick they are to make. But, if you get tired of wearing the same old thing, this quick trick adds some extra uniqueness to the classic style and changes things up a bit.
Besides being fast and simple to create, the other awesome thing about ponytails is that they can be worn for casual or formal occasions. This "spindle top ponytail" would be great for sports (soccer, gymnastics, cheerleading, dance, etc.) to the gym, for school, work, church, or even to a prom or homecoming dance.
Spindle Top Ponytail, Video Tutorial: (Click here to watch the video directly on YouTube.)
This cute hairstyle could also be worn as a half up ponytail if you prefer and should work with most hair types and textures: Long hair, medium length hair, and even fairly short hair.... curly, wavy, or straight. If your hair is on the shorter side, I would recommend using several sections of hair to make the loops instead of one continuous strand.
Pictured below is another option, showing how this ponytail could be worn without stretching the hair out. I think this variation looks pretty cool, sort of like a ponytail holder made out of hair!
Supplies needed to recreate this hairstyle:
- 1 medium size hair tie, preferably stretchy "cloth like" material (rather than elastic.)
- Topsy tail. (As mentioned in our video, if you don't have a topsy tail you can wrap the sections around the hair tie by using just your fingers. But, we have found that the topsy tail does make things easier.) These can be found online here: Topsy Tail link (affiliate) or in some stores where beauty supplies are sold.
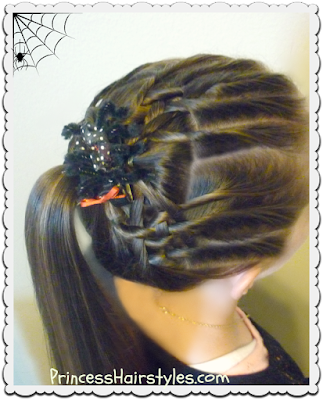
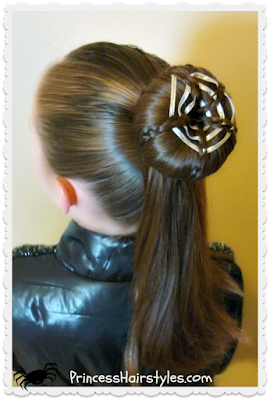
Halloween Hairstyles - Tangled Weave Spider Web Ponytail
Hey guys. This week we are adding one more fun Halloween hairstyle tutorial to our collection before October is gone! We recently went through our archives on our website (Princess Hairstyles) and found this spider web ponytail that we originally posted way back in 2008 as a pictorial. We remembered this woven spider web as being one of my daughter's favorites back then.... and she says she still remembers receiving tons of comments and compliments on this hairstyle when she wore it to a school Halloween carnival 8 years ago while she was in Kindergarten! Of course, we decided we needed to share this spooky hairstyle in an updated video tutorial for you today.
Tangled Weave Spider Web Ponytail Video Tutorial (Click here to watch the video directly on YouTube.)
We are loving the intricate webbing design created around the ponytail with these woven twists. As mentioned in our video, you could add a bun instead of the ponytail if you prefer, and bring the weaving all the way around her head in a full circle, just like a real spider web!
We added a cute spider bow (which was given to us years ago) to our finished design. Of course, this is optional but a spider accessory of some kind would make the perfect finishing touch to this hairstyle.
Supplies needed to recreate this spider web hairstyle:
- Several small, clear elastics.
- 1 medium size hair tie or ponytail holder.
- Several claw clips
- A spider accessory to add to your finished web (optional.)
P.S. Although this hairstyle is fairly easy and requires no braiding skills at all... it can be time consuming. I would give yourself 20-30 minutes to complete.
Spider Web Bun Hairstyle Tutorial
This week we are showing another fun Halloween Hairstyle and this one might be our favorite so far! We are loving this spider web bun / ponytail since it looks festive for Halloween, but isn't too over the top or crazy for teens, or even adults. This spooky Halloween spiderweb hairstyle could be worn to school, for a Halloween party, a Halloween dance, a trip to the pumpkin patch, Oktoberfest, or as part of a costume for trick or treating.
Spider Web Bun, Video Tutorial: Click here to watch the video directly on YouTube.
Supplies needed to recreate this spider web hairstyle:
- We purchased the silver ribbon used to make our webbing at a local craft store. You can use any color or type that you want. We have found that thinner ribbon works best for this style. You could also use yarn or string if you prefer (which may lay flatter and be easier to sew in.)
- The donut bun maker we used can be found in most stores that carry beauty supplies. You can also find them online (affiliate.)
- We purchased the plastic craft needle (shown in our tutorial above) at Walmart. You could also use a regular sewing needle.
- You will need 3 medium size hair elastics or hair ties to make the bun and several clips or temporary hair ties to hold your braids while you are working.
- Of course if you wanted to take this style a step further, you could add a spider accessory to your web! We have seen some plastic spider rings at the dollar store that would be perfect. ;)
Eyeball Bun Hairstyle For Halloween Or Crazy Hair Day!
Hey guys, we are back with another fun HALLOWEEN HAIRSTYLE or CRAZY HAIR DAY idea for you today! Depending on your Halloween costume, this eyeball bun would be perfect to go with a scary / creepy costume.... or with a funny / cute costume. I could see this hairstyle working with many creative and unique DIY costume ideas actually: A monster, zombie, witch, robot, alien, sea creature, swamp creature, etc. Or if you don't want to go "all out" dressing up, or aren't allowed to wear a full costume to school, you could just wear the eyeball bun by itself! We were thinking you could wear this bun and go as a "mom" because moms have eyes in the back of their heads, and those eyes would probably be bloodshot lol.
Eyeball Bun Hairstyle, Video Tutorial: (Click here to watch the video directly on YouTube.)
As shown in our tutorial, we started with a standard donut bun or sock bun, and it really doesn't matter how you make it, you just need a "roundish" bun to start with. We have several videos and different methods on our YouTube channel already showing how to make these buns. You can look at our donut bun playlist to see if there is one that would work for you.
Supplies needed to recreate this Halloween Hairstyle:
- We used the "perfect bun" tool (affiliate) to make our bun, which can be found online or in stores.
- You could also use a donut bun maker (affiliate.)
- 2 medium size hair elastics or hair ties.
- Several bobby pins
- Hairspray or gel
- We purchased our plastic eyeball and pipe cleaners at the dollar store, but I also found some online here: Plastic eyeballs (affiliate) and here: Pipe cleaners (affiliate.)
- Hot glue gun
Of course, if you would rather make 2 eyeballs on the back of your head, you could start with pigtails instead. Or, you could stack 2 buns vertically, like a faux hawk.
Happy trick or treating!
Step Ladder Braid Hairstyle
This week we have combined a woven twist step technique, a french braid, and a ladder braid to create a pretty and unique side braid hairstyle for medium or long hair.
This braided hairstyle could be worn for casual or formal occasions (school, work, church, the beach, prom, homecoming, etc.) I think this is one of our new favorite styles, as it is just so eye catching and intricate from every angle, and actually quite easy to create as well. ;)
Step Ladder Braid Hairstyle Video Tutorial: (Click here to watch the video directly on YouTube.)
Supplies needed to recreate this braid:
- 1 temporary ponytail holder or hair tie.
- 1 clip to help hold the hair while you are working.
- 1 medium size hair elastic or ponytail holder for the end of the braid.
- As shown in our tutorial, we used a topsy tail (affiliate) to create the woven "steps" in this hairstyle (which does make it easier, but is not absolutely necessary.) These tools can be found in various stores where beauty products are sold, or online.
- Pomade, hair spray, wax, gel, etc. as desired.
Unicorn Hairstyle For Halloween Or Crazy Hair Day
Since Halloween is right around the corner, for our hair tutorial this week we are sharing a fun unicorn hairstyle! This DIY unicorn horn could be used as a Halloween hairstyle, or for crazy hair day. Looking for a horn accessory to go with your "My Little Pony" or horse costume? Why not use your own hair?!
DIY Unicorn Hairstyle, Video Tutorial: (Click here to watch the video directly on YouTube.)
As mentioned in our video, you can make your "tail" sleek, or more voluminous. Curls, crimping, and teasing could add some extra texture if you are looking for more volume and lift. If you are wanting a colorful mane, tail, or horn, you could definitely add some temporary spray in hair color to go with your mystical creature look. As another fun option, if you would rather style a "mane" with your unicorn horn, you could make a series of messy buns, a pull-through braid, a french/dutch braid, curls, or faux hawk behind your horn instead of the ponytail.
In our video tutorial (above) we also show a great technique for wrapping hair around the top of your ponytail for a pretty every day look... when you aren't dressing up as a unicorn. Surprisingly enough though, recently we have actually seen a few unicorn hairstyles becoming sort of a "thing" in fashion magazines, tv shows, and around the internet. Maybe this will be the next big trend hahaha.
Supplies needed to recreate this look:
- 1 strong ponytail holder for the main ponytail. 1 medium size clear elastic. 1 temporary clip or hair tie to keep the hair sectioned while you are working.
- Several bobby pins. We used miniature bobby pins from Sally Beauty Supply (affiliate) which hold things tight extremely well.
- Small piece of card stock. (Approximately a 5 inch square.)
- Clear tape.
Braided Faux Hawk With Cornrow Accents Tutorial
Today we are showing how to make a voluminous Dutch braid faux hawk with sleek double cornrows on each side. My daughter actually wore this edgy hairstyle to girls camp this year and loved it! We posted a picture of the style on Instagram and Facebook a few months ago and have had quite a few requests for a tutorial, so here we are. ;)
Faux hawks and braided mohawk type styles have been trendy and popular for awhile now and we think they are super cute and fun. We have seen styles similar to this at dance competitions, in high fashion magazines, runway shows, for sporting events, in movies, on celebrities, (everyone from the Kardashians to Selena Gomez) all over the internet, etc.
Braided Faux Hawk With Braided Cornrow Accents Video Tutorial: (Click here to watch the video directly on YouTube.)
Of course, there are many different ways you could style this braided "faux hawk" for a similar look. We chose to create a large stretched out "inside out" braid in the center, with 2 cornrows on each side. This style would also look cute with a standard or multi strand pull-through braid in the center, which would hold the faux hawk shape with a lot of volume. Or, if you wanted to do a series of messy buns, that would be cute too. Since my daughter was going camping for a few days when she initially wore this this hairstyle, we didn't want her to have to deal with taking out a bunch of elastics (which we would have used to make the pull-through braid or messy buns.) This is why we chose a dutch braid, which only required one elastic at the end!
Supplies needed to recreate this hairstyle:
- Several temporary hair ties or clips to hold the ends of the braids while you are working and to help keep the hair sectioned and out of your way.
- 1 medium size hair elastic or hair tie for the end of the braid.
- Pomade, gel, or other product to help control flyaways,
- Finishing hair spray.
If your hair is fairly thin, fine, or straight, you may want to add some texture to the center section before you start braiding. You could do this by teasing your hair, crimping it with a crimping iron, or by adding product. These methods will help add volume to your braids, but are not absolutely necessary. Just pulling and stretching out the edges of the dutch braid (as shown in our tutorial) will add quite a bit of lift.
Since Halloween is right around the corner... I am seeing this style working with several costume ideas as well. This would be adorable on a biker chick, punk rocker, viking, huntress, etc.
Kaleidoscope Braid Continuation, 2 in 1 Hairstyle Tutorial
Hey guys, this week we are building on a style we posted last month (the kaleidoscope loop pull-through ponytail.) We love the look of the elastics in the first ponytail, but wondered what it would look like with a braid running through the center of the knotted loops. We ended up loving the unique and intricate design of the second braided ponytail. The day my daughter wore this hairstyle, she had several people stop and ask her how it was made! It can be our little secret that this braid is much easier than it looks.
Video instructions showing how to make both kaleidoscope ponytails: (Click here to watch the video directly on YouTube.)
As shown in our video tutorial above, we decided to create our 2nd ponytail with a regular 3 strand braid, but you could do a fishtail braid instead if you prefer (which would be gorgeous.)
Supplies needed to recreate these hairstyles:
- 2 medium size hair ties or elastics (for the top and bottom of the ponytail.)
- Several small elastics (the amount will depend on the length of your hair.)
- Pomade, gel, hair wax, or other product to help with flyaways.
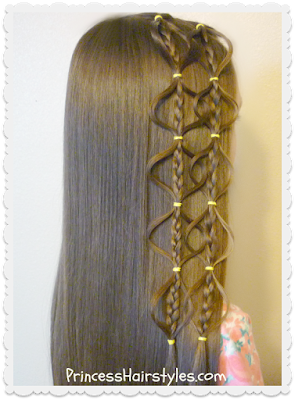
Interlocking Floating Bubble Braid Hairstyle
Our hairstyle tutorial this week is partially inspired by a braid we saw on Instagram by @pr3ttygirl79 We took the original "floating bubble braid" and tried interlocking a second braid for a fun and different variation. We love the intricate "swirly" design that was formed when the 2 braids came together. So pretty!
This would be a cute back to school hairstyle for girls or teens. If you prefer wearing your hair up for school, you could try making this braid in a ponytail, or you could pull all of her hair into a low bun, ponytail, or braid (after making the accent braids on top like we did.)
We love that this hairstyle looks unique, but is still super easy and fairly quick to create!
Interlocking Floating Bubble Braid Hairstyle, Video Tutorial: (Click here to watch the video directly on YouTube.)
As mentioned in our video, if you would rather stick with one braid, it looks adorable alone! Here, we have wrapped a "floating bubble braid" around her head forming a crown braid look.
And, an example of the style with a single accent braid. So many different hairstyles could be made using this basic concept, the possibilities are endless!
Supplies needed to recreate this braid:
- Several small hair elastics (the amount will depend on hair length.)
- Pomade, gel (or other product) to help control flyaways.
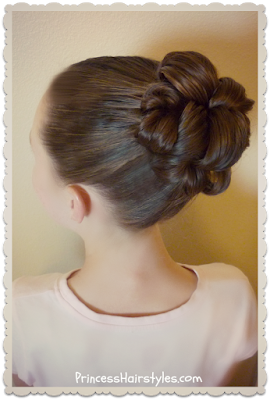
Topsy Tail Bun Tutorial
A quick and easy bun, perfect for dance or ballet!
A few weeks ago we saw this simple and beautiful bun while scrolling through Instagram on an account called "brownhairedbliss." As soon as we saw this "flip through topsy tail" technique, we knew we wanted to try it. My daughter is a dancer, so dance hairstyles and ballet buns are a huge part of our life. ;) Sometimes it can be a struggle to put all of her long hair up, and we get tired of our usual bun makers, donut buns, and sock buns. A standard or braided bun (wrapped around the top of the ponytail) always requires using tons of bobby pins and elastics and can be a pain to take out. So, we were super excited to see that this bun is quick and easy, and that it only requires using one ponytail holder and zero bobby pins!
Topsy Tail Bun Video Tutorial: (Click here to watch the video directly on YouTube.)
P.S. Watch to the end of the video to see how to take this bun out and for some tips and tricks. The topsy tail we used can be found on Amazon (affiliate) and in some stores. The brand we use is "Conair."
She tested this bun one afternoon while doing all sorts of trampoline tricks, and it held up and stayed in extremely well (which is quite amazing considering it is only being held together with one hair tie.)
Of course, this bun isn't only for dancers. This updo hairstyle could be worn for many casual occasions such as school, for sports, for cheer leading, gymnastics, to work, to the beach, etc. This could also be worn for more formal occasions; church, weddings, prom, homecoming, communions, recitals, flower girls, etc.
Supplies needed to recreate this bun:
- 1 hair tie, elastic, or ponytail holder. (You will want something sturdy that can handle all of your hair in a ponytail.)
- Topsy tail tool. (Affiliate) The package we purchased contains 2 different sizes. We used the smaller size.
- Finishing hairspray, pomade, or gel (optional.)
Subscribe to:
Comments (Atom)


