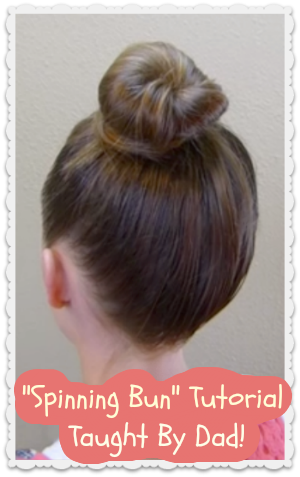
Dad Does Hair, Spinning Bun Hairstyle
While I was out of town recently "The Princess" had an event to go to where she needed to wear a bun. Coincidently her dad remembered seeing a video on Facebook awhile ago, showing how to make a bun by the subject spinning as the hair was magically twisted and formed into place! Our dad does not have much experience with hair and was getting desperate, so he decided to give it a try. They decided to film a fun hair tutorial of their experiment for you, just in case it turned out... and I'm so glad they did. What a cute little surprise I found on our memory card when I got home!
Dad and daughter hair tutorial: How to make a spinning bun. (Click here to watch the video directly on YouTube.)
Although this video is on the silly side and was made mostly for entertainment value, this method actually does work and makes a great bun. And as you can see... it is easy and quick! Dads can do hair too!
P.S. This is not the first time "The Dad" has made an appearance on our channel. You may remember him from the infamous "vacuum ponytail video" which has strangely and unexpectedly become quite popular on YouTube! You can see that crazy spoof here.
Double Fishtail Stitched Braid Hairstyle
Do you love fishtail braids as much as we do? Hope you enjoy this fun, woven variation! This braid has a trendy, bohemian feel to it. You may have noticed how popular fishtail braids (of all kinds) are right now..... demonstrated in a big way at Coachella.
Today our video tutorial is a spin-off of a hairstyle you might remember us posting last year called the "rope stitched fishtail braid." The Princess wears our rope stitched braid quite often to school. We decided to try the hairstyle using a micro fishtail braid instead of a rope braid recently, and actually ended up loving it even more than the original, so of course we wanted to share it with you!
However messy or sleek looking you decide to make this braid, we just love the unique look of the small fishtail braid weaving in and out of the larger fishtail, sort of like a "peek-a-boo braid" effect.
As you can see, we chose to create this braid in a ponytail for our tutorial. I was actually planning on making a side braid, but it ended up looking kind of awkward on our "plastic patty" since she doesn't have shoulders for the braid to rest on hahaha! For a more "grown up" look, you can make a low side braid or center braid without using an elastic at the top (if you prefer it over a ponytail.)
Supplies needed to recreate this braid:
- 1 medium size elastic
- 1 small elastic
- Alligator clip or similar (optional)
- Fairly long hair
Double Fishtail Stitched Braid Video Tutorial. Click here to watch the video directly on YouTube.
Candy Stripe Waterfall Braid Tutorial
A cute and easy waterfall braid!
If you have been following our hairstyle blog or YouTube channel for awhile, you may remember seeing several styles utilizing what we like to call a "candy stripe braid" (which involves simply wrapping ribbon around a strand of hair.) Fairly recently, we decided to try and combine our candy stripe braid with a waterfall braid and the "candy stripe waterfall braid" was born! We love how this end result turned out.
A few more fun styles using the "candy stripe" method are linked below:
Snowflake Ponytail
Ribbon Shamrock Hairstyle
Candy Stripe Woven Pigtails
Of course, there are many different hairstyles that can be created using this fun new braid. As an example, we have included a picture (above) of the candy stripe waterfall with an added lace french braid underneath. I could also see this braid being used to accent many updos and braided combination hairstyles. The possibilities are truly endless.
If you have trouble with waterfall braids, or braiding in general, this hairstyle is actually very doable... as there really is no intricate "braiding" involved. If you can form a simple twist, you should be able to master this in no time. Also, this hairstyle should work with fairly short hair, medium hair, and long hair. Yay!
As mentioned in our video tutorial (below) we have also shown a different waterfall braid using ribbon previously on our blog called the "waterfall ribbon twist." This candy stripe waterfall actually ends up looking quite different from the waterfall ribbon twist, even though the concept is similar. This braid also tends to hold up better for more active days and isn't so fragile, which is always nice.
Supplies needed to recreate this braid:
- A piece of ribbon, yarn, lace, string, etc. The ribbon we used is 1/4 inch thick and approximately 2 feet long.
- 2 small elastics (one for the top of the braid, and one for the bottom.
- Hairspray, pomade, or gel (optional)
Candy Stripe Waterfall Braid Video Tutorial: Click here to watch the tutorial directly on YouTube.
Triple Lace Braid Updo, Prom Hairstyles
Since it is "Prom season" we are in the mood for a fancy and glamorous hairstyle this week!
Today our video features an elegant updo or chignon hairstyle that would be great for Prom, Homecoming, a wedding, communion, church, recital, or other special occasion.
Depending on the look you are going for, this updo is quite versatile. You can make this style look smooth, sophisticated, and sleek.... or more soft, messy, beachy, or tousled looking.
As shown in our video tutorial (below) you can leave the remaining hair down for a fancy and modern ponytail look, or wrap it up into the bun as shown in our pictures. Curls or ringlets can also be added (framing the face) for a cute and feminine touch if you desire. A fun hair accessory to compliment your dress also adds extra glam to the style.
Supplies needed to recreate this hairstyle:
- 1 medium size hair elastic or hair tie
- 3-4 small (clear) elastics
- several bobby pins
- Fancy barrette, clip or other hair accessory (optional)
- Finishing hair spray, pomade, or gel (optional)
Triple Lace Braid Prom Updo Video Tutorial: Click here to watch the video directly on YouTube.
Disney's Cinderella Ball Hairstyle Tutorial 2015
This tutorial is inspired by the hairstyle Lily James aka Cinderella wore to the ball in the 2015 Disney Cinderella movie.
Ever since the new Cinderella movie was announced, we have had many requests for a Cinderella hairstyle tutorial. We're a little slow on getting around to this, but we finally saw the show in theatres this past weekend. We loved it, by the way! We also noticed the many cute braided hairstyles throughout. But, we decided to film a tutorial for the ball hairstyle, as it was the most requested.
As a bonus, this simple and elegant style is quite easy and should work with most hair lengths and textures.
Photo courtesy, the official Cinderella movie trailer.
You might notice in our pictures that "the Princess's" hair didn't turn out quite as curly as Cinderella's did. We were a little disappointed in our curls as we ended up having to take the curlers out after just a couple of hours, and they didn't hold as well as they usually do. We wanted the curls to look effortless and natural, but not quite as flat and blah as they turned out! If I were to try this style again, I would leave our curlers in overnight, or go for a curling wand or curling iron. ;)
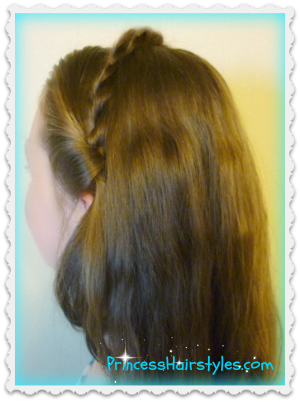
The braided headband in this style can be made in several different ways, depending on your hair length and thickness. If your hair is fine, I would recommend making a braid on each side and doubling them up to make the headband appear to be thicker and more textured. And of course, if your hair is shorter, you can make a braid on each side and join the ends at the top, instead of the braids having to reach all the way across her head. We chose a rope braid because the headband on Cinderella appears to be a twist of some sort, but of course, you can do any type of braid you want. If I had to guess, I would say the original hairstyle was probably created by using a hair piece for the headband, as well as some added extensions for the glamorous looking curls. You can purchase a synthetic braided headband if you want, which would make your hair appear to be thicker and the braid more voluminous.
If you are looking for some magical sparkle just like Cinderella, some glitter could also be added as the finishing touch!
Photo courtesy allure.com
Supplies needed to recreate this hairstyle:
- Several small, clear elastics
- Several bobby pins
- Naturally curly hair ;) or a curling wand, curling iron, or other curling method. We have a tutorial for our "sponge rag rollers" if you want to try that.
- Finishing hairspray (optional)
Subscribe to:
Posts (Atom)


